This week in the shop we had the pleasure of working on this Ford Bronco Badlands edition that was in desperate need of a stereo upgrade. This Bronco came equipped with the base 6-speaker audio system featuring a set of 6.5″ kick panel speakers, dash tweeters and rear 4″ sound bar speakers.
The stock Bronco stereo system is very underwhelming due to a couple limiting factors:
Lack of power
Low quality original speakers – which are also simply too small in the rear sound bar
Lack of a subwoofer to reproduce any sort of bass
Your first thought might be to do a Bronco speaker upgrade, but without addressing the core issues above, you are spinning your wheels. You’ll never hear the full potential of higher quality aftermarket speakers unless you include a DSP amplifier to A) clean up the shoddy signal coming from the original radio B) add the power that is missing.
DSP Amplifier necessary for non amplified models
If you happen to have the premium 8 speaker B&O system, you don’t necessarily have to use a DSP amplifier. For OEM amplified models we prefer to use a digital pre-amp adapter such as the PAC Audio AP4-FD31. The pre-amp adapter allows us to get a flat, clean RCA pre-amp level or toslink digital out from the factory radio. From there you could go to a high quality aftermarket amp or one with a DSP included. To learn more about pre-amp adapters, you can check out this video below.
The pre-amp adapter isn’t currently an option for the basic 6 speaker model. That is why in this Bronco speaker upgrade we used the MATCH UP 6 DSP amplifier. Don’t let the size of this compact little amp fool you. It packs a tremendous amount of power and audio control tools making it an amazing value.
The MATCH UP 6 DSP is one of our shops favorite DSP amps to use. It features 4 channels of power at 65 watts plus another 2 at 90 watts RMS @ 4 ohm. The higher powered channels are also 2 ohm stable and deliver 160 watts at that resistance. The MATCH UP 6 DSP is what allows us to analyze and correct the crummy signal coming from the original radio. It features a whopping 31 bands of equalization per channel.
But really – why do I need a DSP amp for my Bronco speaker upgrade?
Have you ever heard the analogy garbage in/garbage out? If you don’t use a DSP amp with your Bronco speaker upgrade, that is essentially what you’re dealing with. Your speakers performance will continue to be throttled unless you include a DSP amp to change that signal from garbage to clean and powerful. Only adding an amp without addressing the quality of signal simply makes that crummy signal louder. To learn more about our shops car audio tuning process, whether it be with a DSP amp or aftermarket head unit, check out the video below.
With a clean audio signal and plenty of power in place, we upgraded the Bronco speakers using the Sony Mobile ES XS-162ES 6.5″ component speakers in front and XS-160ES 6.5″ in the rear.
Using the right Bronco speaker mounting adapters
To upgrade to larger speakers in the rear, we used the Metra 6.5″ sound bar kit FD-BROPOD1. This kit is a must in order to create a nice full range response in the rear. The great part about this accessory is the factory fit and finish. You can barely see the Sony logo under the grille which is perfect. No one will know this Bronco has an upgraded stereo unless they hear it.
For the front 6.5″ kick panel speakers we used speaker mounting adapters and fast rings. A fast ring is a foam ring that goes around the outer edge of the speaker. This helps to create a seal against the panel directing more of the sound waves directly into the cabin, rather than getting lost in the kick panel itself. We also used mounting adapters for the dash tweeters enabling us to neatly mount the new Sony tweeters in the factory location under the original grilles.
These Sony Mobile ES speakers deliver sound quality with high power handling capability. A combo that is hard to beat. To learn more about the Sony Mobile ES speakers, check out my video below.
This Bronco speaker upgrade would not be complete without a subwoofer. Did you know that we can hear down to 20 Hz? Yet your average 6.5″ car stereo speaker can only really effectively play down to about 60 – 80 Hz. Even then it’s typically not even at a high enough output level to overcome things like road noise and wind noise. That’s a pretty big gap in frequency range. This is why you need a subwoofer. To fill in that natural frequency range that is missing from your Bronco car stereo system.
Bronco subwoofer upgrade
The Bronco is tight. Most clients want to utilize the existing cargo space without any compromise. Thankfully Stinger makes a great little 400 watt 12″ subwoofer designed to mount right on the swing gate.
This low profile enclosure looks clean and sounds amazing. Powered by the MATCH UP 1FX shown below. Both amplifiers were mounted discretely under the driver and passenger seat using a vehicle specific amp mounting rack by Stinger Electronics.
With each speaker on its own dedicated channel perfectly tuned and dialed in, we don’t want to change the signal going to them by adjusting the bass level on the original radio. Instead, we leave that at 0 and have the Conductor control knob acting as a dedicated sub level control knob.
Conductor as a sub level control knob
The Conductor is a programmable illuminated control knob specific to the Helix/MATCH family of DSP products. It can be programmed to activate different listening presets such as one for driver, another for driver + passenger or, top up, top down, etc. In this application we used it solely as a sub level control knob.
Our preferred mounting location in the Bronco would be on the center console, but it was too crowded with the aftermarket Best Top power top switch so we mounted it right behind the 4-wheel drive control knob.
A true Bronco stereo upgrade requires the total package
This might seem a bit like an all or nothing approach, but the reality is, if you want to upgrade the audio in your Bronco, you need to address each weakness in the factory system:
Lack of clean signal
Lack of power
Low quality original speakers
Tiny rear speakers
Lack of a subwoofer to reproduce any sort of bass
With this quality package of equipment expertly installed by our experienced technicians, this Bronco stereo is ready to be cranked and enjoyed. Doors off, top down, sun on your skin, warm air flowing though the cabin with excellent tunes fully enveloping you. That is my kind of summer. If you’re ready for a Bronco stereo upgrade, reach out to our shop Sounds Incredible Mobile. Call or text us today to learn more.
In the shop, we recently had the pleasure of working on this super clean, 1995 Porsche 911. This is one of my favorite types of jobs to do. I love figuring out how to deliver an upgraded audio system while maintaining the integrity of the vehicle and without detracting from the originality or value of the vehicle. If you own a classic Porsche 993, you understand the push and pull that exists between wanting to upgrade the dated stereo and speaker system with the need to keep everything original without modification. You wouldn’t want to do anything that would in any way detract from the value of the vehicle.
That is why I was extremely selective about what components I recommended to this client for their Porsche 993 speaker and stereo upgrade. We had a couple key requirements.
Porsche 993 Stereo Upgrade Rules to Abide by
I naturally wanted to use equipment that would require minimal to no modifications which means we were limited by certain parameters:
Use all the original speaker grilles
No modification to the dash, doors or wiring
Nothing visibly altered other than the PCCM Classic CarPlay stereo in the dash
It was also imperative for me to include an amplifier simply because the power of any in dash aftermarket radio would not be enough to overcome the road/engine noise of this vehicle. Additionally I wanted to use a DSP amplifier in order to extract maximum performance potential possible out of the speakers as we were not going to add any type of subwoofer.
Good Things Come in Tiny Packages
Meet the MATCH UP 6 DSP. Measuring up at 5.12″ x 5.12″ and only 1.81″ tall this compact amp is an installers dream. It’s a 6-channel amp designed for either speaker level connection or optical SPIDF. Unlike many aftermarket car audio amplifiers, it does not feature an RCA connection.
The MATCH UP 6 DSP is one of our favorite DSP amplifiers here at the shop. We install this particular amp on a regular basis in a wide variety of vehicles. It features 90 watts X 2 RMS plus another 65 watts x 4 RMS @ 4 ohms with an integrated 31 band EQ and Audiotec Fischer’s advanced digital signal processing software. The higher powered channels are also 2 ohm stable which bumps up output to 160 watts x 2. This compact little amp packs a mighty punch!
Key Ingredients to a Seamless Porsche 993 Stereo Upgrade
I’m about to spill some secrets so take note! This car was equipped with the basic stock audio system which has:
Factory tweeters measuring at .75 inches
5.25″ front door speakers
4×6 rear door speakers
In order to keep everything fitting nicely under the original grilles, we utilized the Helix Ci 3 series speakers. The 5.25″ Helix Ci 3 speakers fit perfectly without any modification. Prior to the vehicle arriving, I did a lot of research to find out what speakers would fit with the original grilles.
Some of the speakers that kept coming up in my research for the Porsche 993 were old and long discontinued MB Quart speakers that featured a .75″ tweeter. After reaching out to Helix to confirm I was on the right track with fitment, I learned that the Helix Ci3 and Ci7 series are similarly sized to some of the 90’s MB Quart models. This is probably due to Helix having a heavy focus on integration with German vehicles, similar to MB Quart’s original roots from back in the day when it was actually made in Germany (MB Quart is a completely different company today). How convenient!
Having the right size equipment is half the battle. The other half is the actual execution which presented some challenges that were expertly overcome. John came up with a very creative solution in order to retain the factory speaker grilles. Check it out:
Those are little tiny magnets that John glued to the back side of the original grille. This created a very clean, uniform look that is easily serviceable, but also surprisingly strong. While testing out John’s speaker grille solution I was very satisfied to see that these grilles will not easily pop off.
Attention to Detail in Every Installation
As a small business owner serving clients for 25 years, I have come to embrace an eccentric level of attention to detail in the initial planning phases because I want to cover as many variables as possible and have all the questions covered before the car even arrives. This helps to increase overall efficiency, insure we have all the right parts the day the car arrives and minimizes surprises and delays during the installation process. This hyper focus on details is a strength John and I both share.
While working on the car, inevitably, something will pop up that I couldn’t have foreseen. In this case, one such example was the driver’s side door panel. While working on the Porsche 993 speaker replacement, he noticed one edge of the trim was coming apart at the corner.
Be Prepared to Make Repairs Along the Way
Not able to overlook anything, John went ahead and resecured that corner. He even added some additional reinforcement for the other edges to prevent them from coming loose as well.
The man just can’t help himself. If he sees it, he will fix it. Schedules be damned.
While he was at at, he also repainted the grilles with a fresh coat of black paint. Below you can see the final result on the driver’s side with the freshly painted grilles.
The passenger side came out pretty sharp too:
In preparation for the rear speakers, I ordered and set aside a set of 4″ coaxials, the Ci3 C100.2FM-S3 and 4″ components, the Ci3 K100.2FM-S3. I wasn’t sure whether this car was equipped with a 4×6 or the 4″ component we sometimes see in Porsche models. This turned out to be a non amplified Porsche 993 with a set of 4×6 in the rear deck. I was also slightly concerned about the rear tweeter protruding too high up and interfering with the factory grilles, but luckily that was not an issue.
The old original rear speaker grilles did present a major challenge. The plastic base for each side was cracked. Despite John’s numerous attempts and hours spent trying to repair them, the stubborn old plastic would just crack again each time he reattached the grille. After the 3rd attempt to rebuild I convinced him to order new grilles which of course look great.
The new rear grilles look much better than the original 1995 Porsche 911 grilles. The replacement rear grilles weren’t cheap, but we think it was well worth the cost for a clean look.
It’s not just about looks, we also needed this Porsche 993 stereo to be fully functional. The client opted for the Porsche PCCM Classic CarPlay radio.
Making the Porsche PCCM Classic CarPlay Stereo Sound Incredible
The Porsche PCCM Classic CarPlay radio is interesting to me. The display is SO small I am not quite sure how I feel about it. I generally appreciate the overall look of the modern Porsche 993 stereo.
Although the display is small, it certainly fits the dash and maintains a period appropriate look. The knobs and buttons certainly have a factory like feel to them and the Porsche logo on top seals the deal.
We used the PP-ISO 2 T-harness to make a clean speaker level connection from the Porsche PCCM Classic CarPlay radio to the MATCH UP 6 DSP amplifier. I asked John to mount the amp in the factory location under the passenger seat. If you didn’t know where to look, you’d never know it was there!
We chose to run each speaker actively for maximum performance and efficiency. Utilizing each channel for each speaker eliminated the need for any external crossover network. The tweeters were run on the 65 watt channels, the 5.25″ midranges powered off the 90 watt channels and the rear 4″ run off the remaining 65 watt channels.
The combination of equipment used along with John’s expert installation and tuning process created a powerful system that was crisp, clean, detailed and vibrant yet fully maintained the original aesthetics of the vehicle. If you’re interested in a clean and classic Porsche 993 stereo upgrade like this for your vehicle, please contact our shop, Sounds Incredible Mobile in Brookfield, CT.
We recently had a client reach out inquiring about what options were available to upgrade the audio system in his 2024 Mercedes E 350. He recently acquired the vehicle, having traded in his last Mercedes which had been equipped with the premium Burmester stereo (option 810). Like so many of the clients that we meet, it wasn’t until after he took delivery that he realized his new Mercedes did not have the premium audio option. It was just the standard audio package and it sucked – BIG time.
How does Mercedes get away with this?
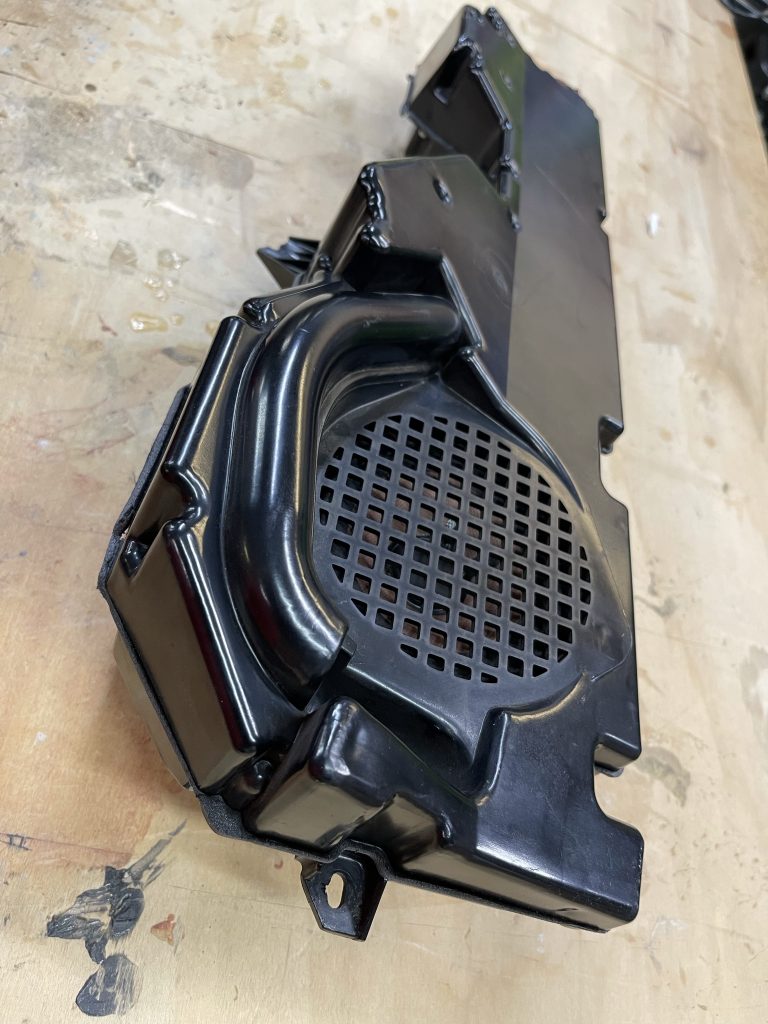
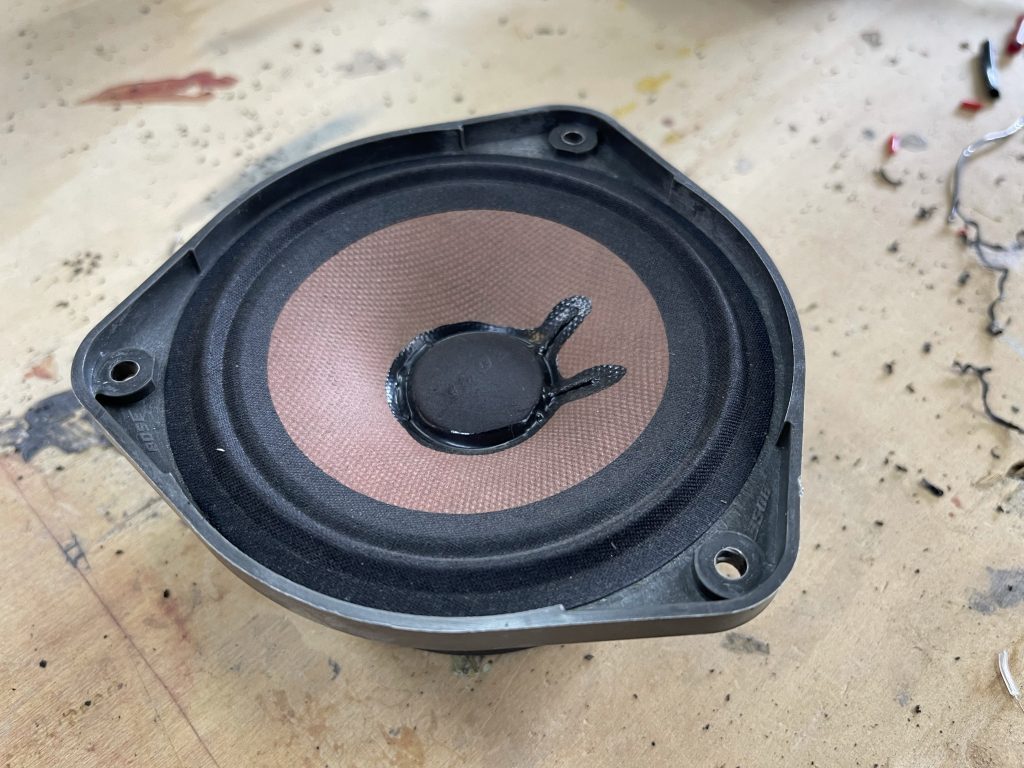
Take a look at this picture. That is a super basic paper cone speaker. Mercedes charges around $80 for this piece of hardware. This is an $80,000 car with a paper cone speaker that couldn’t cost them more than a few dollars to manufacture. They didn’t even throw in a tweeter or whizzer cone! The rear passengers are lucky to have any sound apparently. There is a nice empty channel where a tweeter could have gone if the car had been equipped with the premium audio option.
Thankfully our shop has what it takes to bring this audio system up to and beyond the level of quality you would expect in such a luxury vehicle. For this build we used a combination of vehicle specific products from MATCH and Helix.
Mercedes Standard Audio Components
The standard audio system in the 2024 Mercedes E 350 can be been described as horribly thin, tinny and reminiscent of an old transistor radio. Depending on the build date of your Mercedes you may only have 6 speakers – all in the front and nothing in the rear. However, this vehicle had 8 speakers total:
4″ components (midrange and tweeter) in the front doors
Passenger side floor mounted “subwoofer”
Driver’s side floor mounted subwoofer dummy plate
4″ round piece of foam in the center channel speaker location
4″ rear mid range speakers – we were surprised there were actually speakers back here – you could barely hear them!
Not wanting to do any sort of modifications to the vehicle, our plan was to use a combination of Helix and MATCH products including a super handy vehicle specific T-harness.
MATCH and Helix – the Perfect Match for this 2024 Mercedes E 350
The MATCH UP 8 DSP amplifier is at the heart of this 2024 Mercedes E 350 audio upgrade. This compact, yet truly powerful DSP amp features a hearty 6 channels x 65 watts RMS (4 ohm) +plus another 2 channels x 160 watts (2 ohm). We used the main channels to power the center channel, front components and rear coaxial speakers and the higher powered channels for the new Helix i5 subwoofers. John found a great spot to mount the amp under the passenger side dash, right behind the glove box.
The DSP software by Audiotec Fischer is what makes this audio system shine. Helix and MATCH DSP amplifiers are our go to product when upgrading a factory audio system because we know the results achievable thanks to their incredible software. We use their vast array of audio tools to perfect whatever audio signal we are working with. Each and every time we execute an audio upgrade using their hardware we remark on how incredible their products are. Our team is always deeply impressed and the client is equally floored by the end result.
The other benefit of the MATCH series products are their vehicle specific T-harnesses. We do not want to modify anything in a brand new vehicle if we can help it. We want the upgrade to be heard, but not seen. This is the case whether you’re simply looking at the vehicle interior or if you’re a Mercedes mechanic taking the car apart and servicing another item in the vehicle. We want these components to integrate seamlessly and for the most part they do in an exceptional manner.
Mercedes Speaker Upgrade Components
Not having seen the vehicle in person, it was hard for us to verify exactly what this car was equipped with prior to it arriving for the audio upgrade. Using the MATCH upgrade finder and working with MSC America, we presumed based on earlier models we would need the MATCH UP C42MB-FRT for our front component speakers and the UP S4MB-CTR for our center channel. However, once we disassembled the front doors, we hit a snag.
The UP S4MB-CTR matched perfectly for the center channel, but we found the front doors utilized a different type of mounting system. At this point we were already committed to the Match series speakers. We are big fans of their silk dome tweeter.
In order to use the MATCH UP C42MB-FRT John did have to make a modification to the plastic factory speaker housing in the front doors. If we were to do this again, we would recommend using either the Helix Compose i3 series (titanium dome tweeter) or Compose i7 series (silk dome) along with the appropriate CFMK100 MB.5 flex mount adapters.
The MATCH series speakers sounded superb. The silk dome tweeter is delicate and detailed, the midrange quite warm and pleasant. Performance wise we were quite happy with this choice despite the modification that we hadn’t planned on. After discovering this car had rear speakers, we proceeded with the Helix Compose Ci3 C100.2FM-S3 (3 ohm) with the Flex Mount adapter for a perfect fit.
The speakers is this car are really quite small. Even with a robust DSP amplifier, the best 4″ speakers can only play so low in frequency range. To really fill out this audio system with some depth and punch we needed to reproduce bass. But we did not want to see any type of subwoofer enclosure in the trunk or anywhere else in the vehicle. Meet the Helix i5 S200FM-S2.
The Helix Compose i5 Subwoofers Steal the Show
Hands down, the showstopper of this Mercedes audio upgrade are the Helix Compose i5 subwoofers. Holy cow. The amount of bass these free air subwoofers produce is off the charts and totally unexpected. Granted anything was an upgrade over the single passenger side factory subwoofer – if you can really call it that.
This is what the factory 2024 Mercedes E 350 subwoofer looks like:
And this is what the Helix Compose i5 subwoofer looks like:
This 8″ (200 mm) mid bass/woofer is available in single 2 ohm voice coil or dual 2 ohm voice coil. These impressive drivers also have some serious weight to them. They can handle up to 200 watts RMS and perform as both a mid range and subwoofer covering a frequency range of 25 to 500 Hz. Using the Flex Mount adapter CFMK200 MB.1S, the i5’s fit perfectly in the factory locations. Accessing these areas to install the new subwoofers does take a little time and skilled maneuvering.
John removed the dummy plate from the driver’s side footwell to install the new Helix i5 subwoofer. He also had to run wiring for the new sub to the new MATCH UP 8 DSP amplifier. The passenger side subwoofer is buried pretty deeply behind power distribution panel. The necessary effort to access and upgrade both sides is well worth it for the dramatic performance and punch the i5’s deliver.
It’s not only important to select the right components for an audio upgrade. It’s equally important to have these products installed by a skilled technician that knows how to use the tools of the DSP software.
DSP Tune for the Magic Touch
Installing the actual equipment is just half the battle. Setting up the DSP correctly to optimize and maximize performance is something our technician John is a master at. Once all of the equipment was installed he began the tuning process which he usually spends anywhere from 2-4 hours doing.
This involves setting up digital time alignment so all speakers are timed to hit the driver’s ears at the same time. It also entails setting optimal crossover points and gains for each speaker. Critically, it involves analyzing the frequency response with an RTA using pink noise with a mic stand set up in the driver’s listening position. The technician then makes the adjustments necessary in the MATCH UP 8 DSP to achieve the optimal sound quality RTA curve. Once this is complete, we do some additional fine tuning by ear listening to a variety of audio tracks together. I like to include sample tracks from the client as well.
Upgrading the stereo system in a brand new vehicle doesn’t have to be complicated if you use the right equipment and the right team to execute the task. If you’re interested in upgrading the audio system in your vehicle, contact our shop today. We’d love to help take your audio system from Standard to Holy Cow!
Have you tried the MATCH or Helix products in your vehicle? If so, let me know what you think of it in the comments below.
For a short period in time, Porsche stopped offering Bose for the 992 due to supply chain issues. Unfortunately for some that ordered the Bose option they ended up with the standard audio system. This is probably just a weird blip in the history of the 992. Unlike the manual transmission option that is no longer available – which is something my millennial brain just cannot process – the $1,600 Bose option appears to be back. This basic stereo is such a unicorn, that we don’t even have wiring diagrams for it in Mitchell ProDemand. Bose and Burmester are the only diagrams available.
In July a client reached out to me that owned one of these unicorns. He inquired about what was available for a Porsche 992 stereo upgrade. He was the owner of this 2023 Porsche 911 Carrera T (manual transmission, of course). An absolutely gorgeous vehicle with a very mediocre base audio system. He loved the car, but was disappointed in the standard audio.
MATCH UP 10 DSP for Porsche 992 Stereo Upgrade
To tackle this Porsche 992 stereo upgrade, I drew on my experience with other vehicles. His situation was not unique. We have assisted many BMW clients with similar upgrades due to the same supply chain issues. In those vehicles we install a MATCH UP 8 or 10 DSP amplifier using a vehicle specific harness for a very clean, minimally invasive audio upgrade. Using the factory speakers and the powerful audio tools within the DSP we are able to completely transform the listening experience. For many of our clients, this is all they need. They are often surprised and overwhelmed with the result. For others, we also upgrade the speakers as well.
I wasn’t exactly sure how many speakers this car was equipped with. It had all the same speaker grilles as the Bose system so I knew it had the potential for 11 speakers:
Center channel
Front tweeters
Front 4″ mids
Front 8″ midbass/subs
Rear 4″ mids
Rear tweeters
Without a solid diagram or taking the car apart, I couldn’t be certain how many speakers the car was actually equipped with. I also wasn’t sure if any of the tweeters were tied in together with their respective midrange’s and a passive crossover OR if they were all on separate channels.
Originally I was planning on using the UP 8 DSP, but I always like to plan for worst case scenario. I erred on the side of more channels and recommended the UP 10 DSP with MEC Analog. This would cover all 11 speakers separately if equipped and if we needed to run everything actively. Even if the car only ended up needing 8 channels, it would future proof the install. This would cover us for any future speaker upgrades if we were to fill all of those speaker slots with higher quality components run actively.
I knew what amp I wanted to use, but I needed to figure out what wiring harness would be needed to create a clean, seamless installation using a T-harness style connection. The problem was there was just no info out there about this vehicle!
Researching Porsche 992 stereo upgrade parts
Using MATCH’s upgrade finder, I did see a T-harness listed, the PP-VAG 2.6. It looked like your typical Porsche, VW/Audi 9003 style connection. This was promising, but I still wanted some real world verification that someone else out there had used these parts with success. The search continued. I scoured industry groups on Facebook with no luck.
However, I landed a few hits on Rennlist that listed these same parts. In one post they used the UP 8 DSP and another poster used the UP 10 DSP with MEC analog in. Both appeared to use the PP-VAG 2.6 wire harness. This was promising. One poster mentioned something about 2 wires in the harness being mixed up, but for a seasoned shop, this didn’t sound like a big deal to me. We could always re-pin the harness if needed.
Executing the Porsche 911 Base Audio Upgrade
With all the parts figured out, it was time to get the car in the shop and execute the plan. I love it when a good plan comes together! It was a bit tricky to find where the T-harness would connect. We assumed it would be behind the glove box or display, but no – it was under the center console far forward. You can see it at about 3:47 in our video documenting our experience below.
Once we found the the harness, John got busy and quickly found out which 2 wires were not pinned. The driver’s side woofer was not lined up in the harness.
After correcting this, he checked phase and toned out all of the speakers. He also checked resistance on each speaker. What we found was the front door woofers measured about 2.5 ohms. The front 4″ midranges were 4 ohm and the rear 4″ component set was about 2.5 ohms. I had concerns about this because the main channels on the UP 10 DSP are technically only 4 ohm stable. They will tolerate 3, but 2.5 would be pushing it.
After getting everything wired up John made a nice little notch out for the amp in the passenger floor. A very important aspect of all of our installations is keep appearance stock. We don’t want clients to see any of the aftermarket equipment if we can help it.
That is one of the many reasons I like to use the MATCH UP series DSP amplifiers – they are incredibly compact which helps us to deliver a stealth installation that looks factory, but performs robustly with depth, punch, vibrancy, brilliance and accuracy.
MATCH UP 10 DSP – It’s all in the tuning
The MATCH UP 10 DSP has an unfathomably small footprint measuring at 1.81 x 5.71 x 6.42″. It features 8 channels of power at 65 watts RMS at 4 ohm plus an additional 2 channels pushing 90 watts RMS at 4 ohm or 160 watts RMS at 2 ohm. However powerful this amp may be on paper, it’s true super hero powers lie in the DSP tuning software that Audiotec Fischer has become known for.
Extensive crossover network options for frequency, slope and type (Butterworth, Linkwitz, Bessel, Tschebyschev + Q factor)
Various phase adjustments
Various sound effects like augmented bass processing, center channel processing + front processing
Digital time alignment
Built in RTA & more
These extensive tools allow us to re-engineer the audio coming out of the factory stereo and extract maximum performance out of the original speakers. It is shocking how big of an impact this can make on a base audio system.
This Porsche 992 stereo upgrade sounded amazing. It was exactly what our client was looking for. It brought out the dormant performance potential that was just waiting to come out of the standard Porsche audio speakers. After hearing it for the first time, our client told us the sound is beautiful! But we did encounter a snag.
Nothing ever goes according to plan
I’m still not positive if this was a wire harness issue or Porsche over the air update issue, but I’m leaning towards a harness issue. While the car was here at the shop (end of July/early August 2024), several times the car tried to do an over the air update and each time John declined. When the client got his car back, he accepted the over the air update, but recalled seeing a message that one of the updates failed. After that, he found the stereo would intermittently say “Goodbye” and shut down. A few hours later, it would be fine. I know now, there was a definite issue with that later July/early August update as others experienced the same issue with failed over the air updates.
At the time, we weren’t sure what was causing the issue. We got the car back to the shop and brought it to an old friend at our local Porsche dealership. He performed the update manually. A few days later, the same thing happened again. We assumed there must be something else either not pinned right in the PP-VAG 2.6 or maybe it was missing some CAN info or just seeing extra resistance that it didn’t like. John ended up taking apart the T-harness and only utilizing the speaker wire portion of it, and reconnecting the original stereo harness for everything else. After that, no more Porsche PCM quirks and everything remains beautiful.
Since we completed this install, Audiotec Fischer came out with a new harness for the door woofer variation, the PP-PAM 92b. Moving forward, that is the harness we recommend to complete a Porsche 992 stereo upgrade with the base 8 speaker audio system. Despite the hiccups encountered, the end the client was very happy with the end result. Since there was so little information out there on this audio package, I wanted to share our experience. Hopefully this will make it easier for anyone else in the same situation.
If you are interested in upgrading the stereo in your Porsche 992, check out our shop Sounds Incredible Mobile. You can call or text us at 203-778-3300 or come see us in Brookfield, CT. Have you upgraded the stereo in your vehicle using a MATCH UP DSP amp? If so, let me know what you think in the comments below.
This week in the shop we had a 2024 Mercedes G Wagon that was in need of a premium Escort radar detector. When I say “premium” I mean the standard window mount Escort Redline series was not going to do justice for this vehicle.
Our client opted for the Redline Ci 360C which is Escort’s top of the line built in radar detector featuring:
Front Radar
Rear Radar
3 Laser shifters in front (2 VX transceivers + 1 VX transmitter)
Example of Escort Radar control panel mounted in a 2024 Bentley Continental GT. Location is directly to the right of the driver’s seat, left of the center console.
The performance of the Escort Redline Ci 360C is hard to beat. The range is exceptional featuring Dual M14 antennas and a Blackfin DSP. In addition, the accuracy is impeccable thanks to top of the line filtering intelligence. Overall, the technology Escort deploys in their Redline series is superior to their competitors in many ways. This advanced tech and performance is truly what makes their radar detectors so desirable.
Example of Escort Redline Ci 360C OLED Display installed in a 2024 Bentley Continental GT. John spent hours carefully notching out the plastic panel above the rear view mirror, then gently heating it and molding it into place.
However, most installers will tell you they prefer the slightly stealthier installation available with K40 which utilizes small and simple LED indicators that can be discretely mounted in a variety of locations on a vehicle interior vs the OLED Display and Control Pad included with the Escort Redline. The reason for this? For one thing, not every vehicle has a great place to mount these components. Secondly, they do admittedly alter the look of the interior slightly. Lastly, depending on how creative you get with your installation method, integrating these 2 accessories can easily add hours to your total labor tab. Solution? Enter Mid City Engineering.
Mid City Engineering Cluster Integration for Escort Radar
For those of you that haven’t heard of this little gem, Mid City Engineering is a niche company in the mobile electronics industry that specializes in OEM integration. They are a talented group of engineers that develop products that make it easier for us to install the cool gear our clients want in their vehicles. Their main focus is on Mercedes, but they do also offer some products outside of that including the cluster and steering wheel control integration piece we used to install the Escort Redline in this 2024 Mercedes G Wagon.
Escort Radar detector integrated using Mid City Engineering Cluster Integration MAX-INT213. Escort Redline Ci 360C installed in 2024 Mercedes G Wagon.
This cluster integration module enables the technician to hide the main display and control pad, keeping the appearance of the interior unaltered in any way. Radar and laser alerts come straight through the instrument cluster. Basic controls and settings can be made using the vehicle’s steering wheel controls. How cool is that? To see how it all works, check out the video below.
This Escort Redline cluster integration module is available for the Redline Ci 360C platform and Escort’s earlier MAX Ci series. Mid City offers this nifty accessory for select Mercedes, Audi, BMW, Porsche, Bentley, BMW, Infiniti, Lamborghini, Jeep, Acura and Ford. If you are interested in having an Escort Radar detector professionally installed in your vehicle, reach out to our shop Sounds Incredible Mobile. We serve clients from Fairfield and Litchfield county, CT as well as Westchester and Dutchess county, NY. Call, text or visit us today for more details!
This is often the dilemma of our clients that own a classic Porsche. You wait until the nice weather finally breaks before pulling your 1987 Porsche 911 out of the garage for a pleasure ride. The sun is shining, there’s a nice breeze in the air and you remember exactly why you fell in love with this car.
But as time passes you start to realize this could be better. Wouldn’t it be nice to have a decent stereo? Ah, but you don’t want to jeopardize the value or integrity of the vehicle. So you suffer through. Here’s the cool thing though – you actually don’t have to.
We recently had the pleasure of working on this 1987 Porsche 911 Carrera which had been equipped with the stock premium audio package. It still had the original radio in the dash, paper cone components in the front doors and rear deck with the original amp under the passenger seat. It was pretty mint! But not functional.
1987 Porsche 911 Stereo upgrade parts list
To do this stereo upgrade, it was important to use speakers that would fit with the original speaker grilles. In the rear this meant going with a set of Kicker KS coaxial speakers which feature a low profile tweeter and low profile magnet. I also wanted to make sure we included a compact, high powered amplifier to drive the new speakers. The more powerful the amplifier, the louder and clearer the speakers will perform. This is key to overcoming engine, wind and road noise. It was also extremely important – to us and to the client – to do this upgrade without modifications. To accomplish it all, we used the following parts and equipment:
Using the amp bypass harness and vintage speaker harness, John was able to install a new amp in the factory location without modifying any of the original speaker wiring or connectors.
He was even able to re-use the original fuse holder and fabricated a nifty platform to mount the amp. How cool is that?
Perfect fit front component speakers
Aftermarket component speakers always have an external crossover network. It’s typically a small box that has an input side and then a woofer and tweeter output. In simple terms, the crossover is taking in a full range signal and then divvying up and directing the appropriate frequency range to the tweeter and to the woofer.
Most factory crossovers are quite simple consisting of a small inline capacitor on the tweeter. In this 1987 Porsche 911 however, they were of considerable size. This worked out in our favor. The factory crossover was installed in the door panel. It was as if these Morel speakers were made for this car. The Morel crossover was almost the same exact size and fit nicely in the exact same location. This wasn’t planned, just a happy coincidence.
Not only did the crossover fit perfectly in the original location, the mounting points for the Morel speakers were spot on. Once again, no modifications were needed which is a beautiful thing!
With the front door speakers mounted, John took it up himself to touch up and freshen up the faded speaker grilles. The front speaker installation came out looking quite sharp.
Rear speakers installed
The Kicker rear speakers fit perfectly under the original grilles. John did have to work his magic here fabricating a new mounting plate. Unfortunately, I didn’t get any pics of him in action. Here you can see the outcome of his craft and expertise.
When you use quality equipment, have it professionally installed and tuned, it will deliver the kind of eye popping audio upgrade that leaves you pleasantly surprised. The end result is a classic Porsche look in a classic Porsche vehicle with high fidelity output. You can have the best of both worlds. If you’re interested in an audio upgrade for your classic Porsche, check out our shop for more details, Sounds Incredible Mobile in Brookfield, CT.
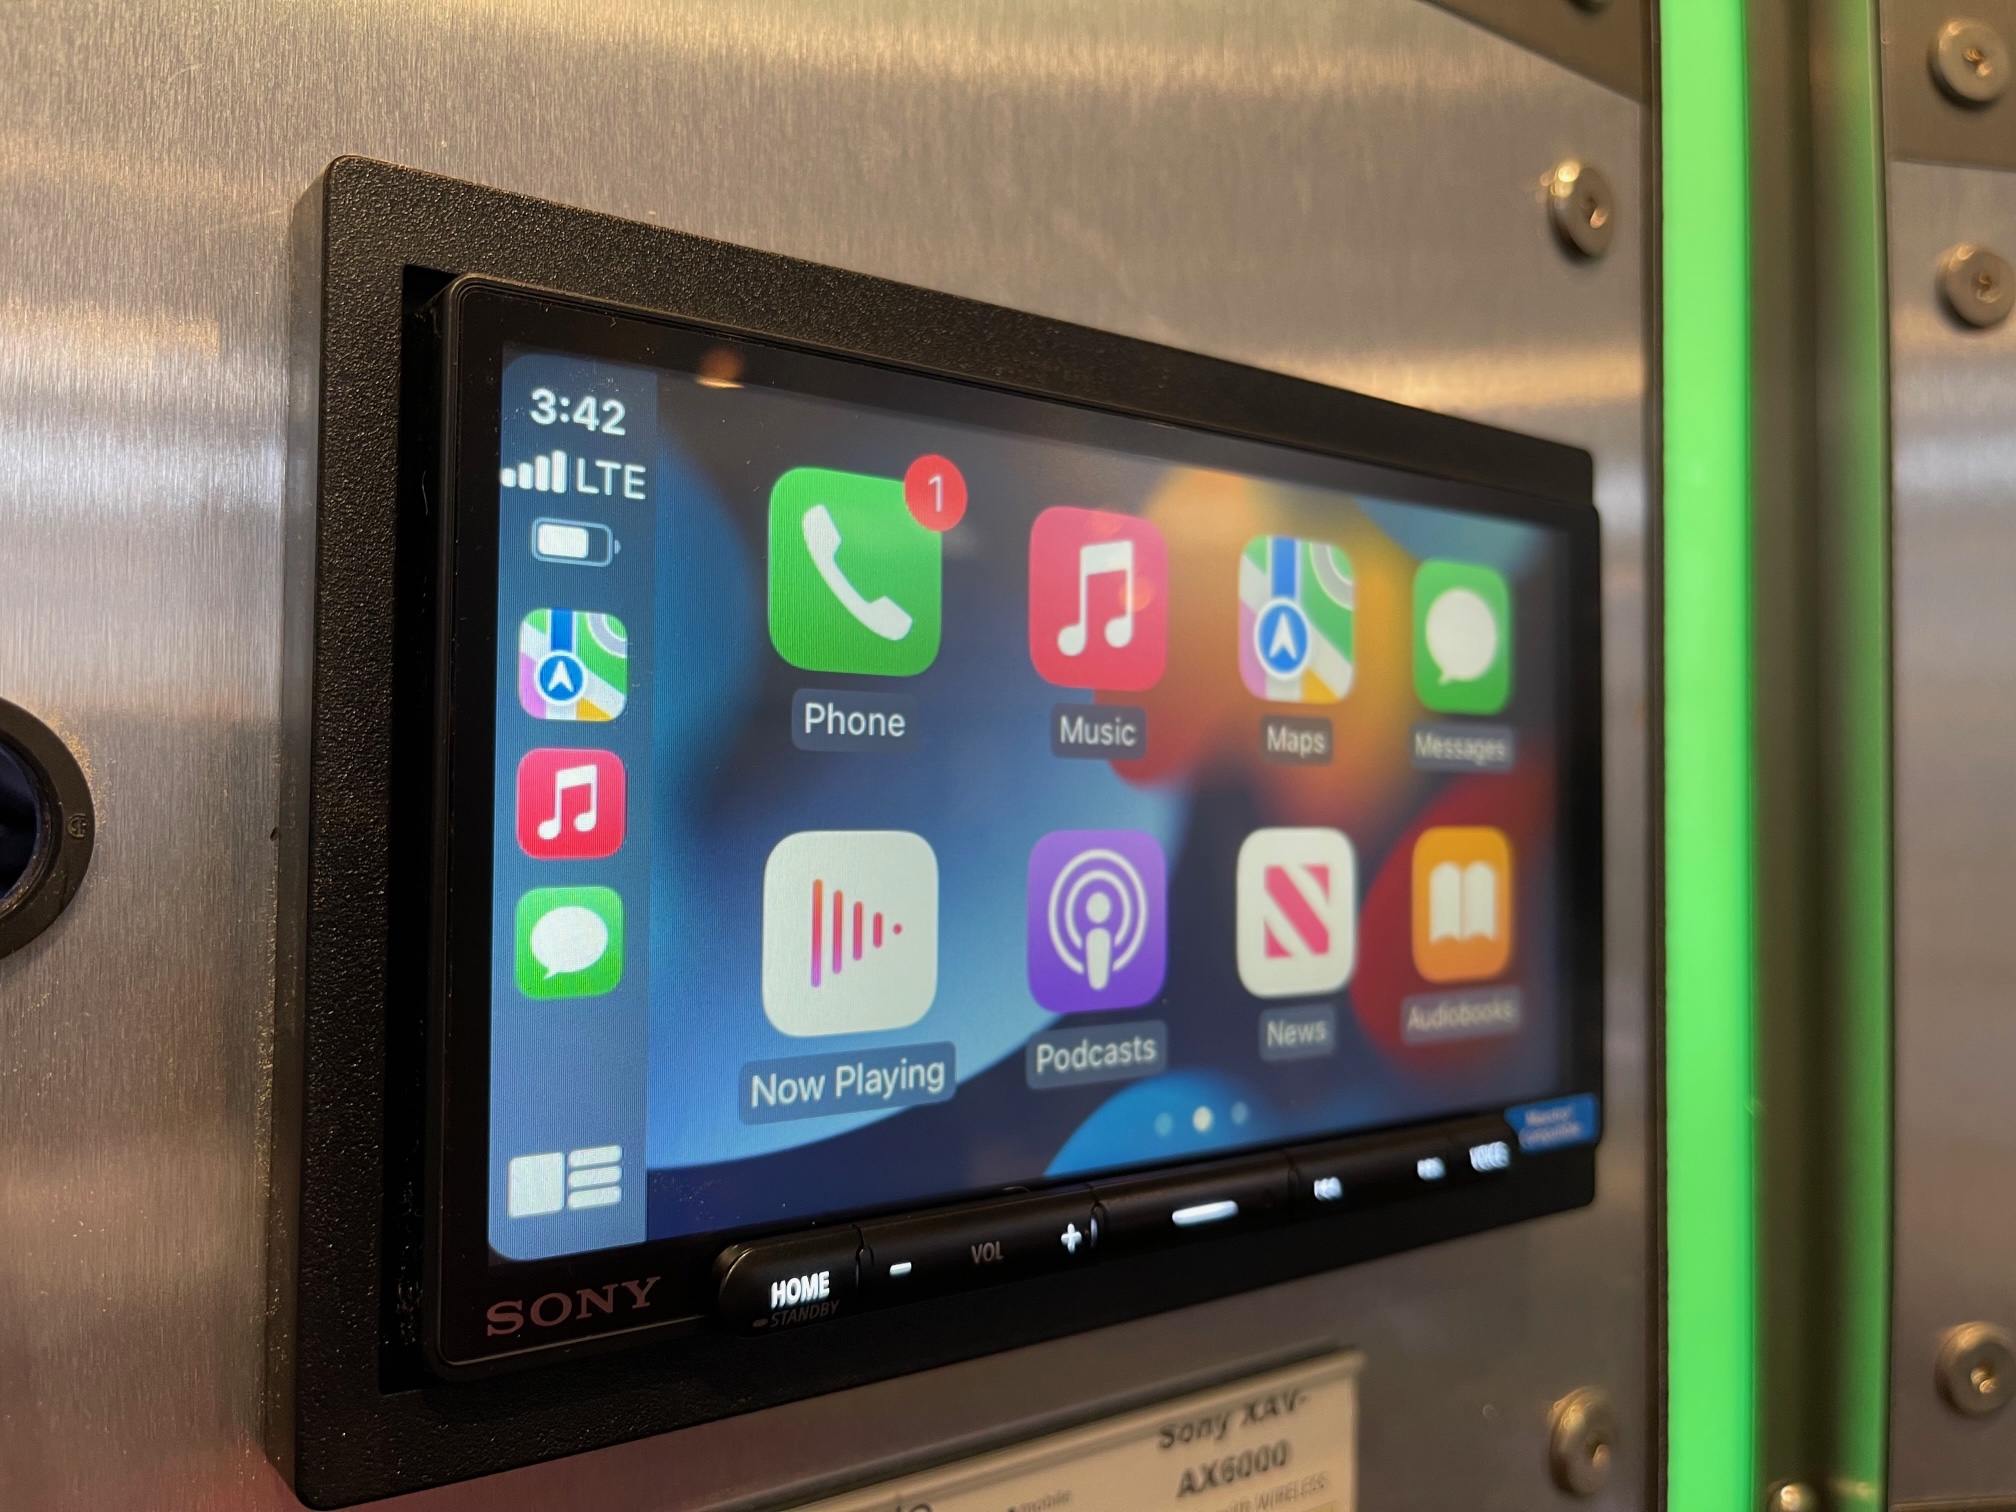
Recently Sony released 2 new Wireless Apple CarPlay and Android Auto models, the XAV-AX6000 and XAV-AX4000. I’ve always been a huge fan of Sony. John and I have had a few different Sony models in both our vehicles throughout the 20+ years we’ve been working together. Sony has always been big on quality and value which is a hard combo to find – especially these days! I recently took the time to break it all down in this Sony XAV-AX6000 vs XAV-AX4000 review on YouTube. But some people, myself included, prefer to read about these things. If that includes you this is your post!
Sony XAV-AX6000 vs XAV-AX4000 – Similar features
Let’s start by reviewing what these models have in common.
Wireless Apple CarPlay
Wireless Android Auto
iDatalink Maestro Compatible
SiriusXM Ready
Reverse Camera input
AM/FM Radio (no HD)
USB C input (extension cable included) with 3 amp charging
6.95″ touch screen
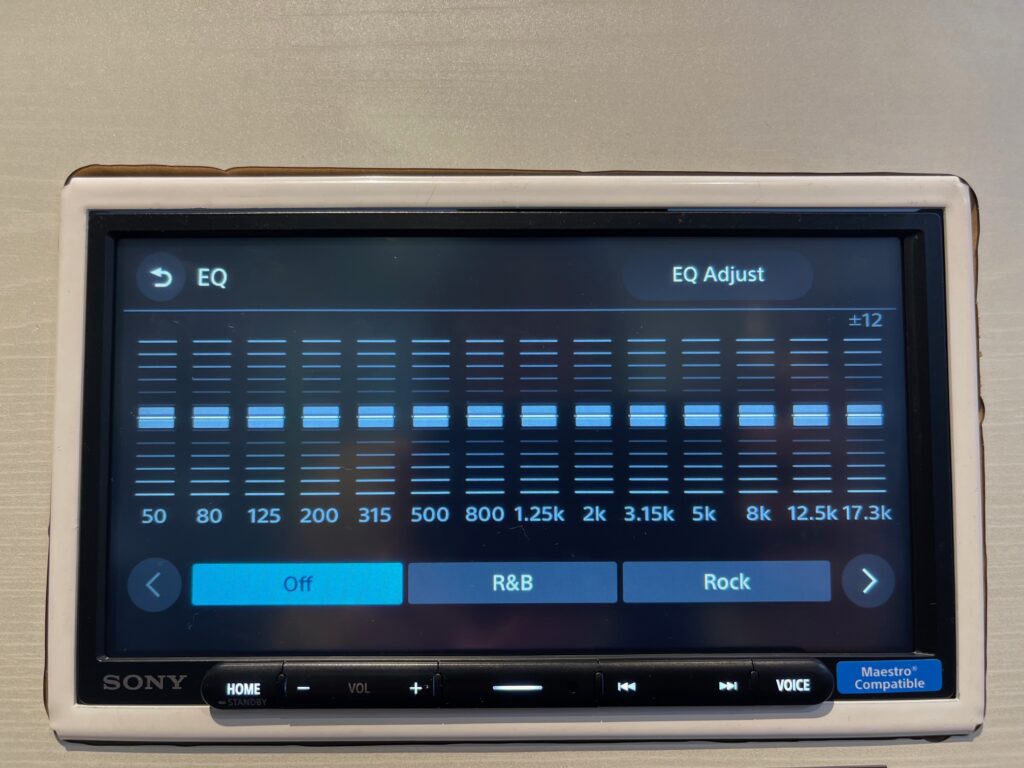
14 Band EQ
Digital Time Alignment – either preset or manually adjust
Built in crossover adjustments up to 48 dB per octave
Subwoofer phase adjustment – love that!
Finally – iDatalink Maestro Compatibility
I was really happy to see this feature finally added into the Sony line up. Now, it may not be the prettiest integration, but if you’re mainly using Apple CarPlay or Android Auto that aspect looks the same regardless of what head unit you have.
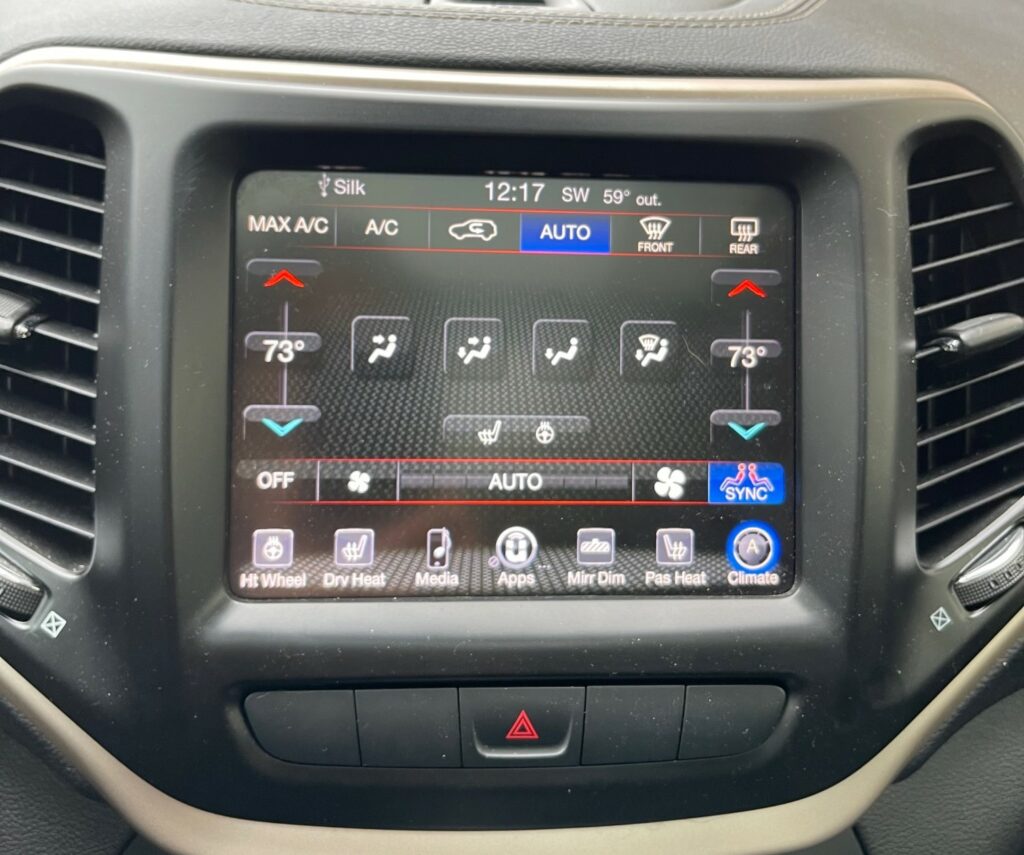
2016 Jeep Cherokee with factory 8.4″ UConnect – OEM HVAC display can be maintained when using an iDatalink Maestro compatible radio.
Previously if you wanted wireless Apple CarPlay or Android Auto, and you had a car that needed an iDatalink Maestro like a 2016 Jeep Cherokee, you were spending beaucoup bucks to get both features with Kenwood or Alpine ($750 – $800). Now with the XAV-AX4000 (with a regular retail price $599.99) you can get into these features at a much more reasonable price.
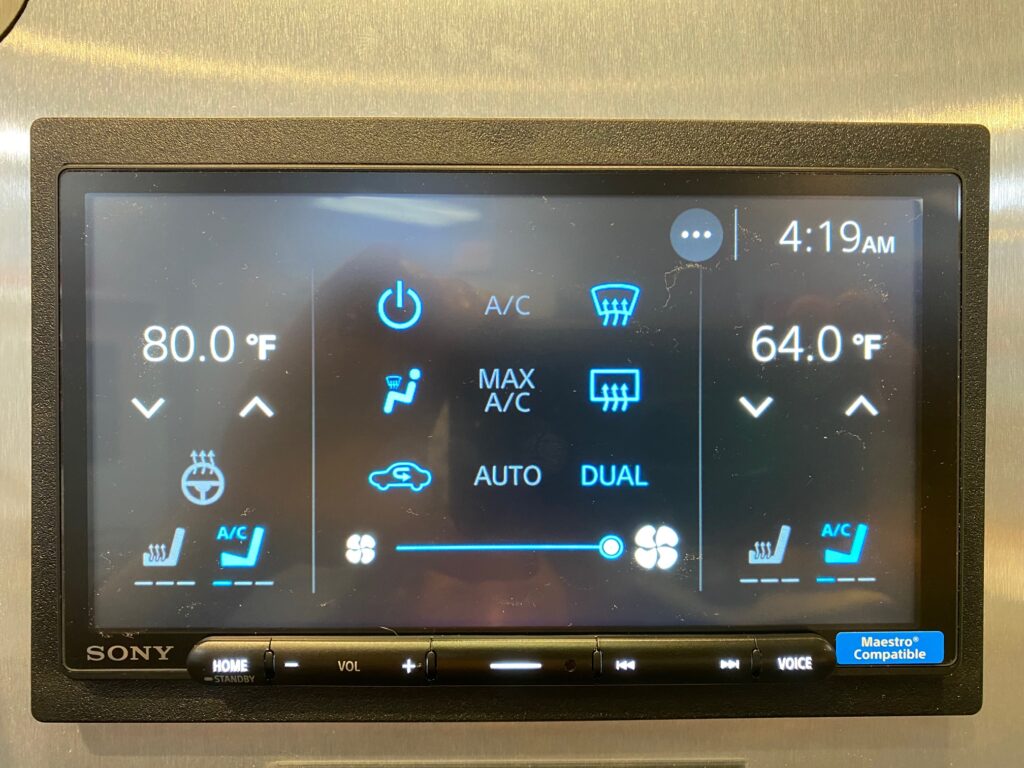
Sony XAV-AX6000 vs XAV-AX4000 Review – iDatalink Maestro HVAC display for select models such as the 2016 Jeep Cherokee
As mentioned, it’s not the most esthetically pleasing graphic user interface – I think Alpine does a better job with their Maestro HVAC graphics, BUT this is definitely practical. It gets the job done and you’re able to retain features and functions which is the main point of the Maestro.
XAV-AX6000 vs XAV-AX4000 – What’s missing from both?
I was surprised to see that neither of these models features HD Radio. However, that could be considered a luxury feature and these are value priced models. Besides – who needs FM/AM Radio anyways when you have wireless Apple CarPlay and Android Auto? Exactly. If you are the type of person who still listens to FM/AM radio you will be pleased to know the reception in both models is quite impressive which is typical of Sony. However, they do have scrolling presets. Not a fan of scrolling presets!
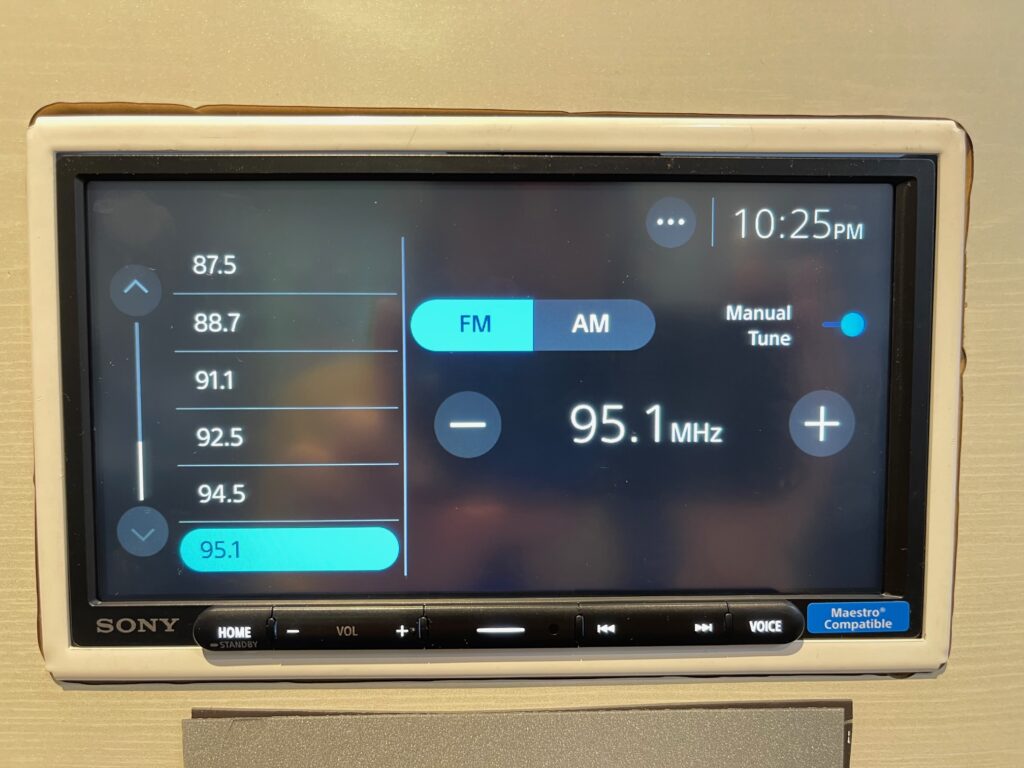
Sony XAV-AX6000 vs XAV-AX4000 Review – XAV-AX4000 pictured
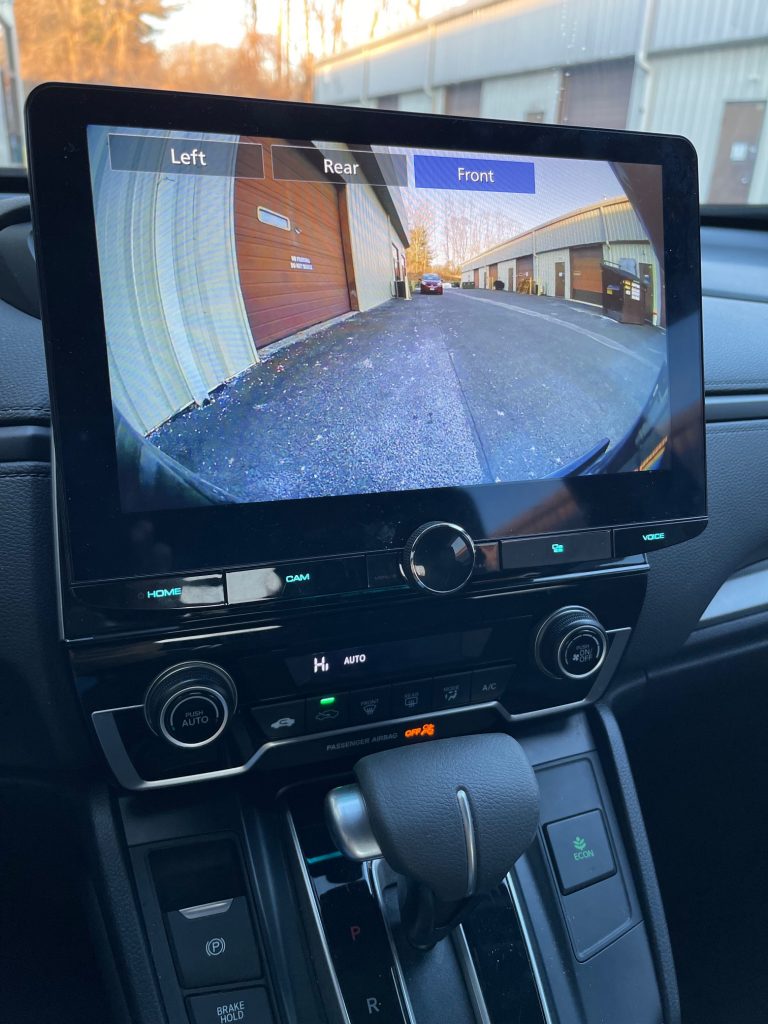
Aside from missing HD Radio, the other potential drawback to be aware of on both of these models is this – reverse camera input only. I find that most clients are totally fine with this. They’re usually just looking to retain their factory reverse camera and not necessarily add a front park assist camera. However, there are those clients out there. You know the kind with young new drivers behind the wheel for the first time. Deep down in their hearts if they could, they would wrap their kid in bubble wrap and strap a helmet on their head before they leave the house. These parents want every possible safety feature added to their older cars such as a front camera, park sensors, blind spot sensors, etc. Alas – there is no front camera input on either the XAV-AX6000 or XAV-AX4000 so if you are that parent, consider an Alpine or Kenwood receiver instead.
So what’s the difference?
I thought you’d never ask. For one, there is a subtle difference in the screens. The XAV-AX4000 has a resistive touch screen whereas the XAV-AX6000 uses a capacitive touch screen. From a functionality standpoint (which you can see in the YouTube video here), they are both similarly responsive and accurate to touch.
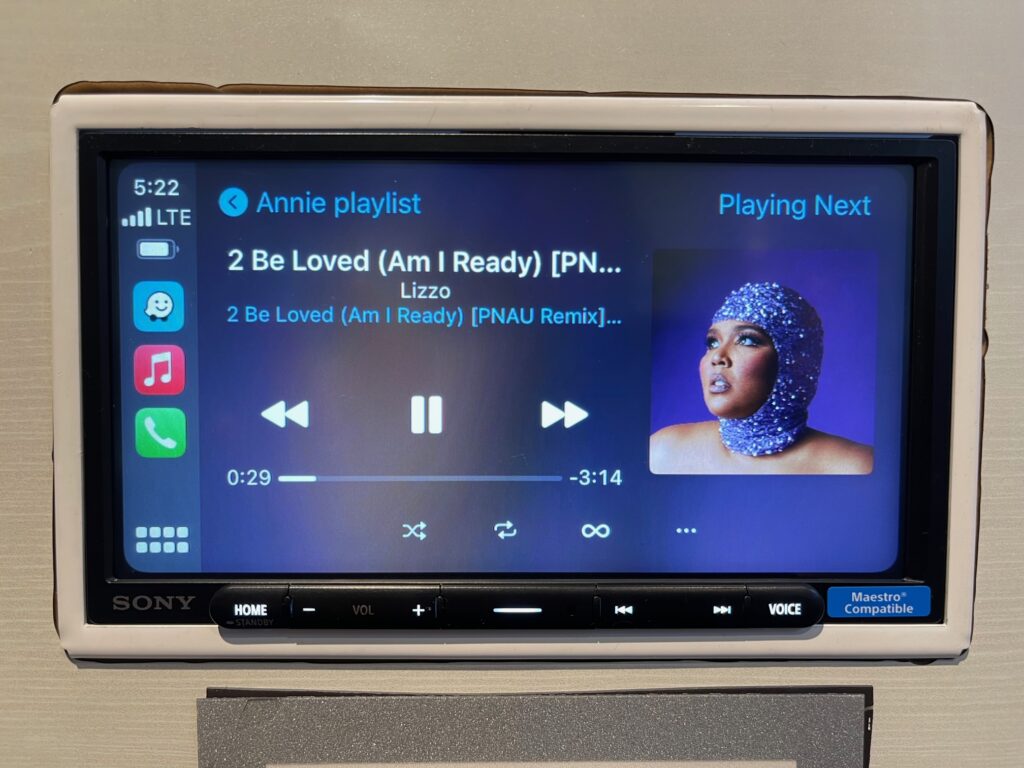
Sony XAV-AX4000 – Resistive touch screen
I find that the XAV-AX6000 is only slightly more vibrant and saturated in color. I expected a more dramatic difference in the contrast, vibrancy and saturation. Perhaps due to the matte finish, it’s a bit muted.
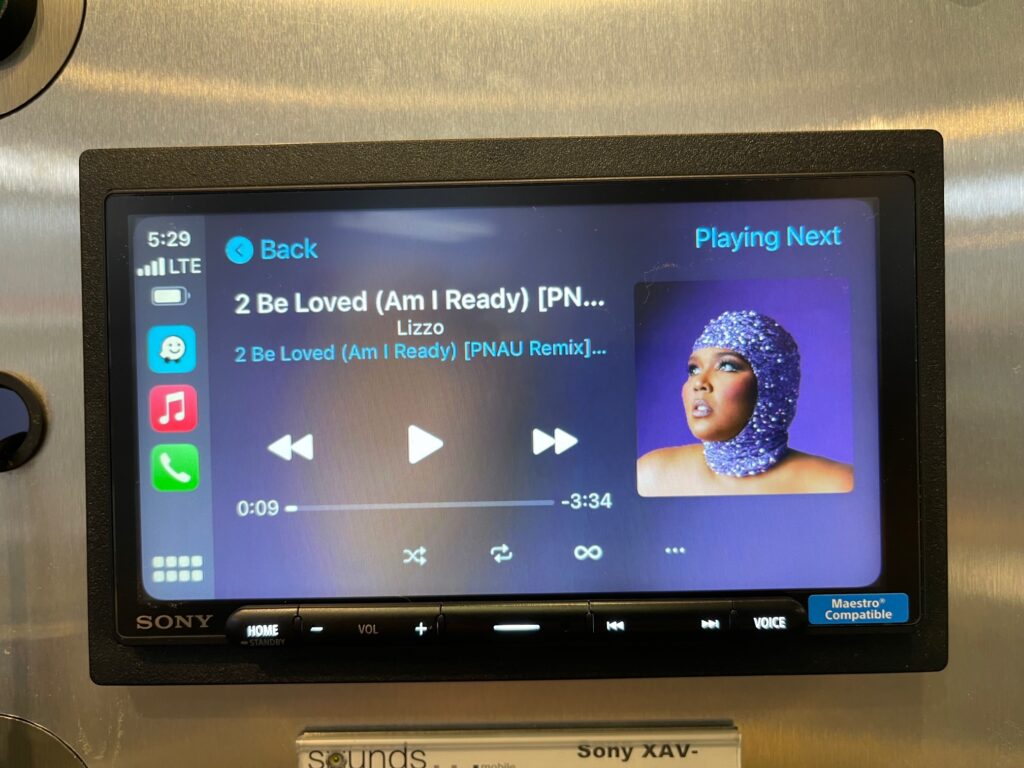
Sony XAV-AX6000 Capacitive touch screen
Other than the actual difference in screen type, the XAV-AX6000 has what they call an edge to edge bezel-less screen whereas the XAV-AX4000 has a small frame/trim around the screen. See below.
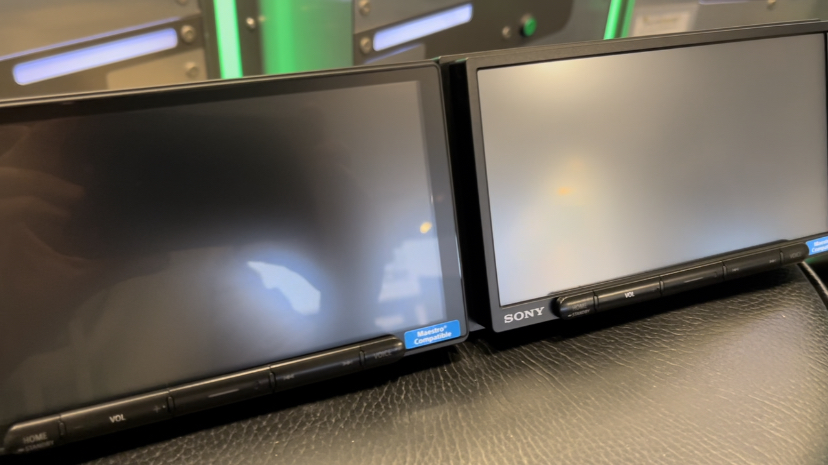
XAV-AX6000 on the left with Bezel-less screen – XAV-AX4000 on the right with traditional trim around the screen.
What else?
There are 3 other major differences between these two models. One of which I consider kind of a bonus feature, but some clients will really appreciate it. The XAV-AX6000 features an HDMI input. Keep in mind, it is a micro HDMI input so there is a little bit of cable adapting to actually mirror your iPhone or Android, but it can be done. To learn more about that, check out the short video below where I wrestle with an Android to get mirroring working thru a nice flush mount HDMI adapter. Turns out I needed to turn off Bluetooth on the Android in order to get the HDMI working properly.
As for the other 2 major differences? A whopping 3 year warranty is included on the XAV-AX6000. The XAV-AX4000 includes a standard 1 year warranty. Lastly, the XAV-AX6000 boasts 5 volt pre-amp outputs for front, rear and subwoofer – perfect for building your hi-fidelity aftermarket sound system. The XAV-AX4000 on the other hand features a standard 2 volt pre-amp outputs, also for front, rear and subwoofer.
But is the XAV-AX6000 really 5 volt?
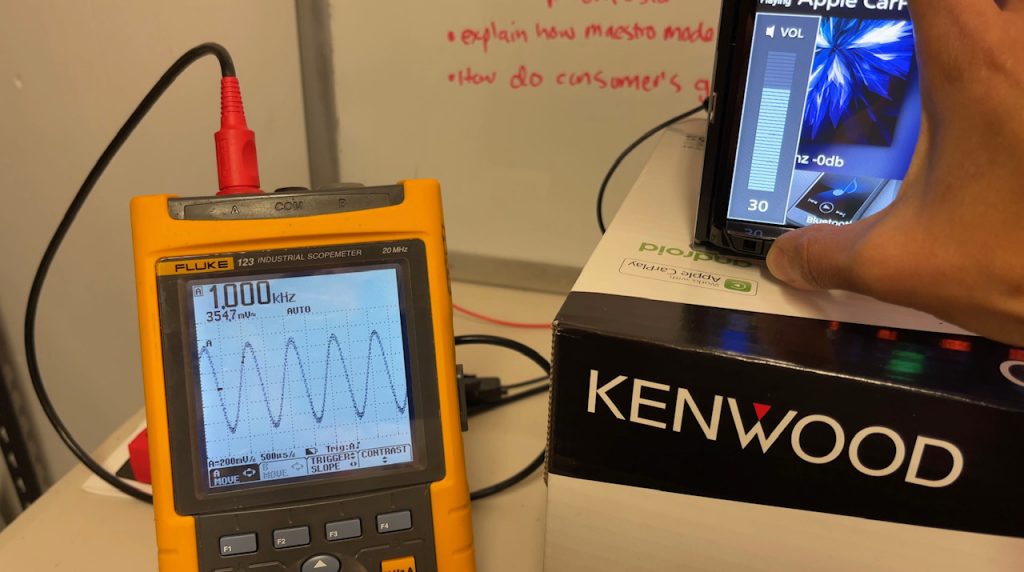
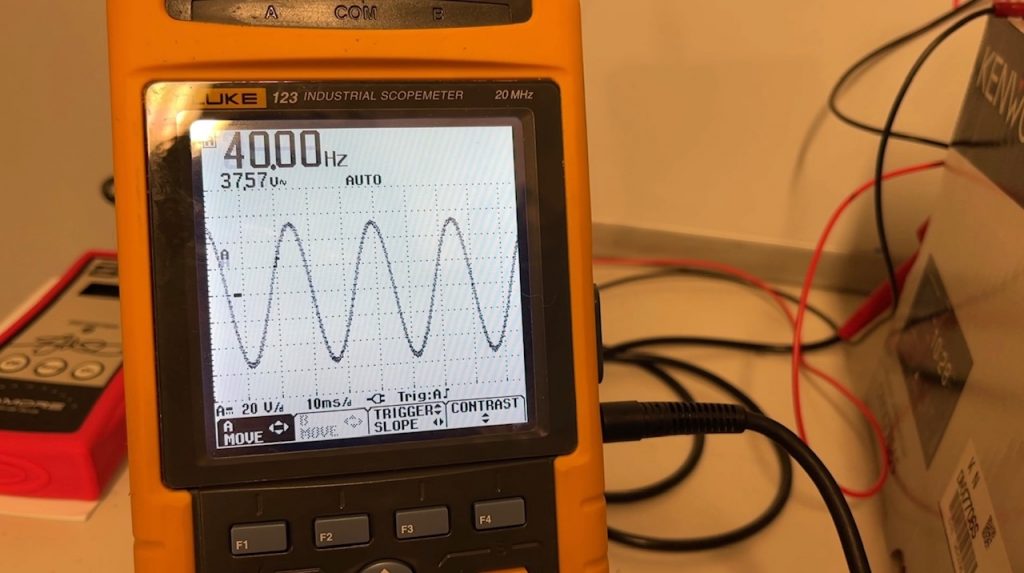
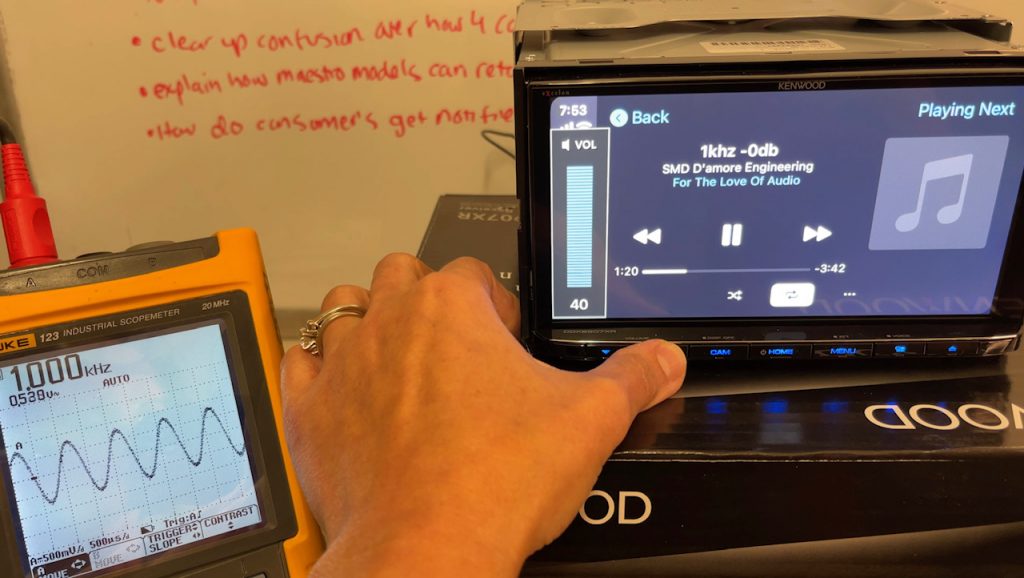
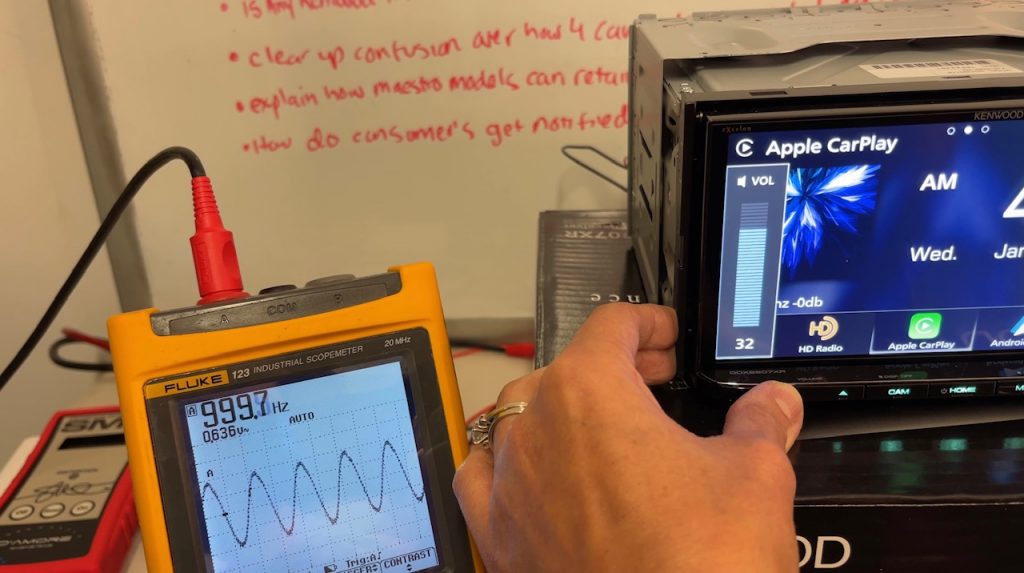
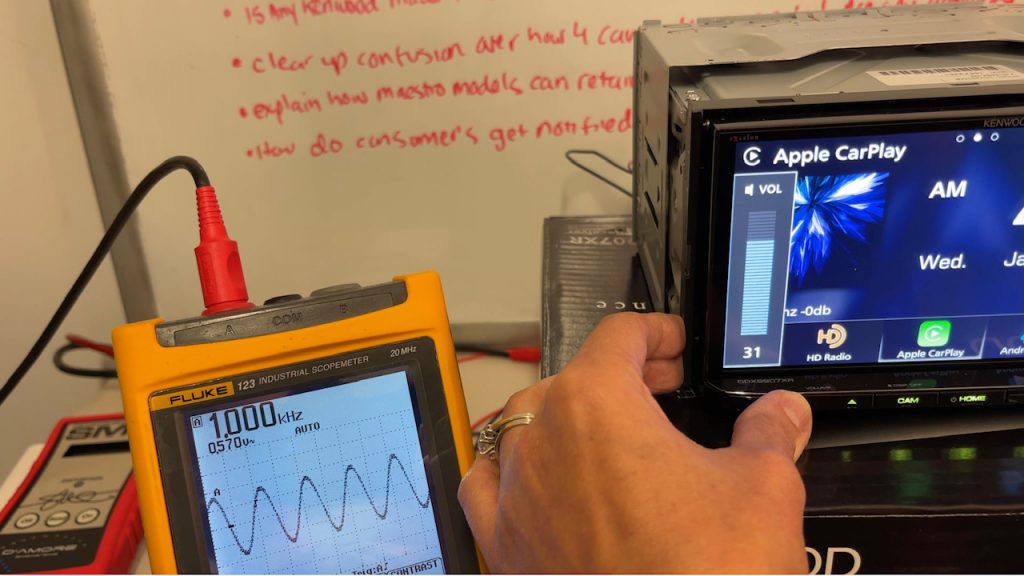
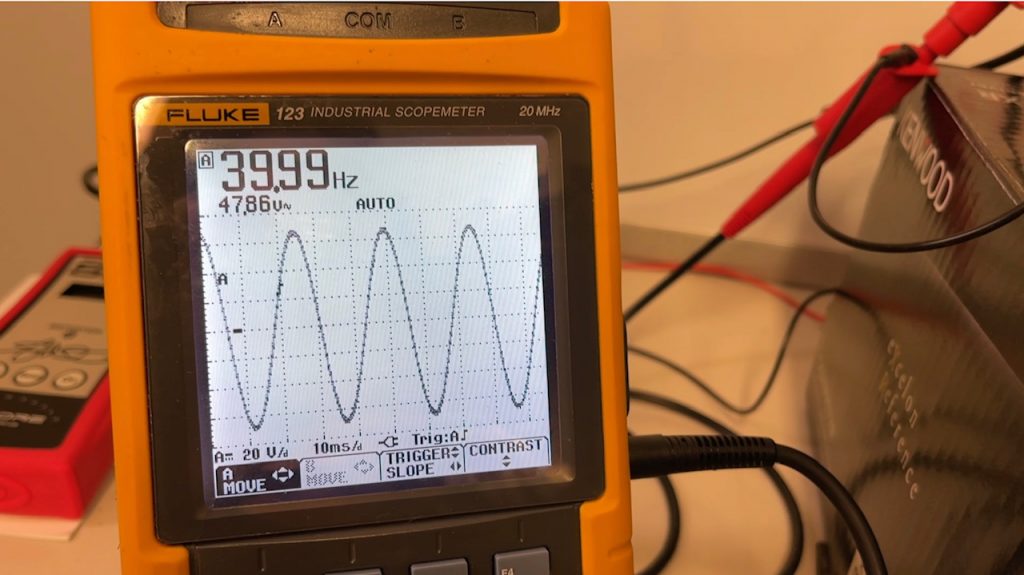
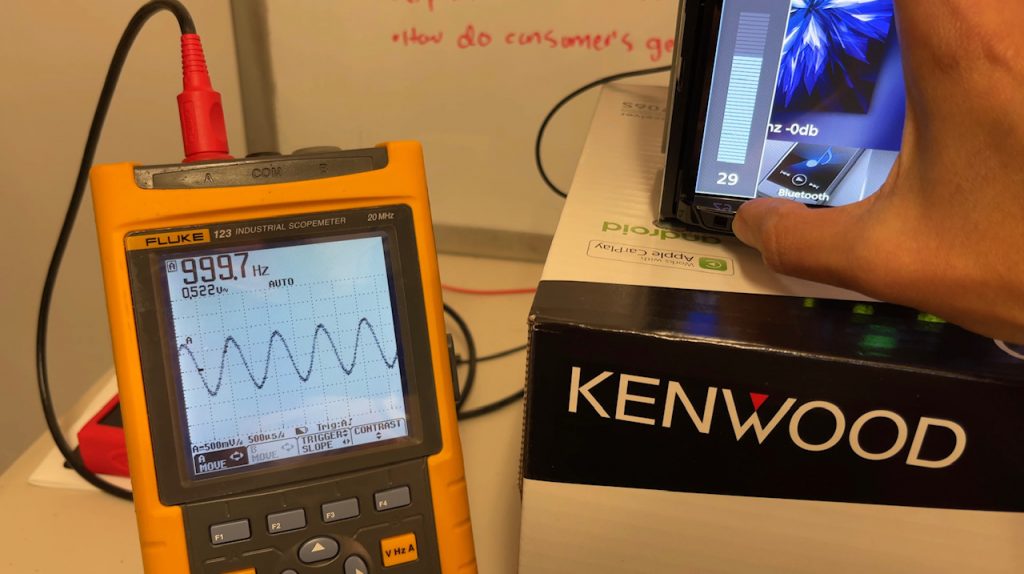
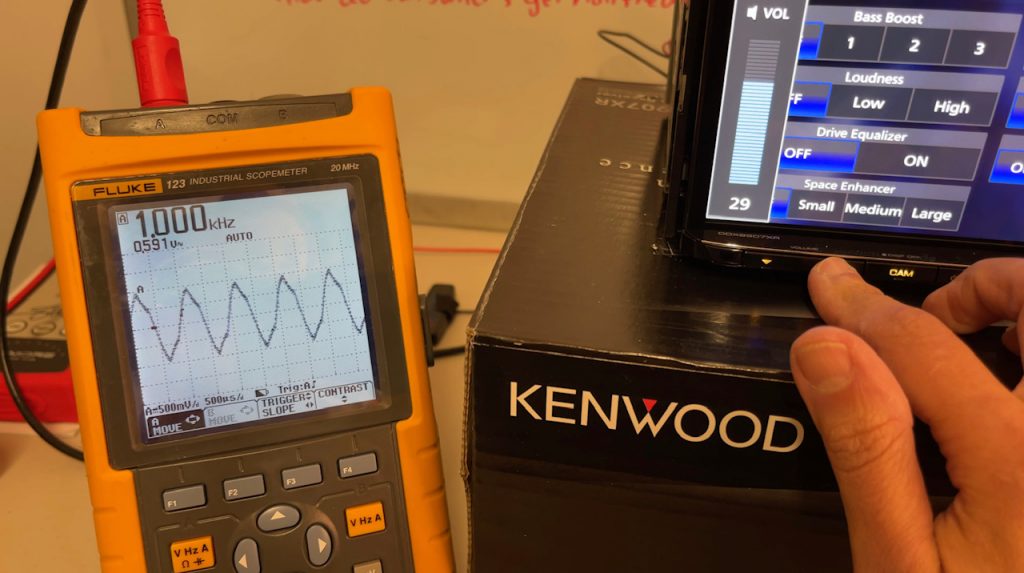
I’m about to find out this weekend when I break out the old Fluke 123B Oscilloscope, but you’ll have to check out my YouTube channel for that. I am curious to see how it performs! With most head units, when rated at 4 volt for example, I expect to see a measurement of 4 volts on each side: 4 volts on the front left RCA pre-out and 4 volts on the front right RCA pre-out. Since the XAV-AX6000 has a mono RCA pre-out – should I expect to see 10 volts when I measure the single mono pre-out? You’ll have to tune in to find out.
Wireless Sound Quality
The other really interesting tidbit I discovered during this Sony XAV-AX6000 vs XAV-AX4000 review is the fact that the Apple CarPlay connection is done entirely wirelessly! That USB C is just there for charging (3 amps) and establishing the initial connection. Sony has implemented their proprietary LDAC technology in both of these receivers enabling high resolution audio streaming up to 990 kbps at 24Â bit/96Â kHz.
14 Band EQ included on both the XAV-AX4000 and XAV-AX6000
I did spend some time listening to the XAV-AX6000 and I must say, I was quite impressed with the sound quality. For this listening test I used a couple tracks: “Old Man” by Neil Young and “2 Be Loved” by Lizzo. The audio was piped thru some Focal Flax series components running off an older Alpine PDX-F4 amplifier.
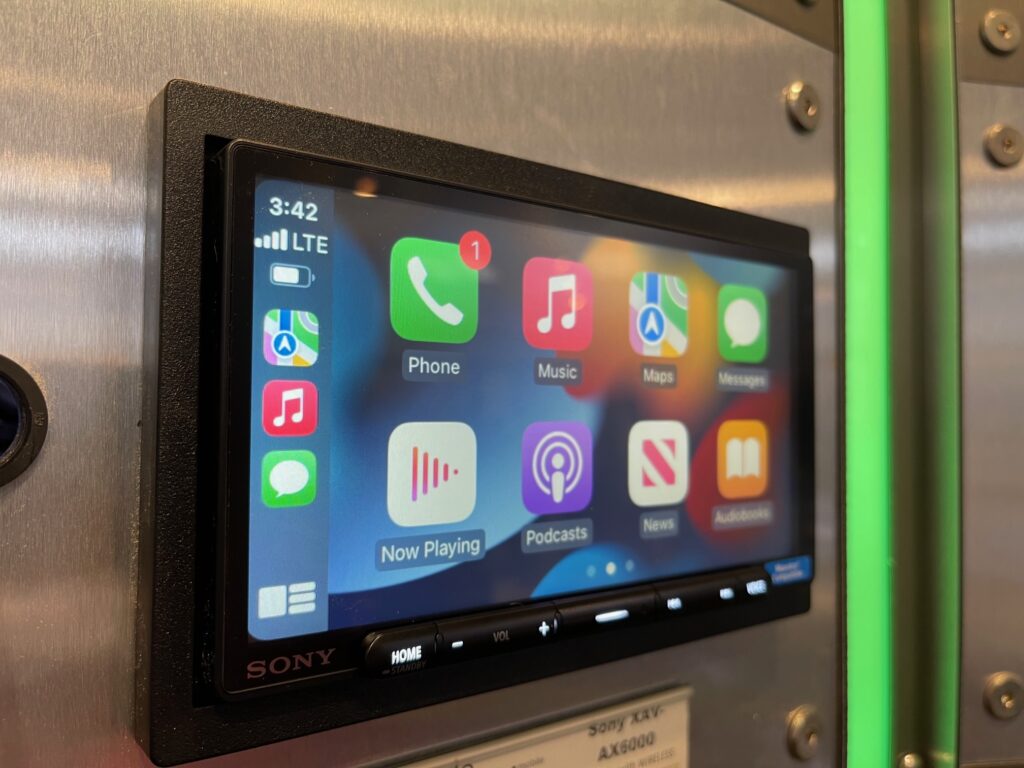
Sony XAV-AX6000 vs XAV-AX4000 Review
I used Apple Hi-Res Lossless for this A/B comparison. The audio coming from the Sony XAV-AX6000 was almost indistinguishable to the audio coming from the Kenwood eXcelon DMX709s which features a wired connection and is capable up processing audio files at 24 bit/192 kHz.
Value That is Hard to Beat
The value on both of these wireless Apple CarPlay and Android Auto iDatalink Maestro compatible head units is pretty phenomenal. We’ve sold quite a few of both and so far all clients are happy. You really can’t go wrong with either model, but the XAV-AX6000 clearly has a few perks that are worth the extra $100. Many clients opt for the XAV-AX6000 just for that 3-year warranty. What do you think? Which wireless Apple CarPlay/Android Auto model stereo are you putting in your car?
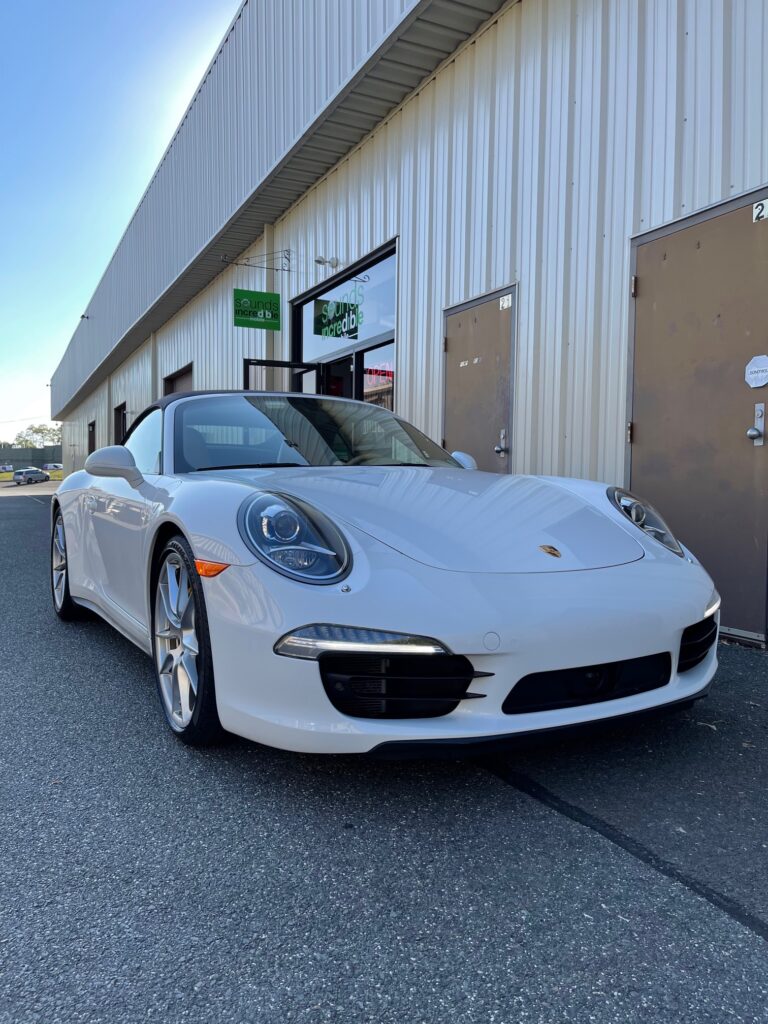
This week in the shop we had the pleasure of working on this mint 2014 Porsche 911 Carrera 4S. Our client explained to us her kids were finally all grown up and out of the house so she got rid of the big family car and traded up. Now it is her time to have and enjoy the sports car she’s always wanted.
2014 Porsche 911 Carrera 4S
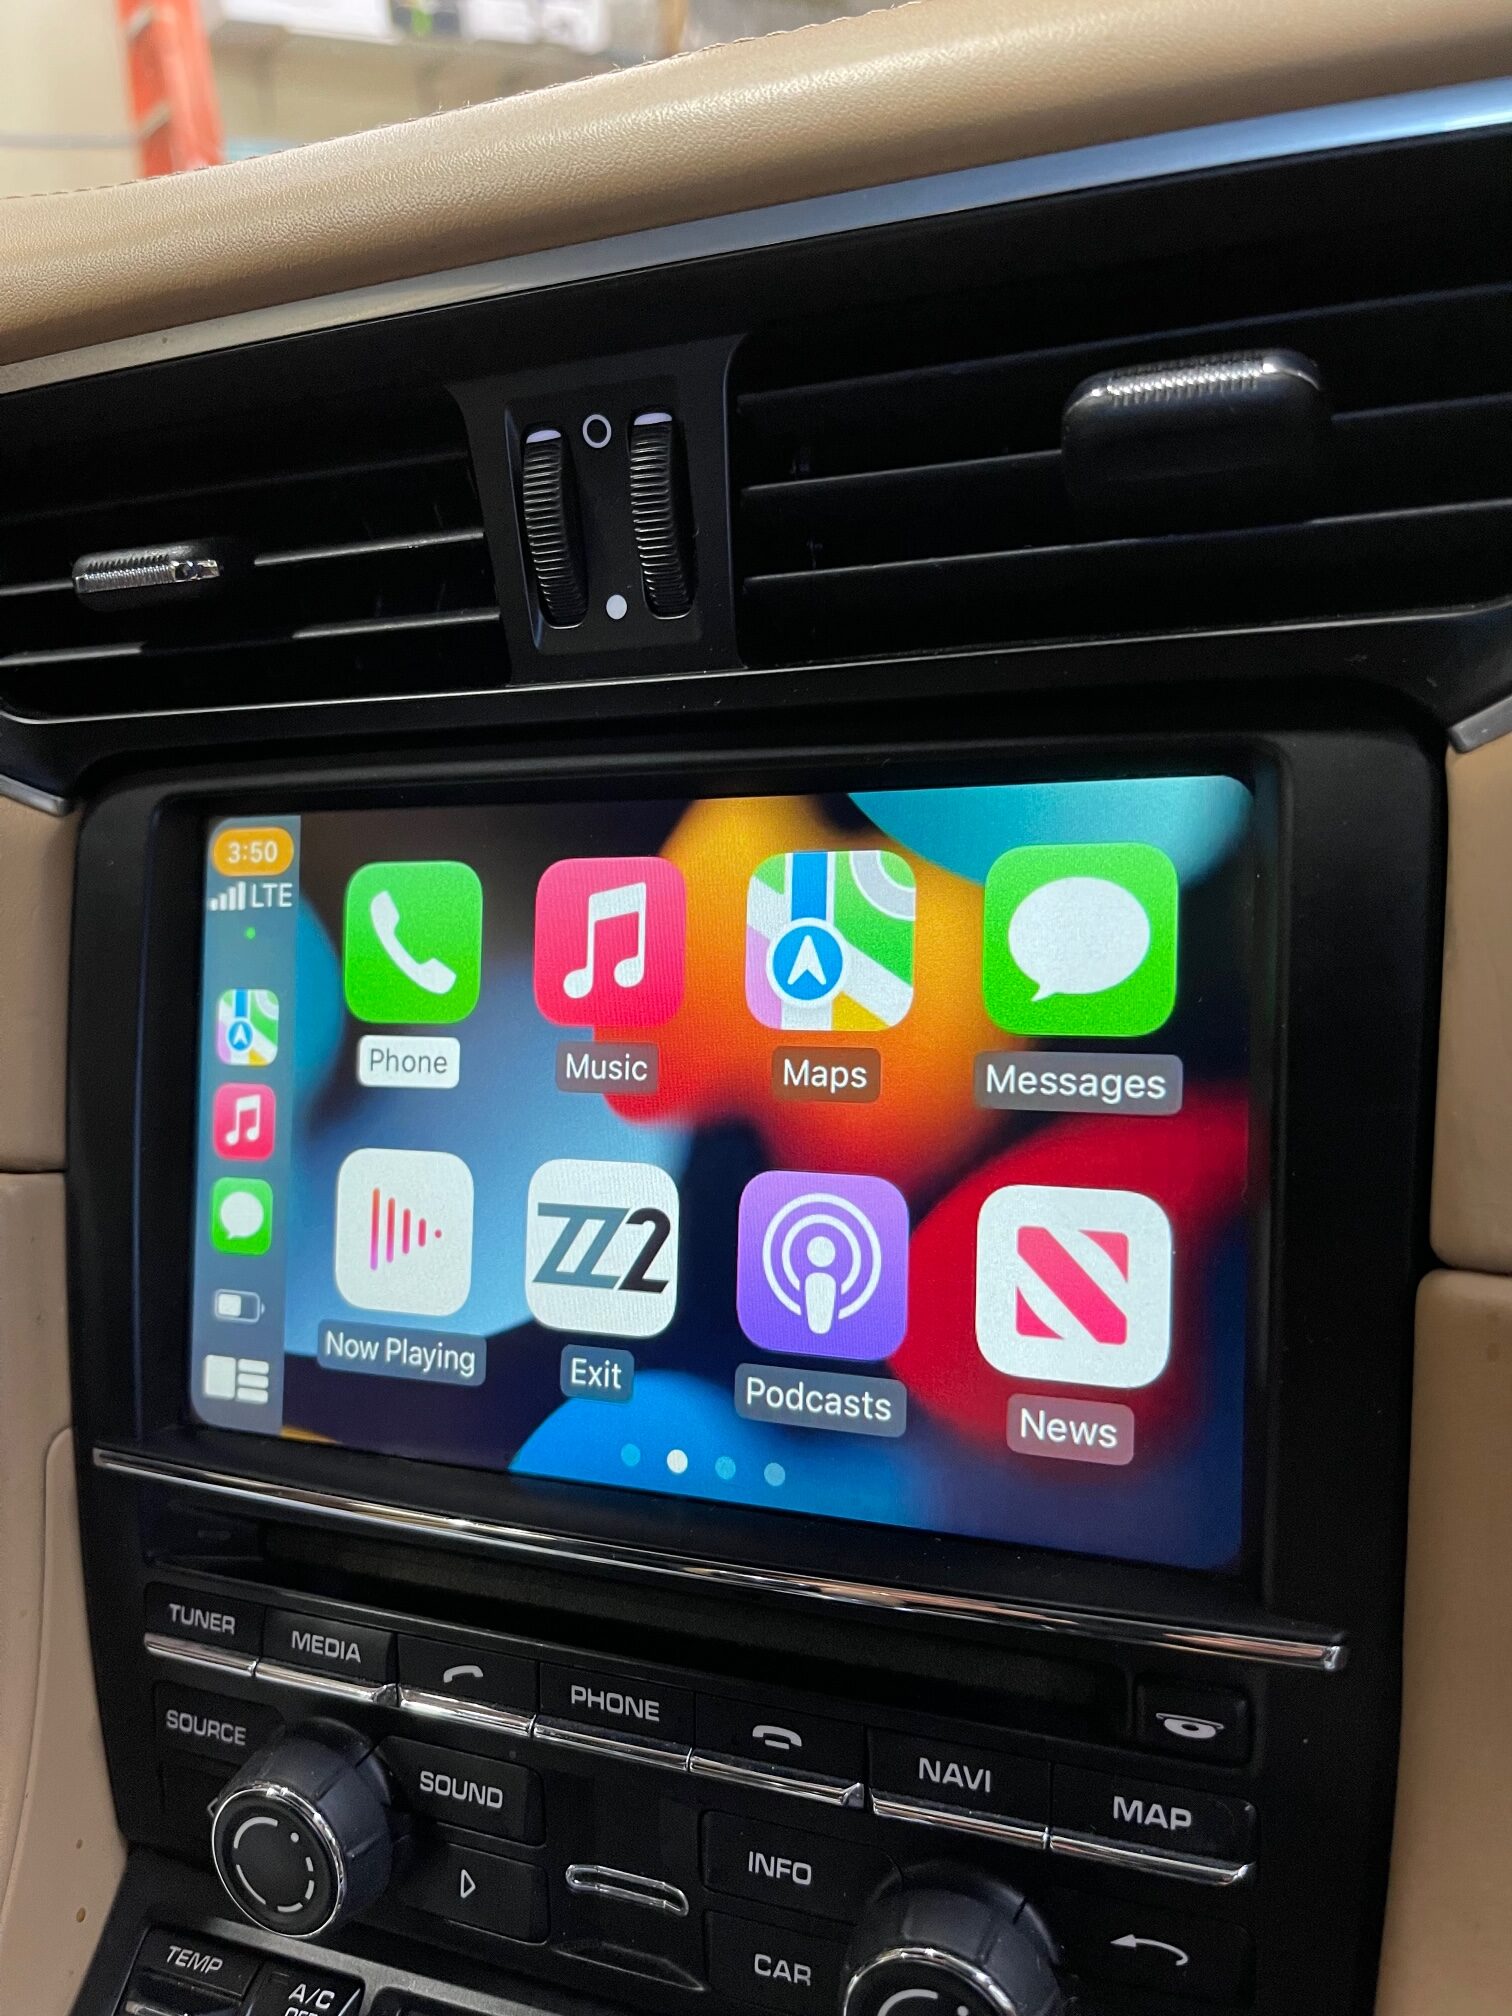
Except this sporty little convertible had some serious blind spots when backing up as it lacked a reverse camera. And although it had Bluetooth and navigation, the PCM 3.1 navigation was extremely dated. Luckily we were able to address that with a Porsche Apple CarPlay upgrade.
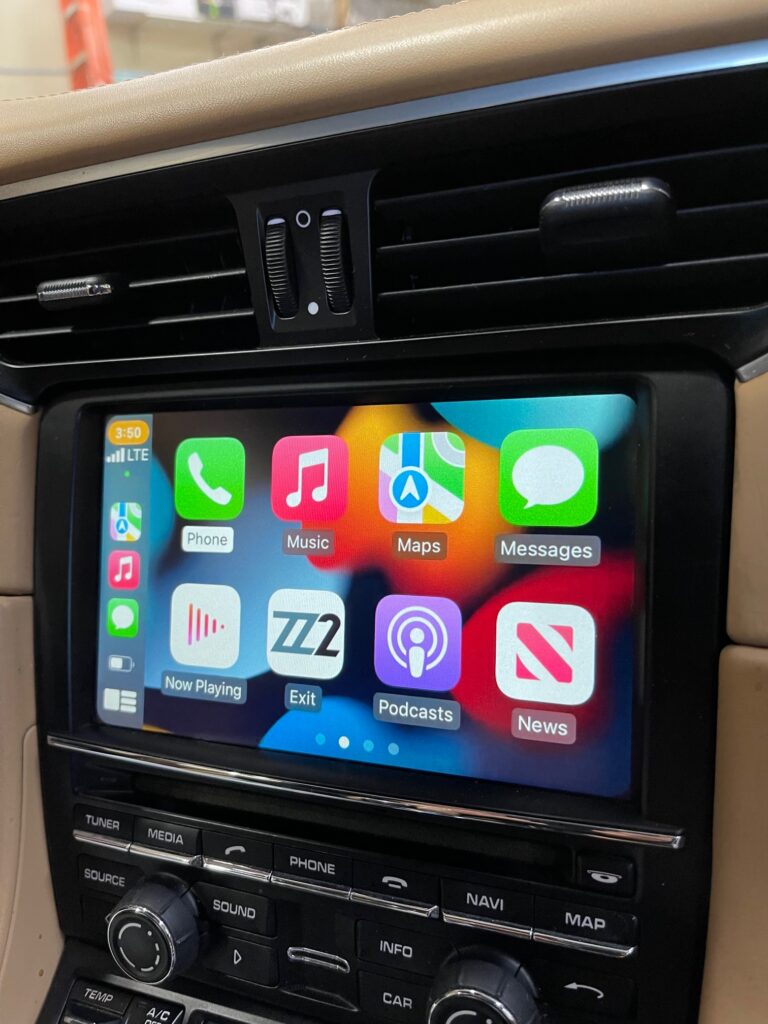
Porsche Apple CarPlay Upgrade – Factory PCM 3.1 Radio
This Porsche Apple CarPlay upgrade was completed using an interface from ZZ-2 which is just one of many manufacturers that we work with for these kinds of retrofits. It does require a bit of expertise to install. It’s not a simple plug and play module.
Intricate Install
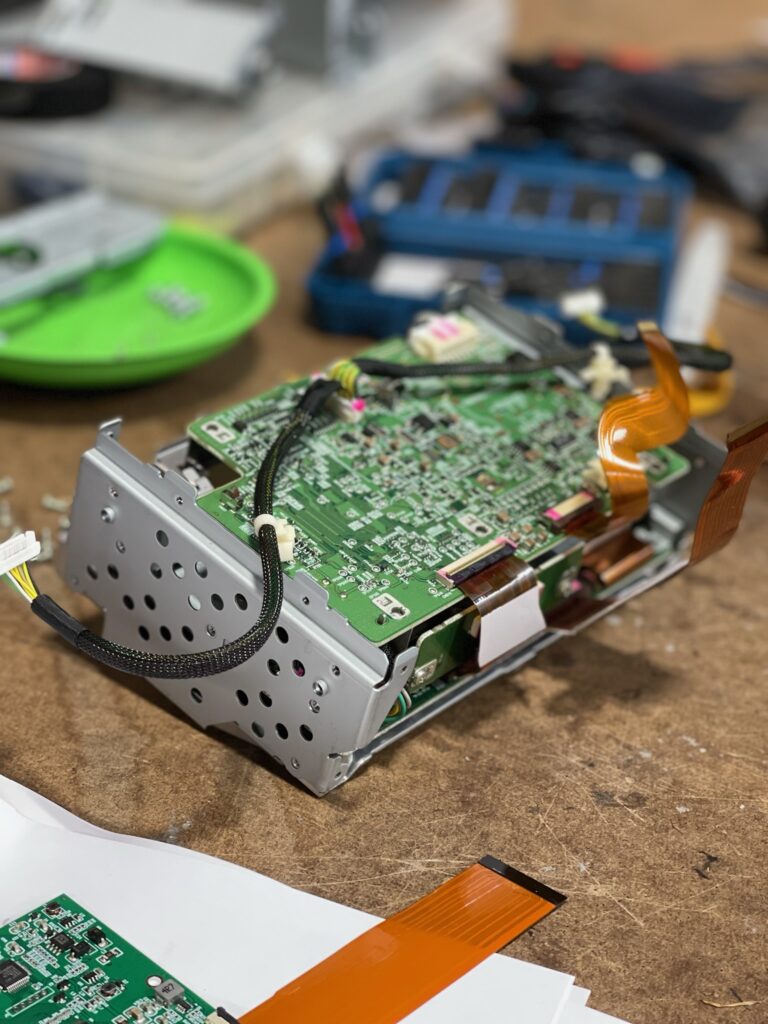
In order to utilize the factory touch screen controls, John had to open up the OEM radio and add a few components. This type of work is very delicate and not for the faint of heart. Luckily he has experience in this type of work as you can see in the pic below.
Porsche Apple CarPlay Retrofit – Requires radio disassembly and ribbon cable connections similar to the work being done on this Range Rover radio
Once John successfully added the new hardware, he reassembled the radio and began preliminary testing. This Porsche Apple CarPlay retrofit kit utilizes the factory microphone which is great. Not only is it a clean look, the OEM mic performs quite well.
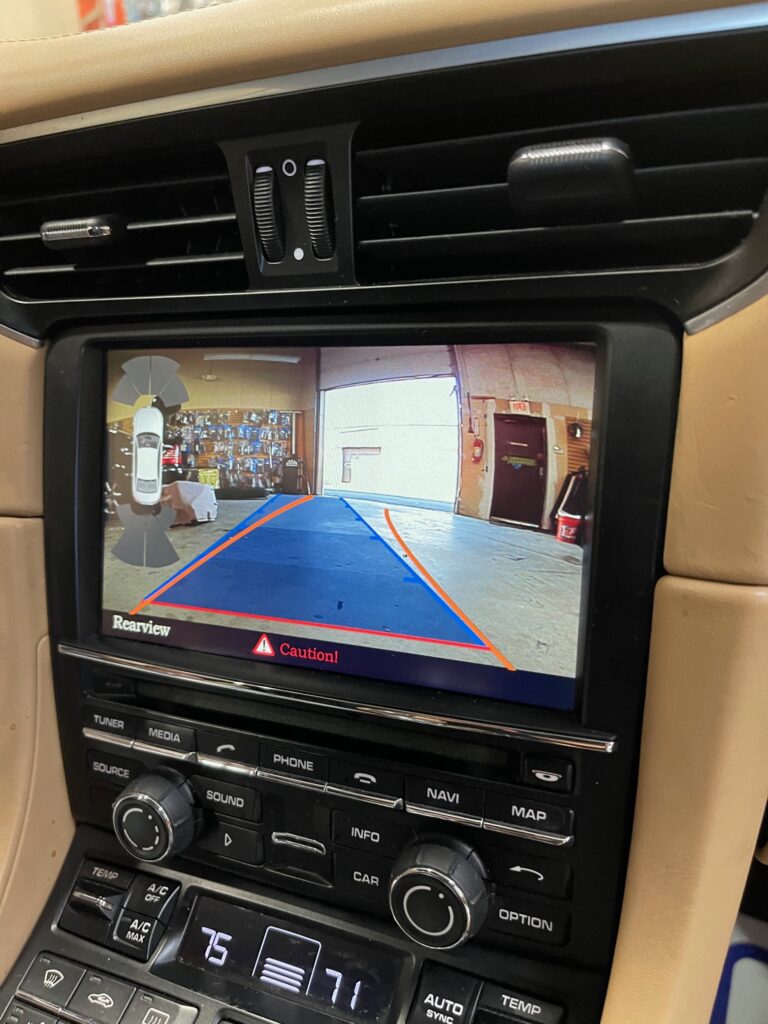
Along with Apple CarPlay we also added a reverse camera complete with Dynamic park assist guidance lines
Along with Apple CarPlay, John also installed a reverse camera. We used the Rydeen CM-HD4 which is a surface mount style (no drilling!) reverse camera featuring high resolution (960 lines), 170 degree viewing angle, .1 Lux with a standard composite video connection. The reverse camera is triggered automatically when shifting into reverse. It also features dynamic park assist lines which is courtesy of the ZZ-2 interface – not the camera.
What to be aware of
Whenever we add Apple CarPlay or Android Auto to a factory stereo, there are usually some functional limitations to be aware of. In this particular vehicle, accessing the Apple CarPlay is actually pretty easy. Number one, you have to select the AUX input source on your radio. Then simply press and hold the info button to prompt the ZZ-2 menu/Apple CarPlay. At that point you can connect and enable wireless connection. Once that connection is established, Apple CarPlay will launch automatically upon vehicle start up. The trick is you must be on the AUX input to hear and use the features of Apple CarPlay or Android Auto. If you are listening to another source such as SiriusXM or FM/AM Radio, you will not hear GPS directions or text message notifications.
To learn more about adding Apple CarPlay or Android Auto to your vehicle, contact us today. Call/text, email or stop in the shop. We’re happy to explain the options for your particular vehicle.
It’s been a few months since we received our first shipment of the Alpine iLX-507. Now that we’ve sold and installed a few, I feel I’ve gotten to really know it intimately. It’s time to share my thoughts! For those not familiar, the 507 is essentially the direct replacement for the iLX-207 which we used to have in our old 2013 Wrangler.
Alpine iLX-507 Review – Wireless Apple CarPlay and Android Auto
Where is it made?
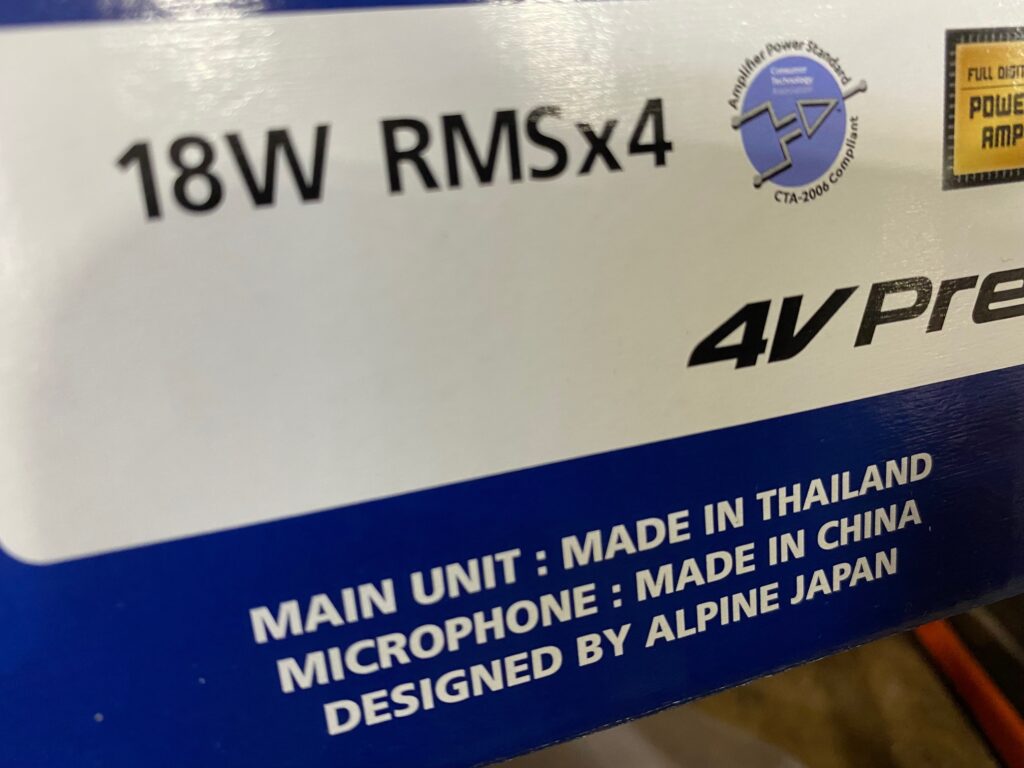
One of the first things I always like to look at when a new product arrives at the shop is the outside of the box. Where’s it made? It’s predecessor, the iLX-207, was made in Japan. For comparison, the wildly popular iLX-W650 and subsequent iLX-407 are both made in Korea and the previous Halo models, iLX-F409 and F411, were made in China. I was intrigued to see the Alpine iLX-507 is made in Thailand. Fun fact. I recently had a client ask me where every radio we sold was made. He based his purchase off of the country of origin. As I rattled off the names when I finally got to Indonesia (Kenwood) he stopped me and said, “I ain’t got no problem with them, that works”.
Alpine iLX-507 – Made in Thailand
HD Screen Quality – But is it really?
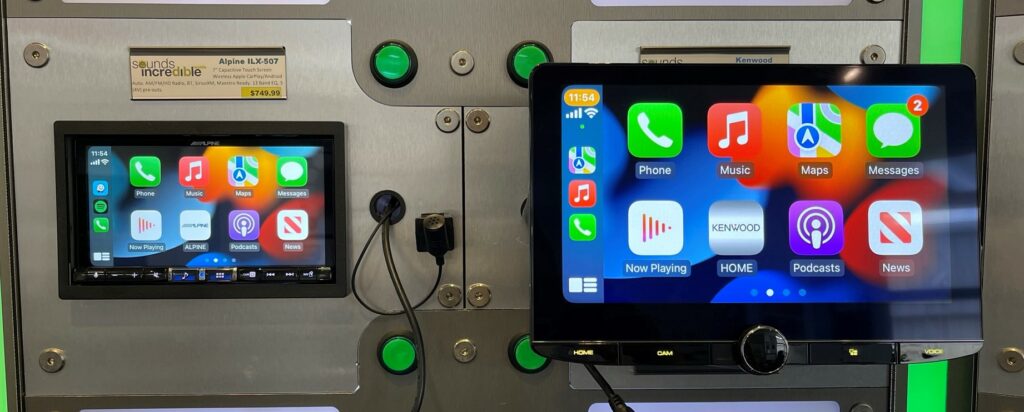
Once I got the unit unboxed and wired up, the HD quality of the screen immediately stood out to me. The Alpine iLX-507 features a 1280 x 720 HD screen with a 2,764,800 pixel count. Not bad. Check it out against this Kenwood DMX1057XR on display right next to it. Keep in mind, the Kenwood is physically closer to the camera because it’s floating away from the display board.
Although this new style screen is much more vibrant and aesthetically pleasing than previous models, sadly, I don’t think it’s as accurate/responsive to touch. For example, just playing around with the iLX-W650 and iLX-407 on display, I find their touch screen is more accurate and responsive than the iLX-507. The Kenwood right next to it blows it out of the water in terms of touch reactivity and exactness .
Screen Sensitivity
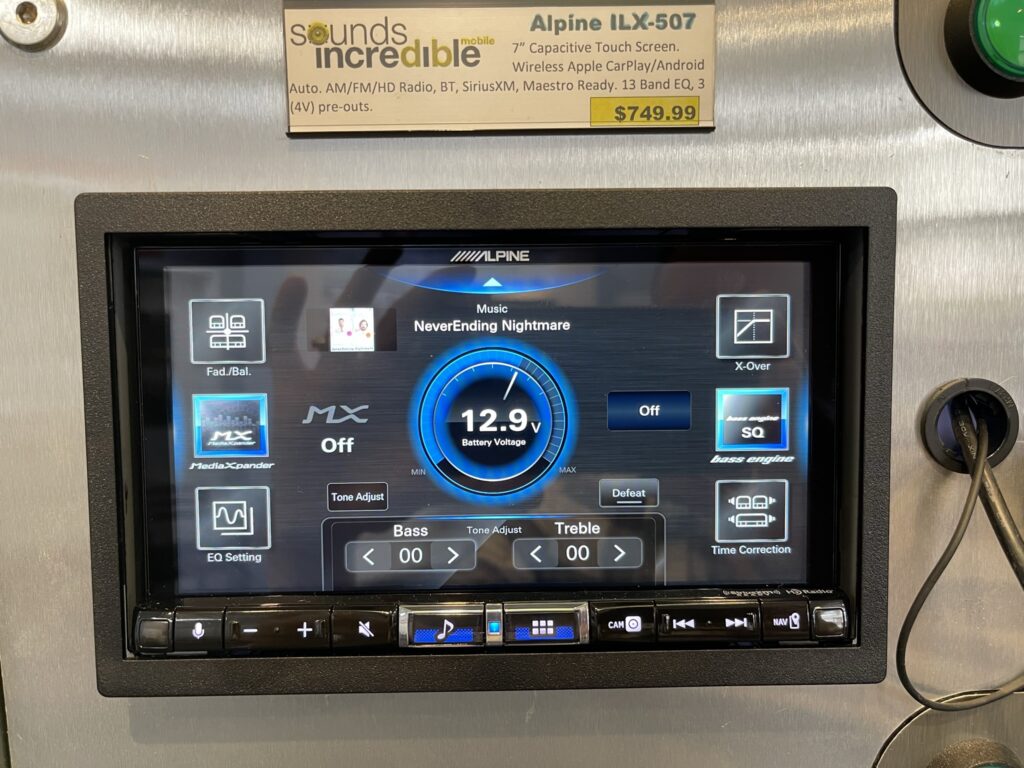
Check out the drop down tab on the top of the screen. This is supposed to be a quick and easy short cut to get to basic audio controls – which I do appreciate! The Alpine iLX-507 features an incredible amount of audio control such as a 13 band parametric EQ (per channel), BUT there are a lot of clients out there that just want a quick easy bass/treble adjustment.
The manual says to simply tap the blue tab on the top of the screen to display this easy sound set up menu. Sounds simple enough, right? Unfortunately it usually takes me 2-3 tries to get it to actually show up. Super frustrating. Especially when I’m trying to show a client how easy it is to use. Imagine trying to do that while you’re driving and hitting bumps and potholes.
Wireless Apple CarPlay & Android Auto plus iDatalink Maestro compatiblity
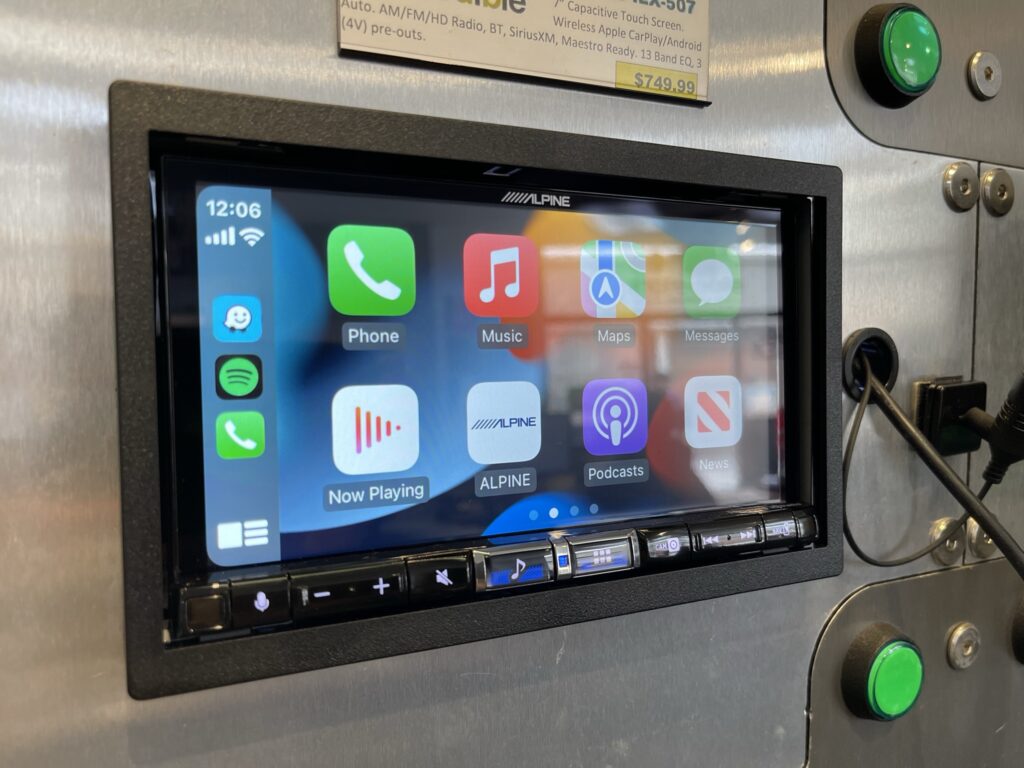
The most attractive feature of the Alpine iLX-507 for most clients is the wireless Apple CarPlay and Android Auto. On top of that, this receiver is also iDatalink Maestro compatible which is a critical feature for a lot of different vehicles. Although not required for every car, even something like a 2012 Ford Escape will benefit from the iDatalink Maestro ADS-MRR which can retain OEM features like audio controls on the steering wheel, factory amplifier if equipped, park distance sensors and even the separate radio display that is mounted above the factory radio.
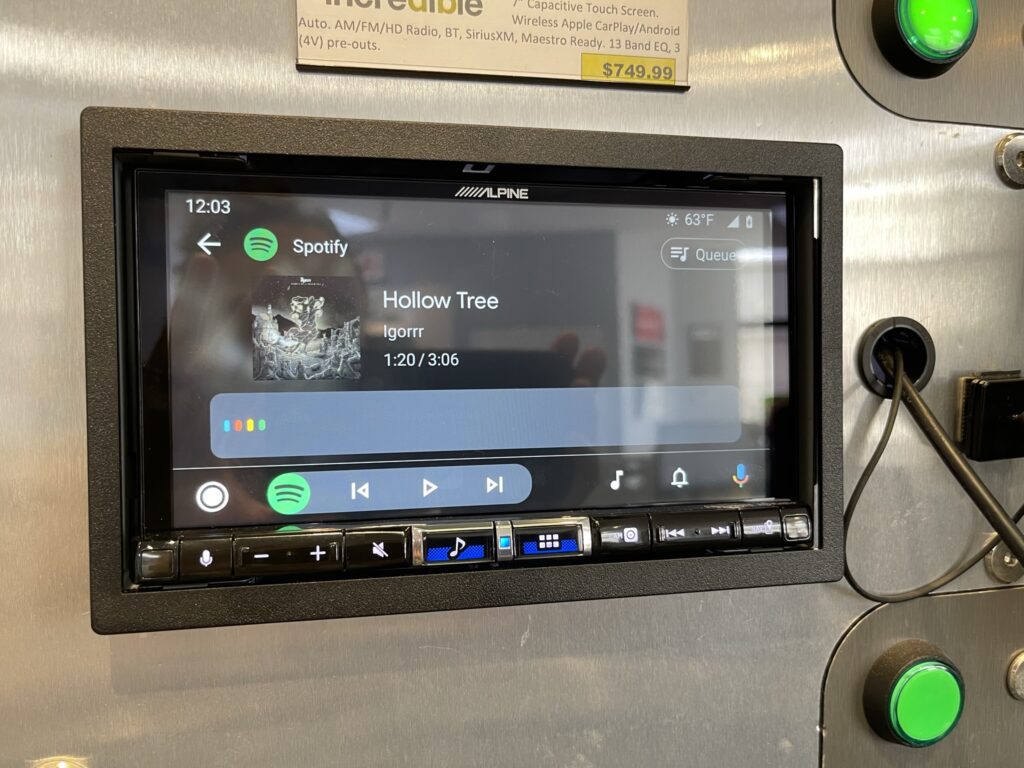
Alpine iLX-507 – Wireless Android Auto
Two USB ports – Optional GPS Navigation
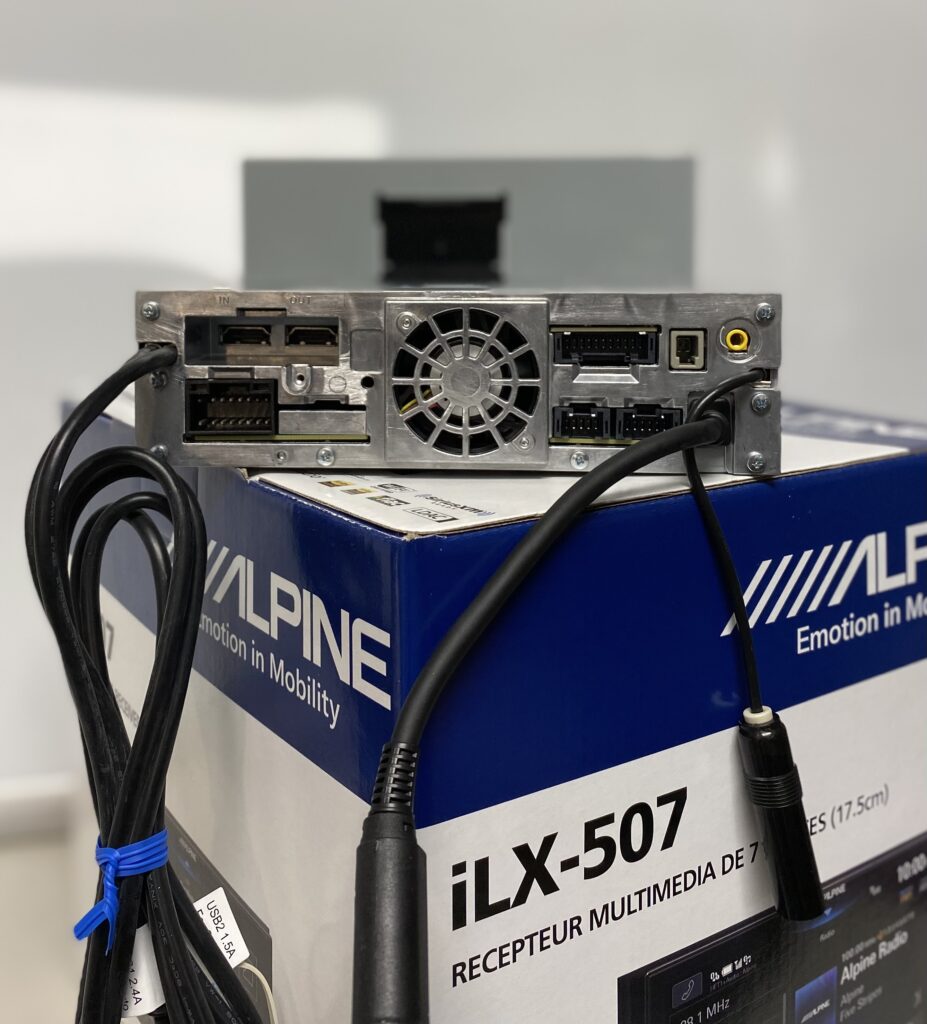
In addition to wireless Apple Carplay and Android Auto, there are TWO USB ports for this receiver. Bonus points – the main USB features 2.4 amp charging. That is huge. I was super surprised this wasn’t covered in an earlier product training when the question was asked, but I’m happy to report the main USB finally has a decent charging rate.
Alpine iLX-507 – Back of unit connector side
Another super attractive feature is the secondary USB port. This can be used for an additional device such as music files on a thumb drive or for future unit expansion. Eventually Alpine plans to release an optional satellite based GPS navigation add-on (release date TBD – keeps getting pushed back).
Optional GPS
I think optional GPS is a no brainer for radio manufacturers and I really don’t get why more companies don’t offer it. Although the Alpine iLX-507 includes a GPS antenna, which helps to improve accuracy on Apple CarPlay and Android Auto, you can still run into coverage issues in dead zones. And trust me, there are still plenty of areas especially in New England with zero cell service. That is the drawback of Apple CarPlay and Android Auto. No cell service? No GPS. For many clients driving in more densely populated areas, this isn’t a concern, but for folks still out in the country, it’s nice to have satellite based GPS navigation. Keep in mind if/when you decide to add that optional GPS when it becomes available, it will occupy that secondary USB input.
Optional Volume Knob
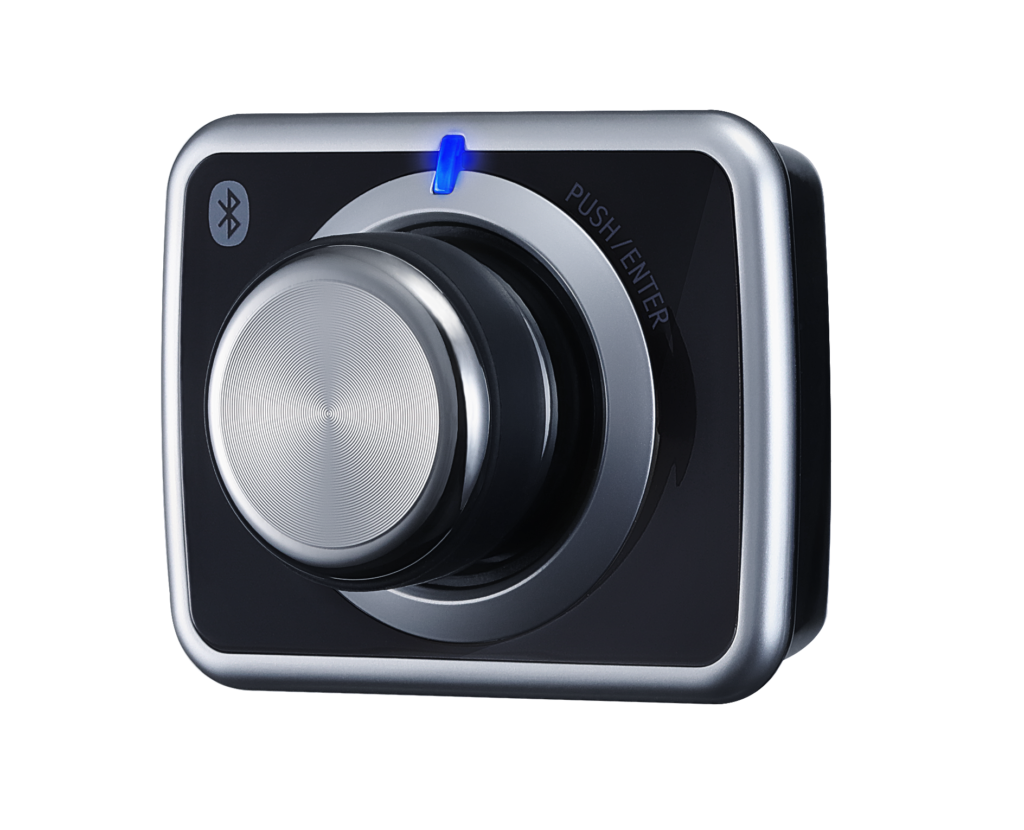
Speaking of options, would you like to add volume knob? Well luckily you can and the best part about it is you can stick it wherever you want on your dash. The Alpine RUX-H02 is an optional Volume/Subwoofer control knob that works via Bluetooth with the iLX-507. By pushing the knob in you can toggle between master volume control and subwoofer level control. How clever!
I do love this accessory. It is such an awesome add-on. I can’t tell you how many times I’ve gone into a clients car to show them how to use their new stereo and they immediately start reaching for the volume knob that is no longer there. People like knobs, what else can I say?
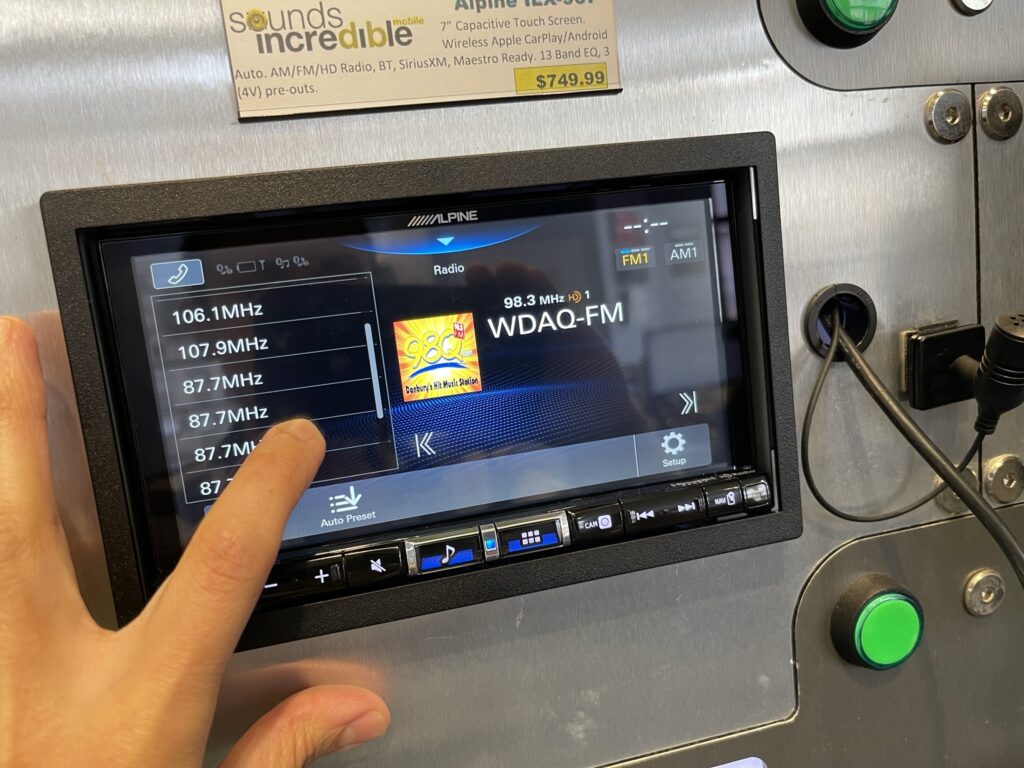
HD Radio – Scrolling presets
Personally I am not a fan of FM/AM radio, but there are some clients that still like to listen to local radio for music, news, traffic and weather. If you’re in an area with a lot of coverage, you may appreciate the added benefit of HD Radio compatibility. What might peeve you however, is how you access those presets.
Alpine iLX-507 – Scrolling presets
This is another design aspect I don’t understand. Scrolling presets! Fixed presets 1 thru 6 on the bottom of the screen with a clear band button (like the iLX-W650) is the way to go IMO. It’s just difficult to scroll and select while driving especially if the screen responsiveness isn’t 100%.
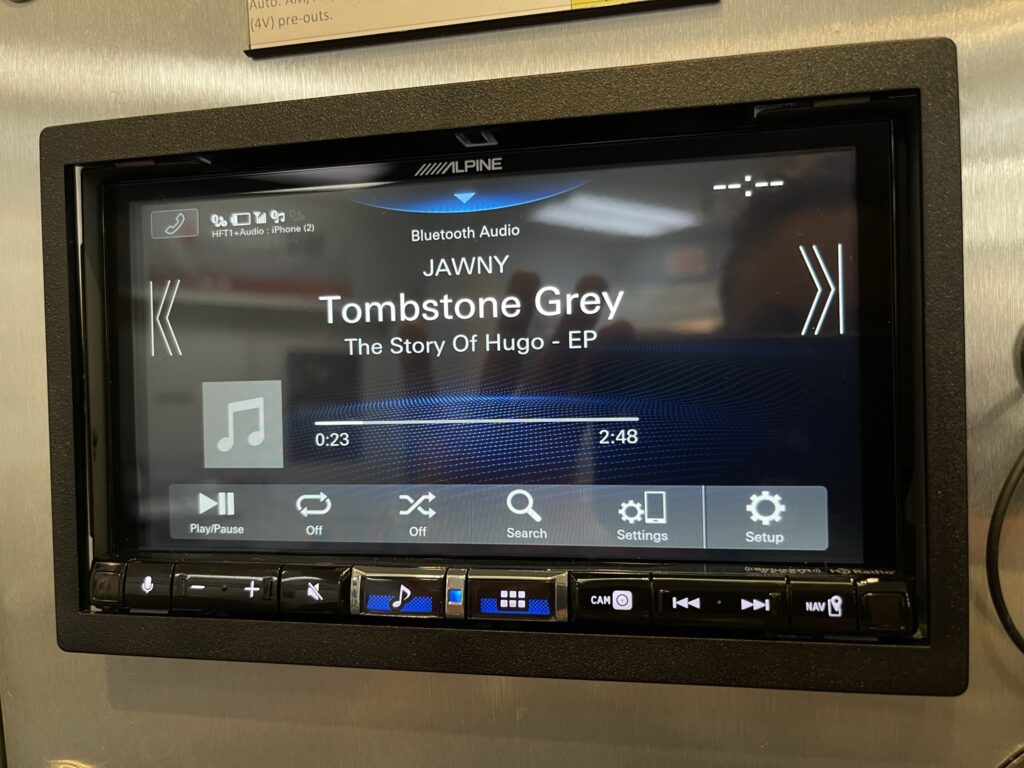
Hi-Res audio playback
You may have noticed that the Alpine iLX-507 features Hi-Res audio playback. It’s compatible with higher resolution audio apps like Apple Music, Tidal, Amazon HD or tracks downloaded from HD Tracks and capable of playback at 96kHz/24Bit. This may be a very important feature to a lot of you out there. You might be surprised I haven’t made a bigger deal out of this feature. Practically speaking, most of the clients that have bought this unit are not purchasing it for this reason. Hi-Res audio isn’t even on their radar.
Alpine iLX-507 – capable of Hi-Res Audio
In general, many of my clients don’t really understand that the music they are streaming from Pandora, Spotify and SiriusXM is wildly compressed. Whenever possible, I take the time to let them hear a track off their playlist from their phone using their preferred app and then I let them hear the same track from my phone using Apple lossless. They’re usually blown away by what they’ve been missing. If you are using high res audio apps, you will totally appreciate this feature. If you’re still rockin’ with a free Pandora subscription, it’s time to upgrade and try a higher quality app.
Control up the Wazoo
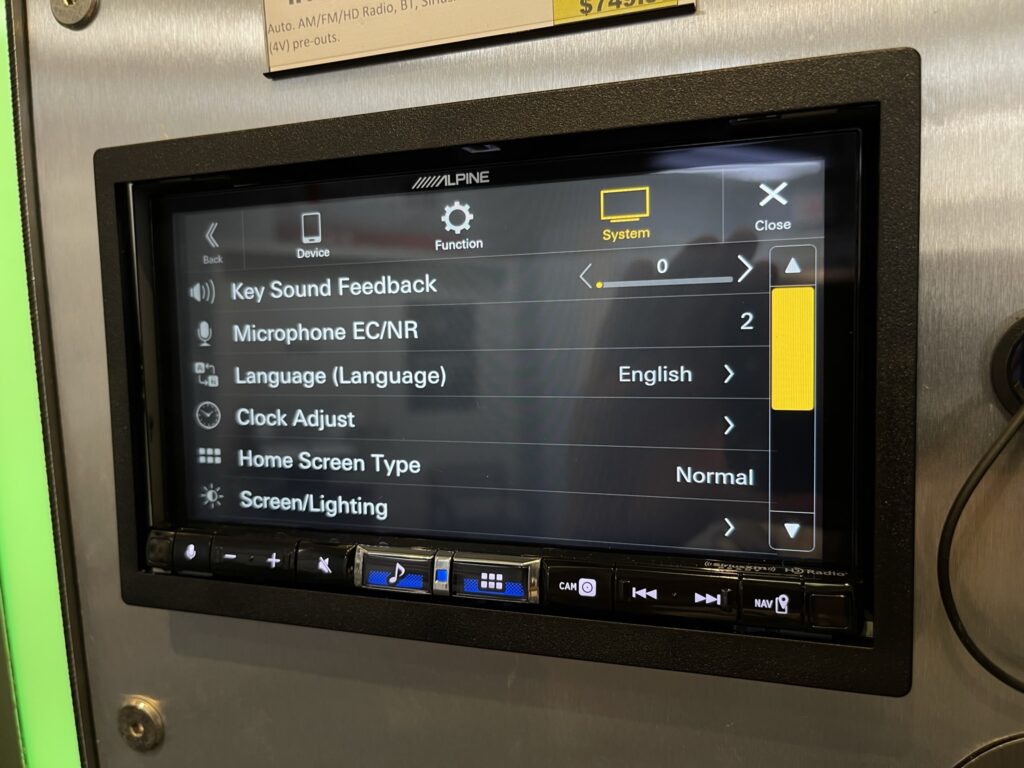
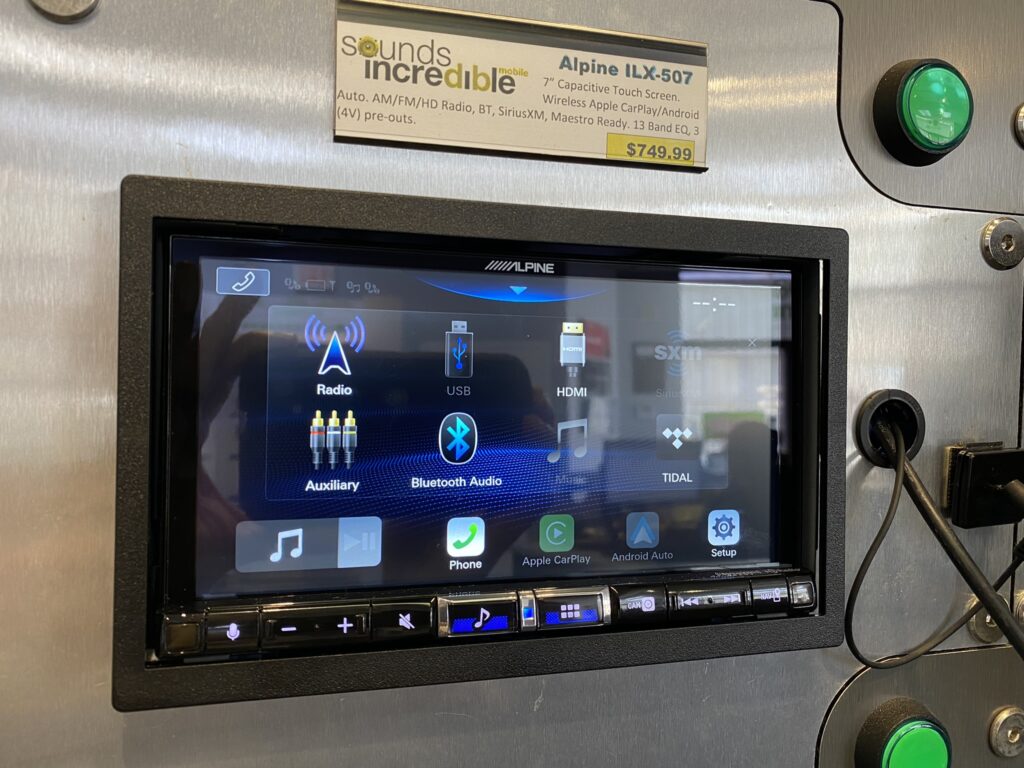
As nitpicky as I am, one thing I really love about this unit is all of the control it has. There are SO many settings. You can get lost in the settings for days. Telephone/Notification volume settings. Mic gain and echo cancellation/noise reduction settings. Key feedback tone settings. Camera image settings. Source volume settings. Background image/color settings. 13 Band parametric EQ adjustable per channel. In depth crossover settings.
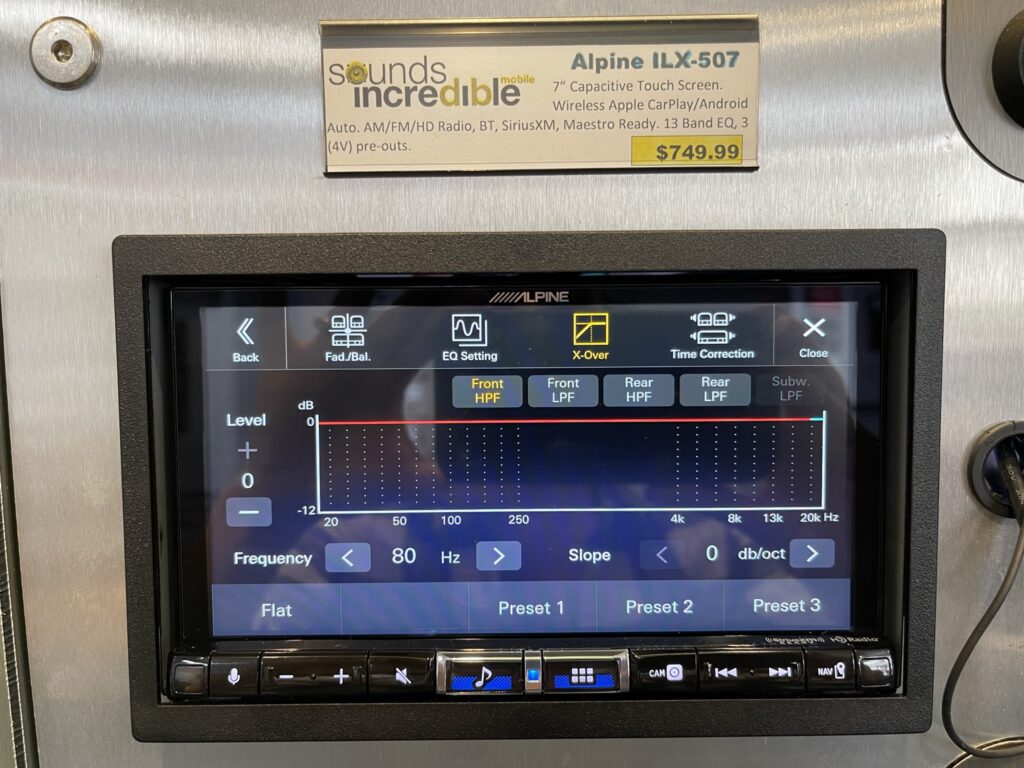
Alpine iLX-507 – Various menu settings
Just look at this. Not only can you adjust Low Pass Filter and High Pass Filter separately for front, rear and subwoofer, look at the frequencies you can choose from. LPF: 4k, 5k, 6.3k, 8k, 10k, 12.5k, 16k & 20k. HPF: 80 Hz, 100 Hz, 125 Hz, 160 Hz, 200 Hz or 250 Hz. Slope: 0, 6, 12, 18 or 24 db per octave plus level adjustment from -12 to 0 dB. Holy crossover control Batman!
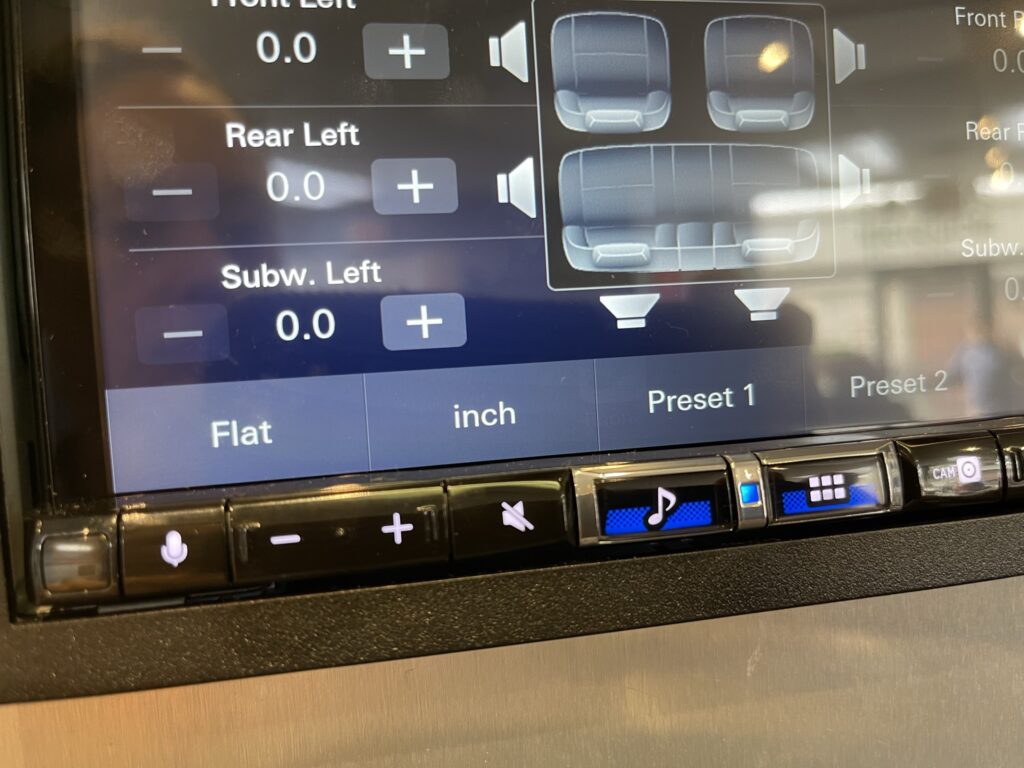
In addition to your standard time alignment controls, you can even select whether you want to enter that information based on milliseconds, inches or centimeters! I’m telling you, the Alpine iLX-507 has settings and options galore. They are seriously giving Kenwood a run for their money with all the audio control tools.
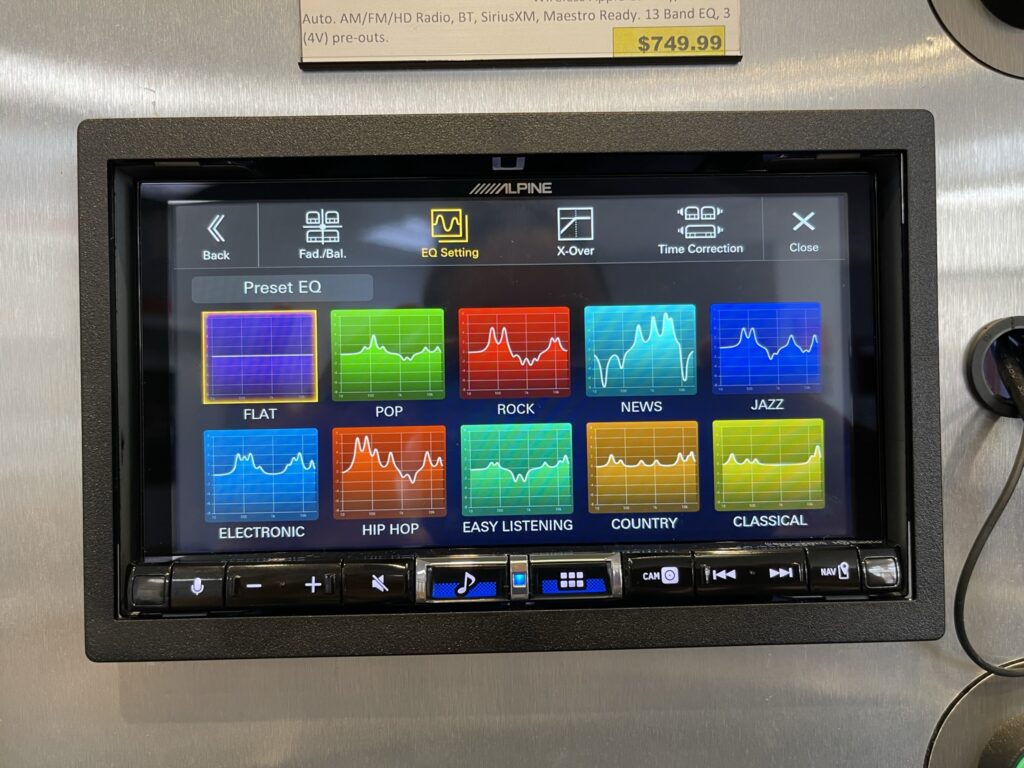
But don’t let all that control overwhelm you. For those that find these kinds of options and settings far too advanced, Alpine does include a basic preset EQ section shown here:
What can’t you control?
Unfortunately there are a few things you cannot control such as the blue color on the buttons. You can change the screen color, but not the button color. Go figure. The other thing that kind of drives me batty is automatic front camera control. There isn’t any. Even though the iDatalink Maestro supports automatic front camera control, Alpine does not offer this feature on any of their models right now. You want to use the front camera input, hit the camera button and tap the screen to alternate between the rear camera input and front camera input. On some higher end Kenwood models, the front camera can be automatically triggered for 10 seconds when shifting from reverse to drive. This is what clients expect when they see a stereo features front camera input.
But wait – there’s another catch!
I remember being really excited about this model when I found out it would support a front and rear camera. It’s about time. It always blew my mind that the more basic iLX-W650 supported 2 cameras, but yet the higher end models did not. Unless of course you dropped bank spent more than the cost of the receiver on their HD cameras: HCE-C2100RD, HCE-C2600FD and don’t forget the fancy camera switcher control module KCX-C2600B.
Alpine iLX-507 Review – Camera connections
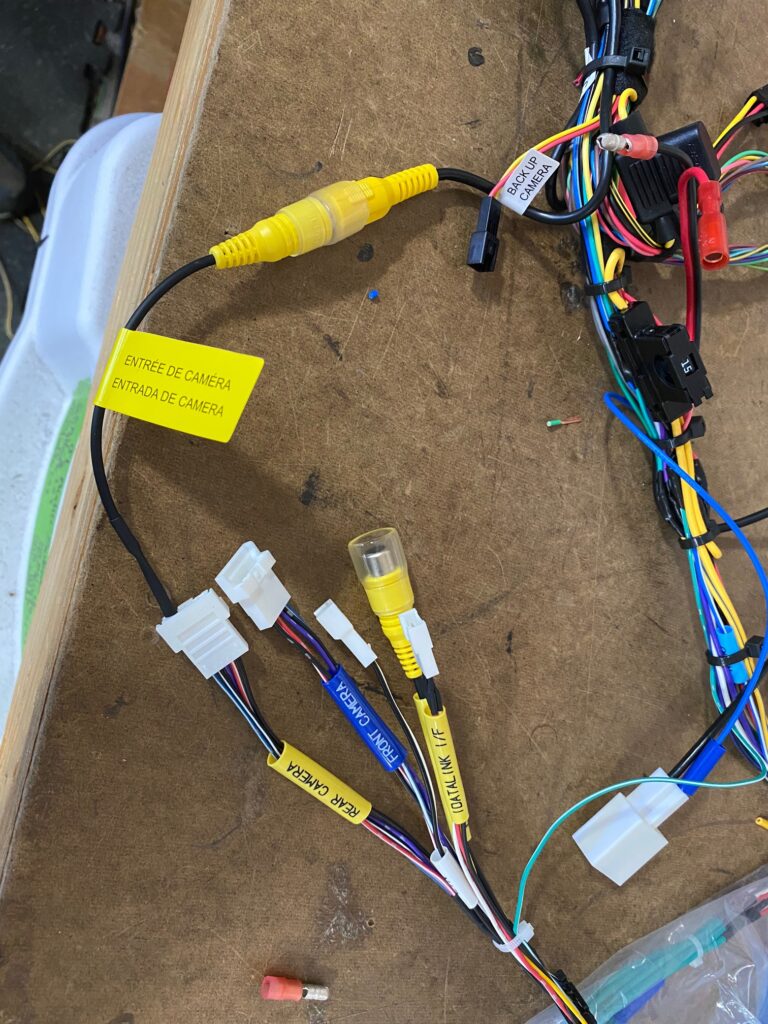
Alright, so the Alpine iLX-507 supports a front and rear camera and it doesn’t have to be a proprietary Alpine direct camera. You can use a composite camera using the included adapter in the box. Great! Except they only supply you one adapter. So let’s say you are like my client here the other day with your daughter’s 2017 Subaru Forester that has a factory reverse camera and you want to add wireless Apple CarPlay, retain the steering wheel controls, factory reverse camera and add a basic front camera. Guess what – you will need to buy another part! Available from PacParts.com – 82076-85781C78. I must say that kind of shit drives me crazy. Clients don’t want to be nickel and dimed or surprised to find out they need another part mid install.
Chassis Design
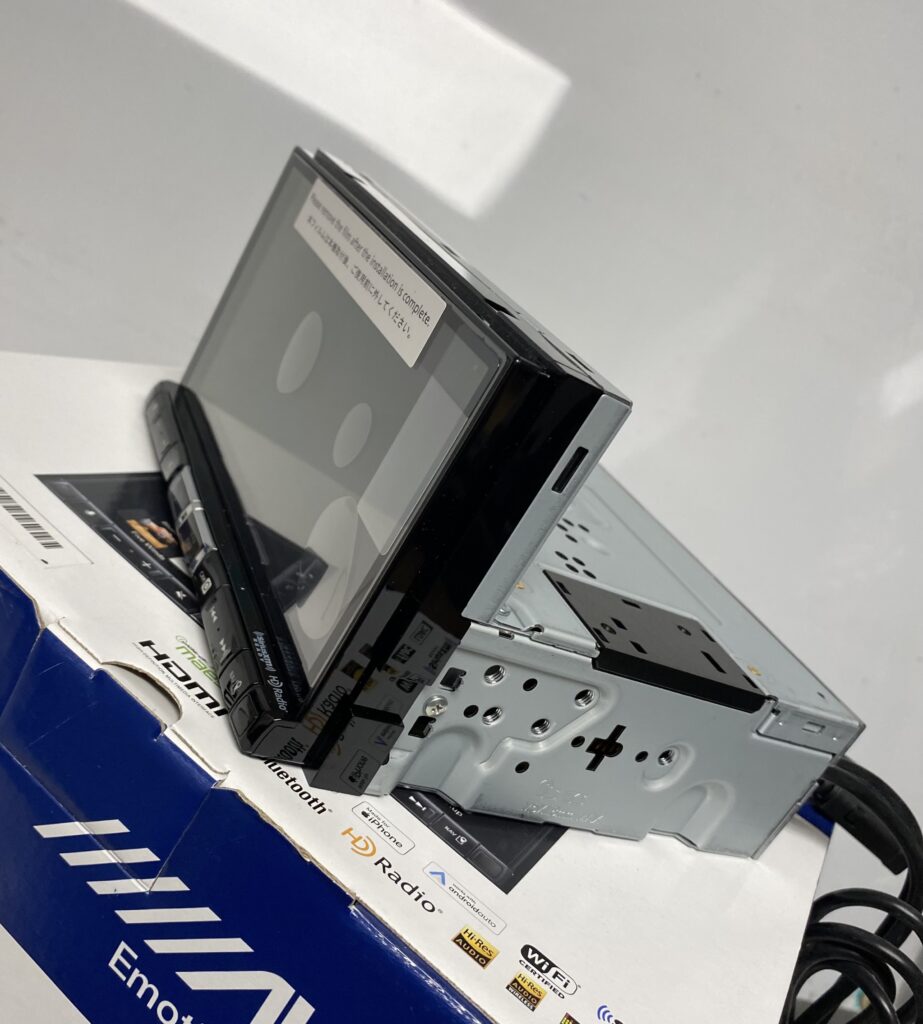
It’s also important to note the chassis design. Unlike Alpine’s other mechless models iLX-W650 and iLX-407, the iLX-507 does not have a shallow chassis. Full single DIN on bottom with a double DIN screen. For most installs that will still leave you some extra space for wire management. All things being equal, I prefer the chassis design of the iLX-W650 and iLX-407 because quite honestly they will fit a larger variety of vehicles. There are some Ford’s on the market (2014 Ford Explorer, I’m looking at you) that simply will not accommodate a full depth chassis like this unfortunately. So just be aware of any depth limitations, if any, in your particular application.
Alpine iLX-507 Review – Single DIN chassis
Overall – Amazing value and feature packed
I know I can be real nit picky on certain features and aspects, but it’s largely because of feedback from clients. I’ve learned what they like, what they don’t like and what they absolutely can’t stand because let’s face it. If I sold it and they don’t like it, I’m the one that’s going to hear about it.
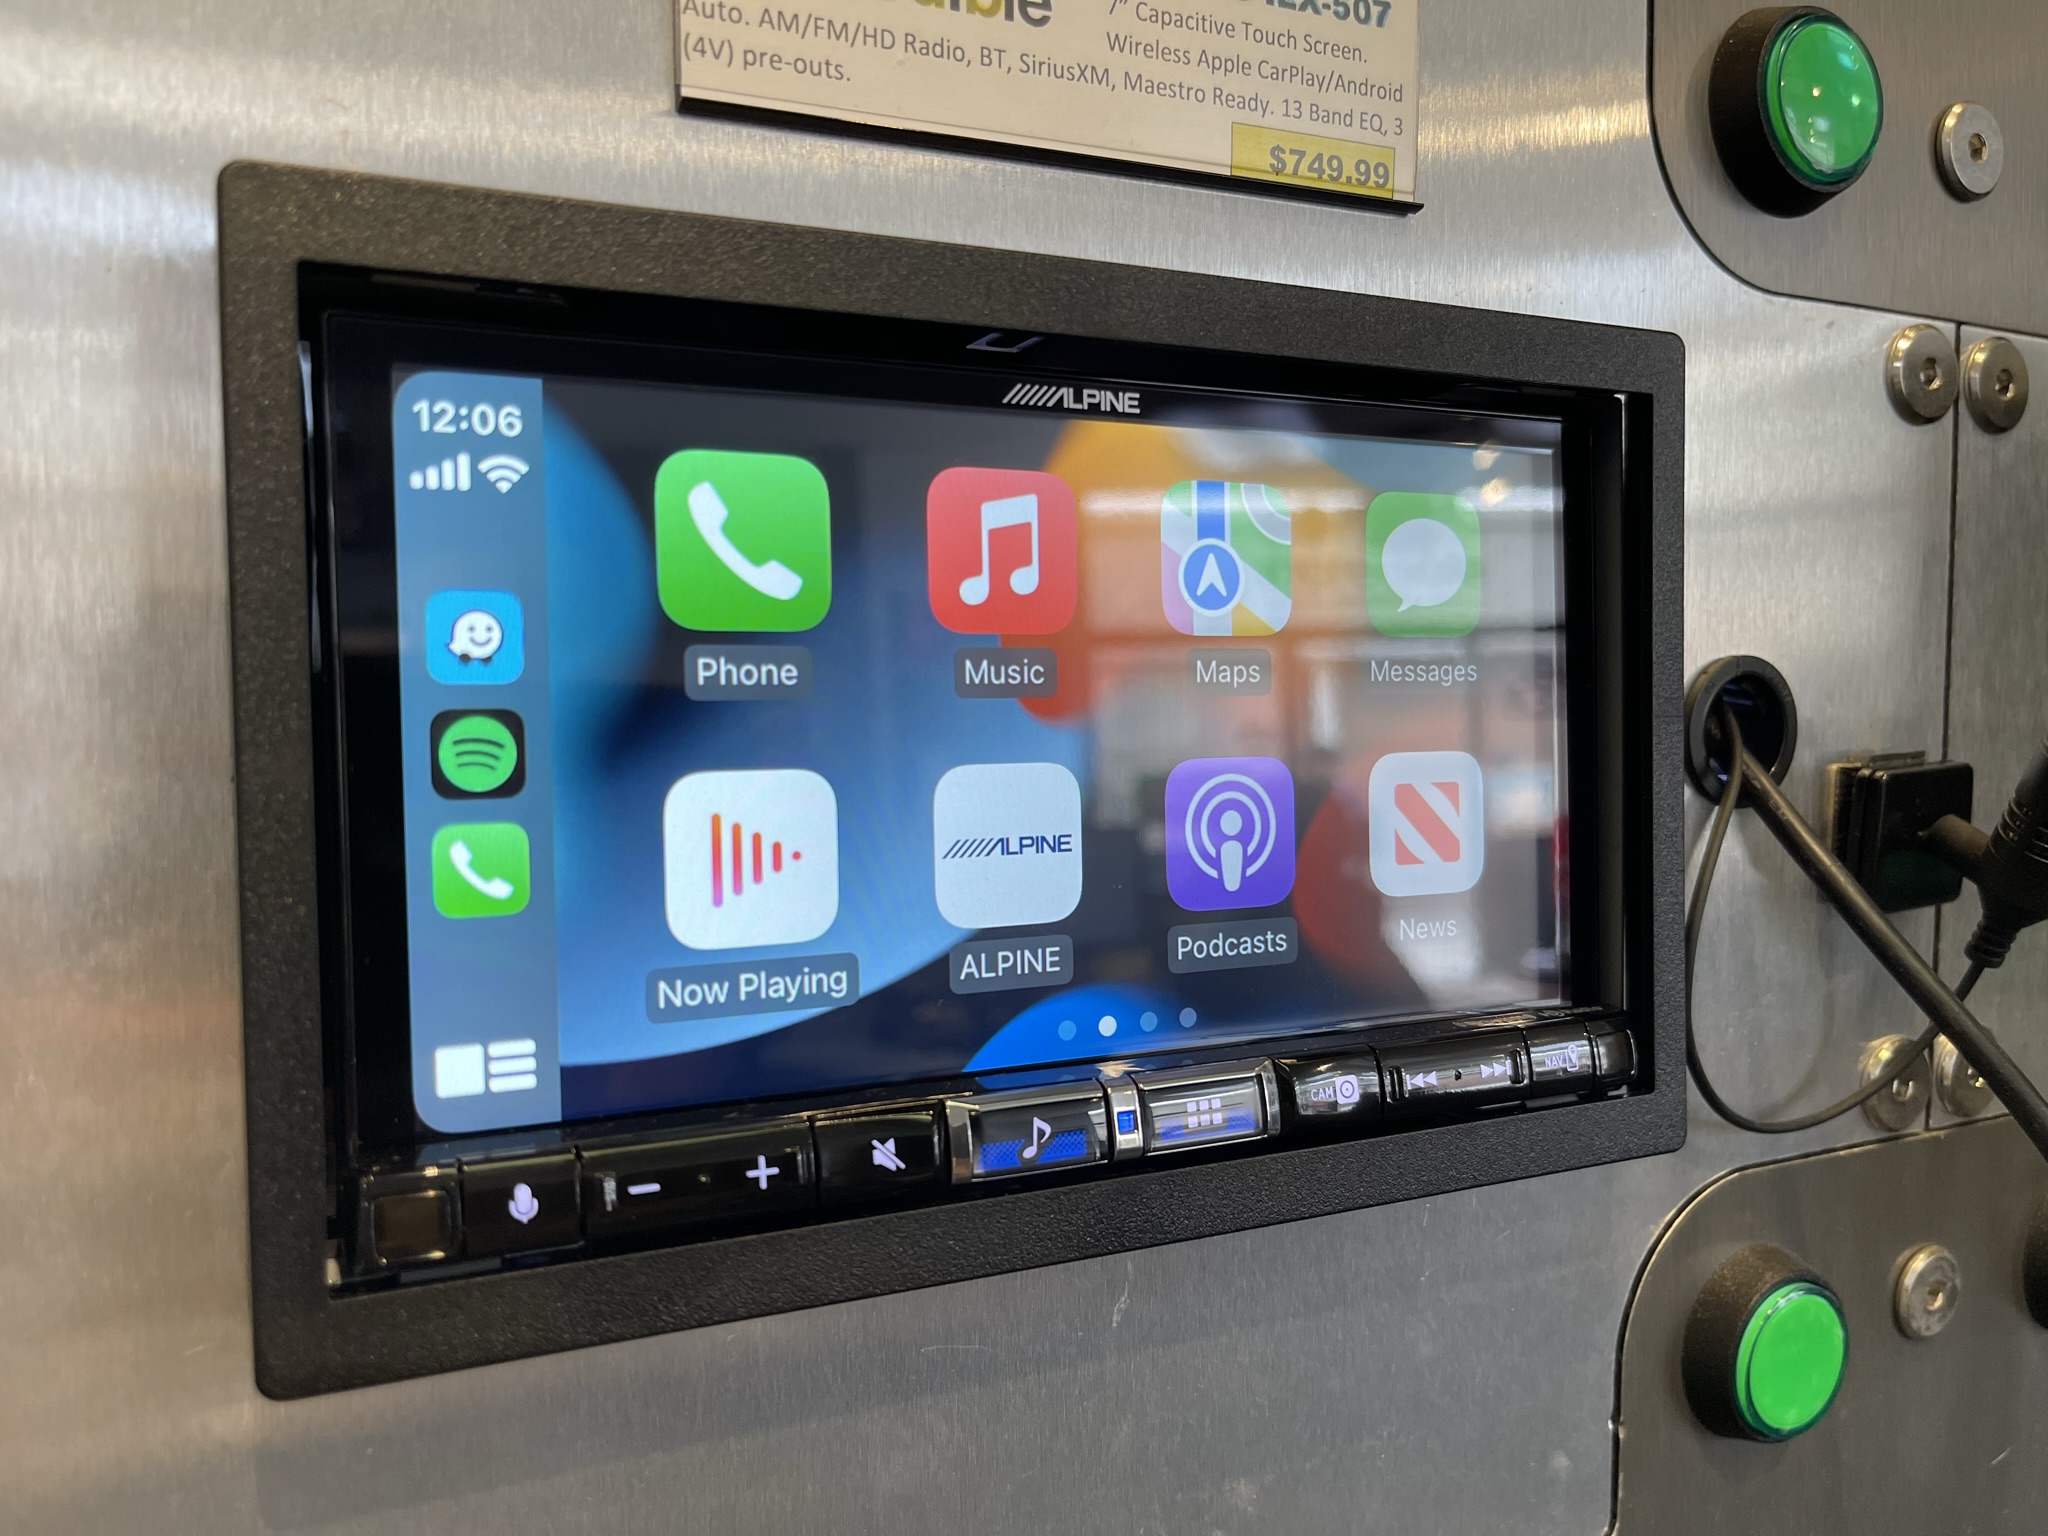
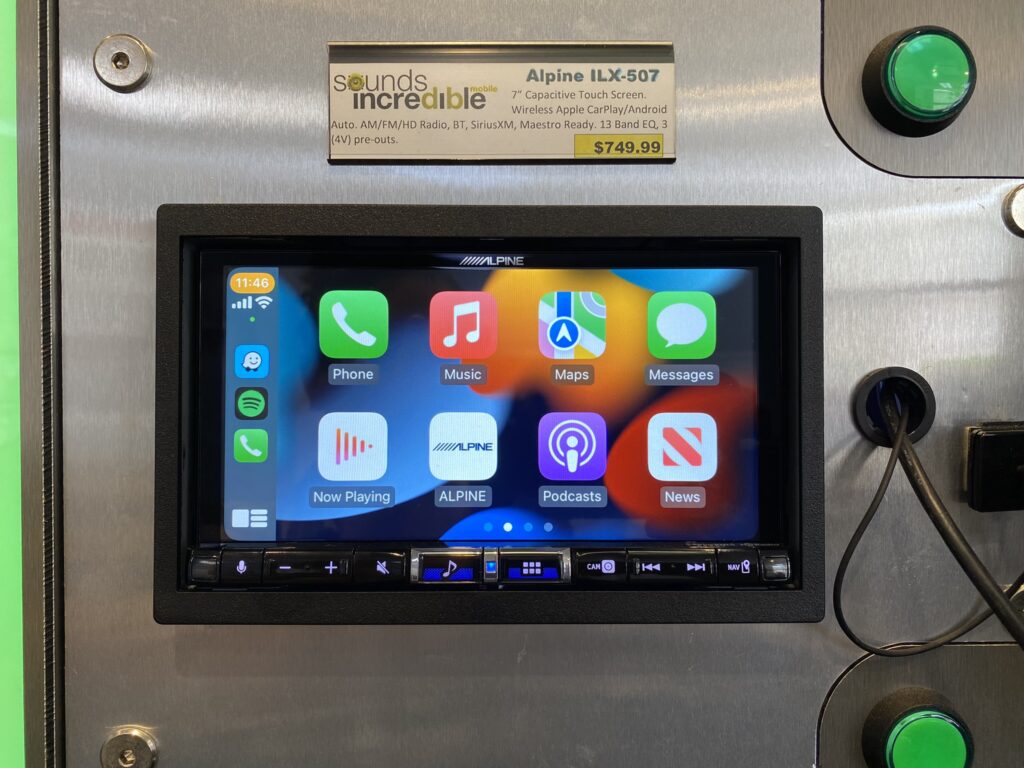
Alpine iLX-507 Review – Home screen
At the end of the day, the Alpine iLX-507 has a ton of fantastic features and very few drawbacks which is why it’s such a popular choice amongst our clients. Alpine, let me count the ways I appreciate you:
Wireless Apple CarPlay and Android Auto
iDatalink Maestro compatible
TWO USB ports
Main USB 2.4 amp charge
Secondary USB 1.5 amp charge
Optional GPS navigation (connects to USB 2)
Included GPS antenna
Bluetooth settings galore – regarding notification volume, GPS volume, echo cancellation, noise reductions, mic gain, etc.
An extravaganza of audio control – 13 band parametric EQ per channel, digital time alignment and a plethora of crossover adjustments
Simple preset EQ option along with basic bass/treble, balance/fader controls
Hi-Res audio compatible – playback up to 96kHz/24Bit
4 Volt pre-amp
HDMI input
HDMI output (great for rear seat entertainment systems that accept HDMI input)
AUX input
SiriusXM compatible
HD Radio
Front and Rear camera input – includes one composite adapter – a second one can be purchased from PacParts.com
Compatible with optional Alpine dash cameras
Direct connection for optional HD Cameras – HCE-C2100RD & HCE-C2600FD – no switcher required – on screen control for various views – top down, panoramic, corner, etc.
Optional Volume Knob RUX-H02
Did you install the Alpine iLX-507 in your vehicle? What has your experience with this stereo been like? Let me know in the comments below. And as always – thank you for visiting and reading!
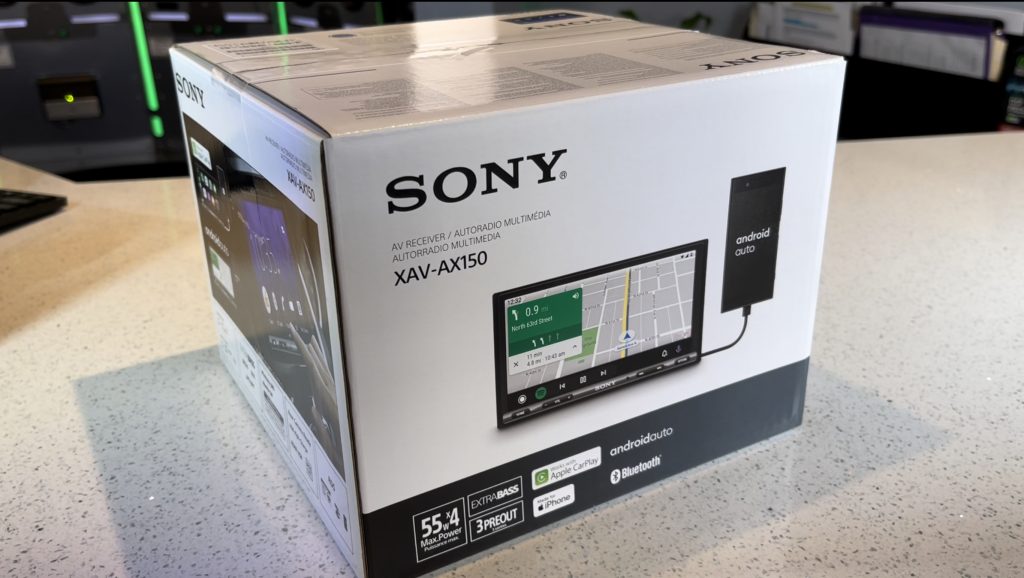
Is the Sony XAV-AX150 the best value Apple CarPlay and Android Auto radio for 2022?
Now more than ever, consumers can appreciate the great value of the Sony XAV-AX150. As we hurtle towards a dystopian new normal, consumers are waking up to the greater effects of high gas prices, limited resources compounded by the weakening dollar. Inflation has entangled its tentacles into nearly every facet of our lives. Car stereo is in no way immune to this ugly beast. In 2019, the best value Apple CarPlay and Android Auto stereo that I sold was the Alpine iLX-W650. Just 3 years ago, you got a lot for your money with the iLX-W650: 4 Volt pre-amp, glass capacitive touch screen, 9 band parametric EQ and more. That deck is a work horse and is still a staple product at our shop. Yet, in the past few years, we have seen the price of that model climb from $299.99 to $349.99 and then to $399.99. Next week it will be $449.99. Yikes!
Sony XAV-AX150 – Best value Apple CarPlay Android Auto 2022
In this day and age, deals are harder and harder to come by which is why I love the Sony XAV-AX150. When consumers are getting hammered by inflation everywhere in their lives, I love seeing a quality brand like Sony hang in there and continue to offer consumers an awesome value.
This deck is perfect for someone who has purchased an older vehicle and looking to upgrade the tech features. It’s extremely difficult to buy a new vehicle right now. So many of our clients are buying used (and paying dearly for it I might add). On top of the inflated used car price, they are spending additional cash up-fitting to add Apple CarPlay and Android Auto. The Sony XAV-AX150 won’t be right for everyone, but it’s a perfect fit for anyone with a basic used vehicle simply looking to add modern features.
Why the Sony XAV-AX150 is awesome
This deck has a ton of great features for the money. It’s super easy to use and super reliable. What you see is what you get. You’re not paying extra for features you don’t want or need.
AM/FM Radio (NO SiriusXM compatibility)
Resistive touch screen
Bluetooth
Wired connection for Apple CarPlay and Android Auto (rear USB)
Reverse camera compatible
Steering wheel control compatible
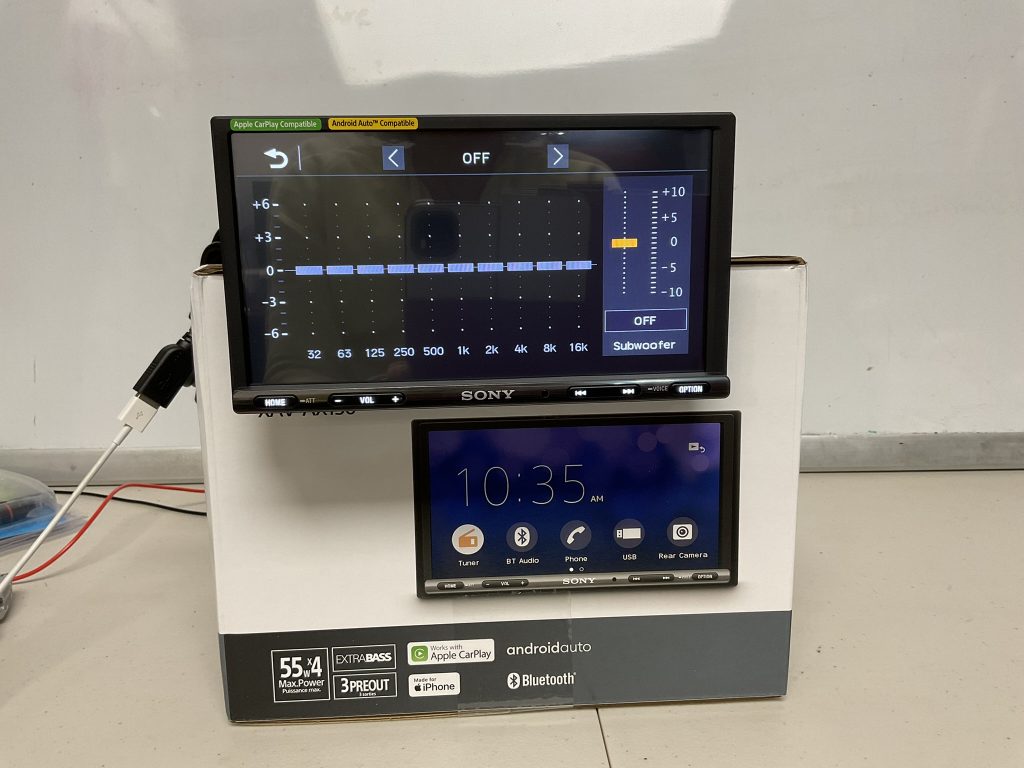
10 Band EQ
Front, rear and subwoofer pre-amp (2 Volt – not the cleanest on the sub channel though)
Built in crossovers – adjustable HPF and LPF
This unit is mechless so no CD player. Although it is meant for double DIN ISO mount installation, the rear chassis is only single DIN which leaves you some room to work with in the dash in case your installation involves a large module to retain things like Onstar/Bose or steering wheel controls.
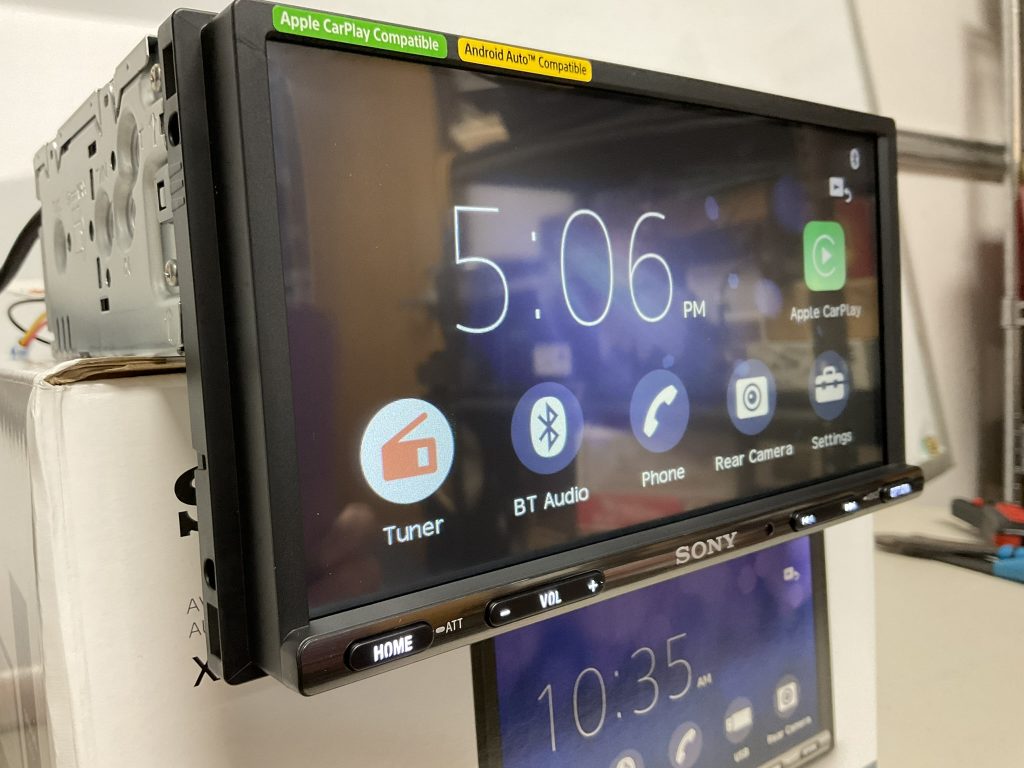
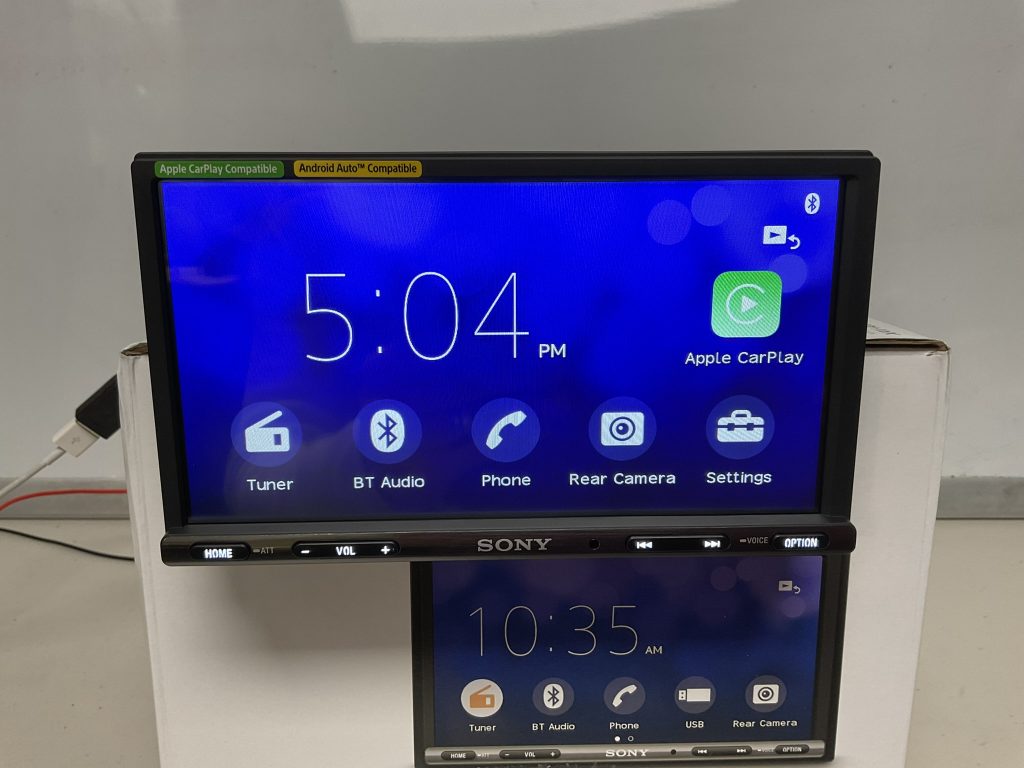
Sony XAV-AX150 – mostly touch screen but with hard buttons on the lower lip
In addition to the 6.95″ touch screen, this unit also has a small lower lip with hard buttons. Here you find functions like Volume up/down, Track up/down, Home screen and an Option button which doubles up as a shortcut to source/audio settings OR as a voice activation button (press and hold to prompt Siri or Google Voice). You cannot rearrange the icons on the home screen, but I don’t see a need to – they are laid out in a nice logical, easy to see manner.
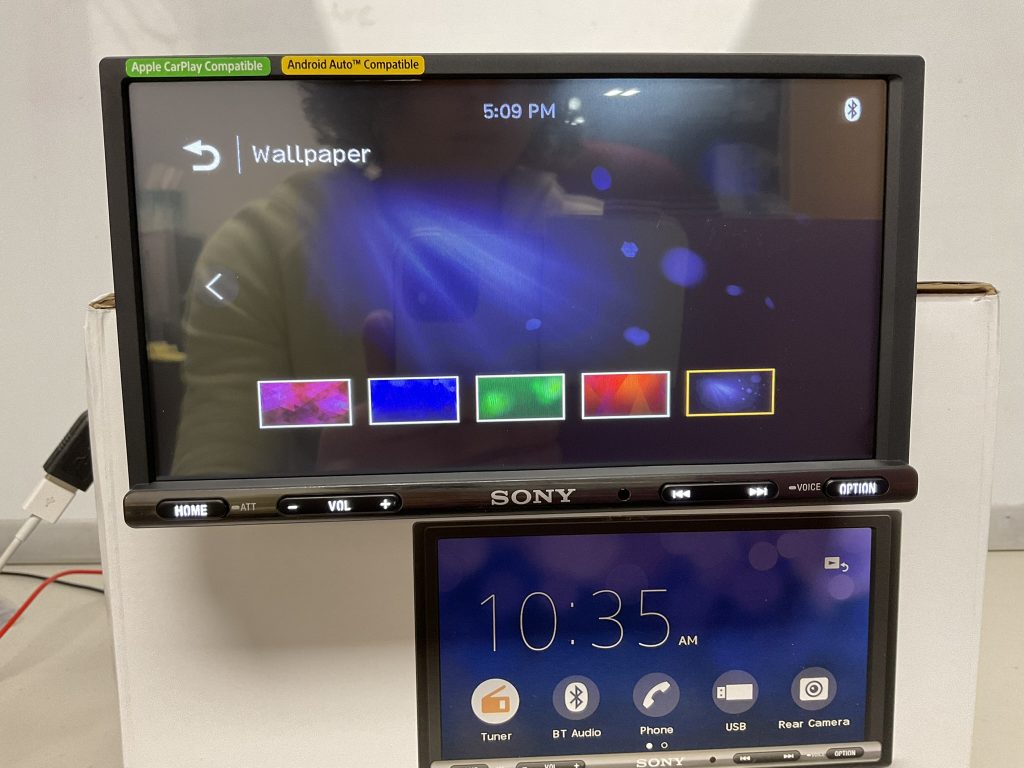
Sony XAV-AX150 different wallpaper options.
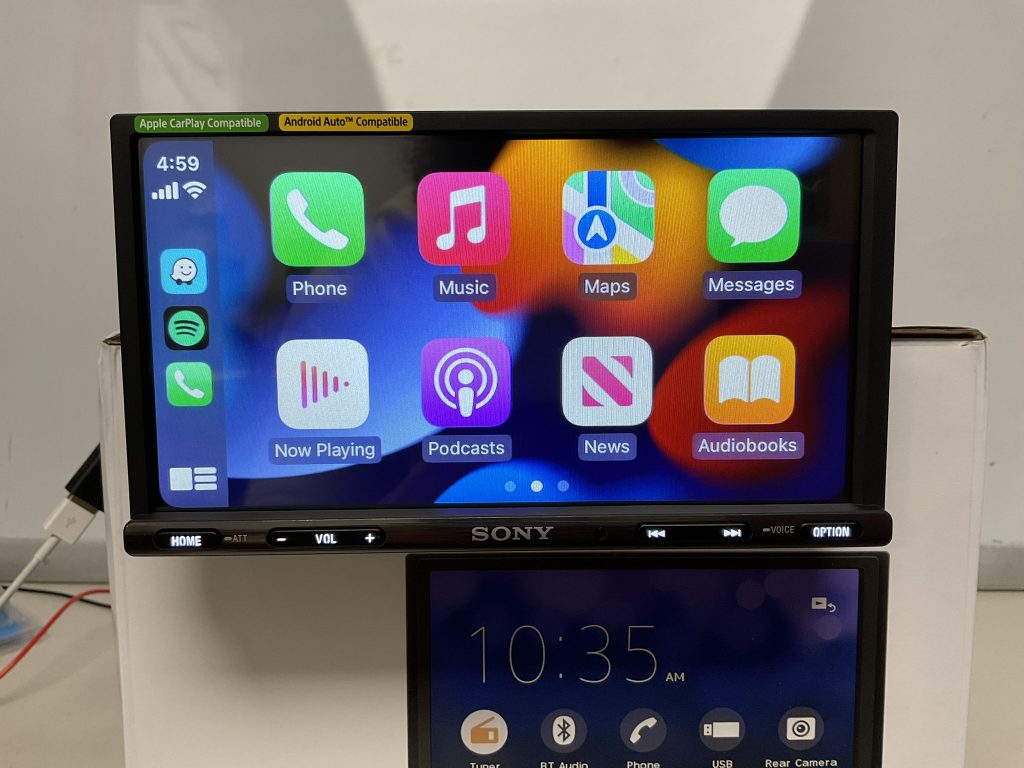
The bottom lip buttons will always illuminate in a neutral white tone. The background color can be changed, but you cannot upload your own. I don’t think the background color will matter for most clients as they are purchasing this unit for Apple CarPlay or Android Auto. These interfaces appear exactly the same regardless of what model radio you are using.
Sony XAV AX150 – Apple CarPlay Android Auto
Who this deck is for
The Sony XAV-AX150 is perfect for anyone looking to upgrade an older basic vehicle with a name brand Apple CarPlay/Android Auto stereo that won’t break the bank. Examples of vehicles this would work well with include 2012 Honda Civic, 2013 Toyota Corolla, 2011 Subaru Legacy or a 2014 Chevy Express Van. Mostly older Japanese vehicles without integrated electronics or basic GM or Ford models without things like a rear seat entertainment system.
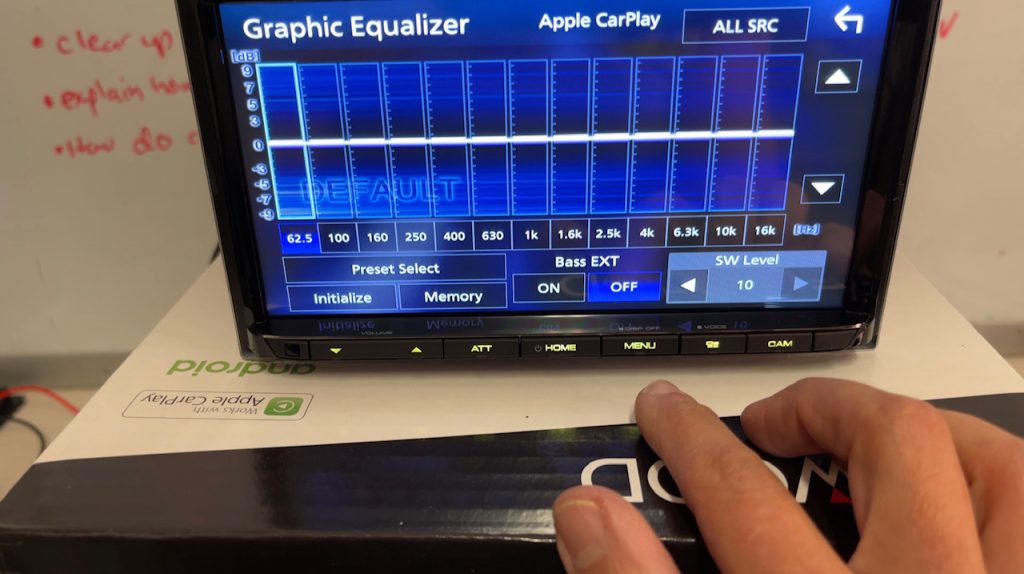
Sony XAV AX150 EQ section
Who this deck is NOT for
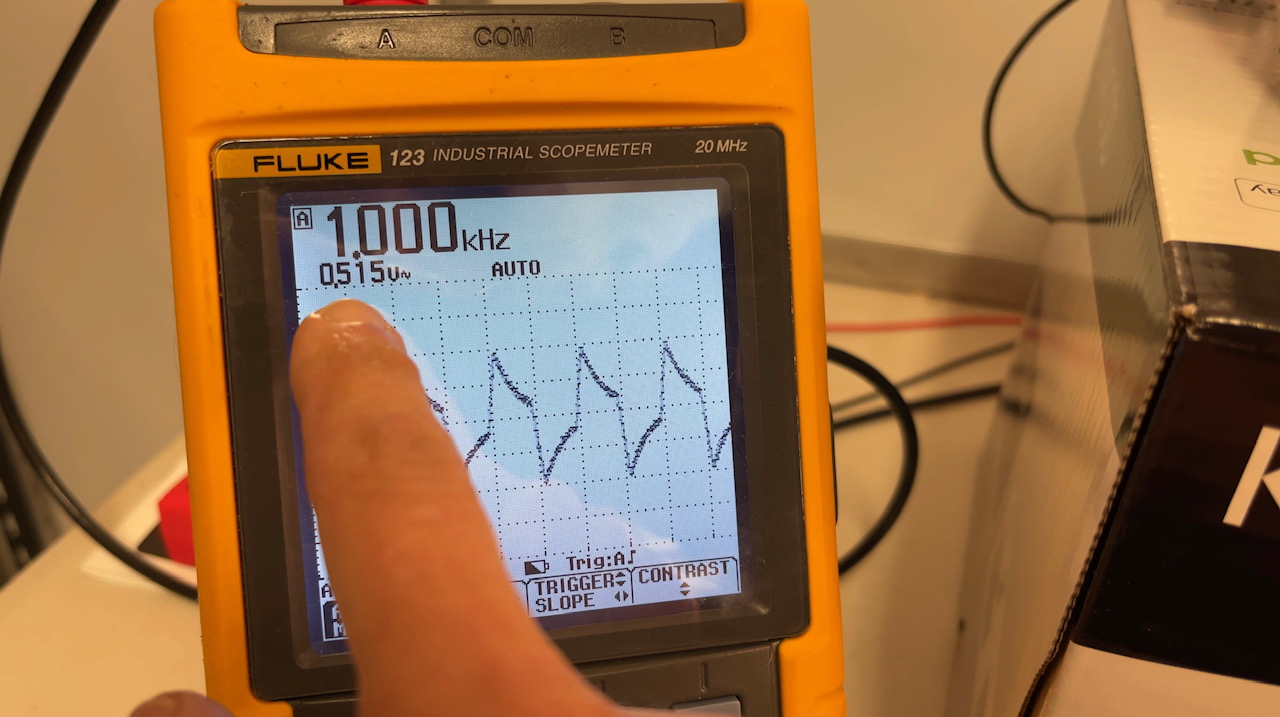
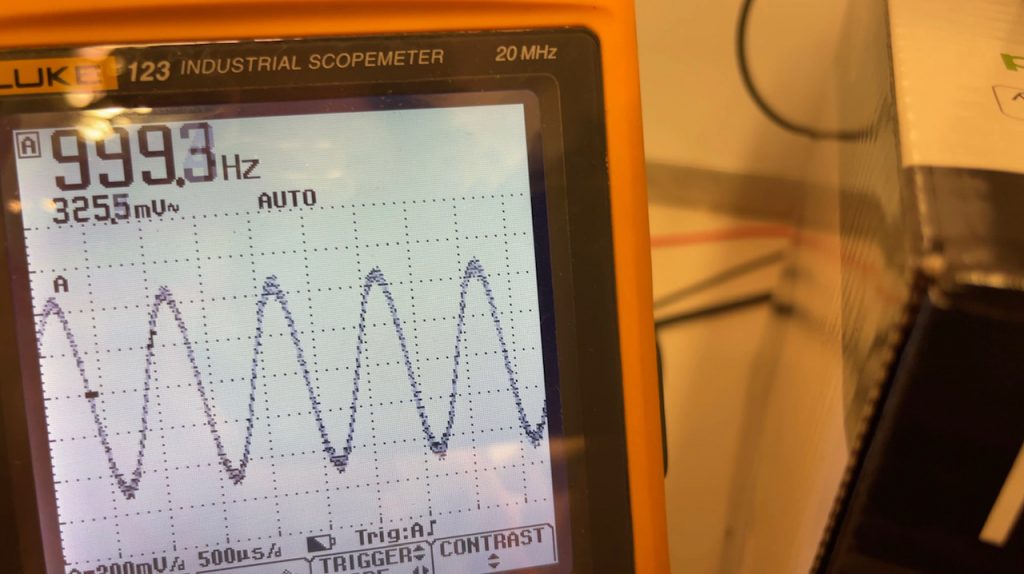
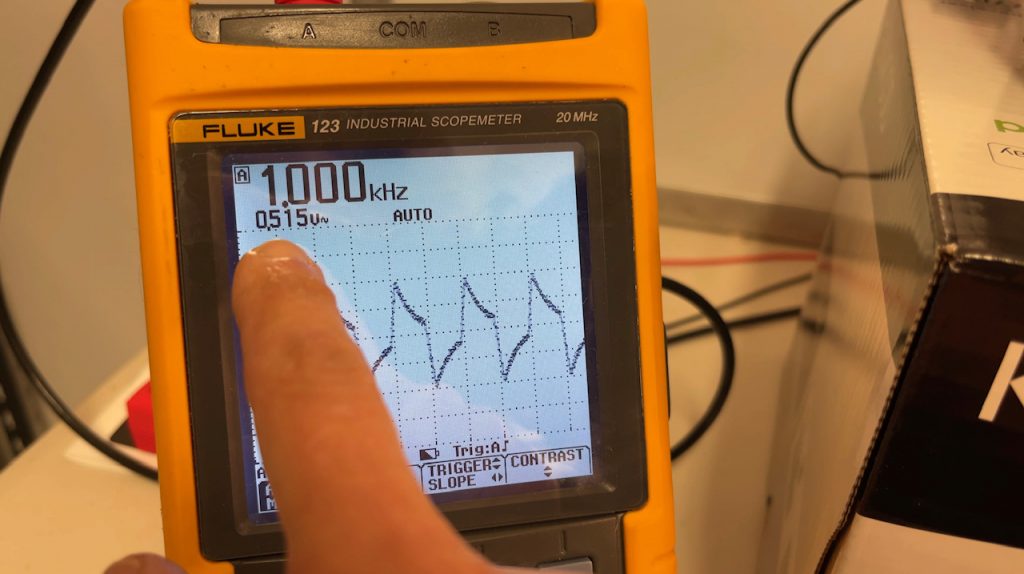
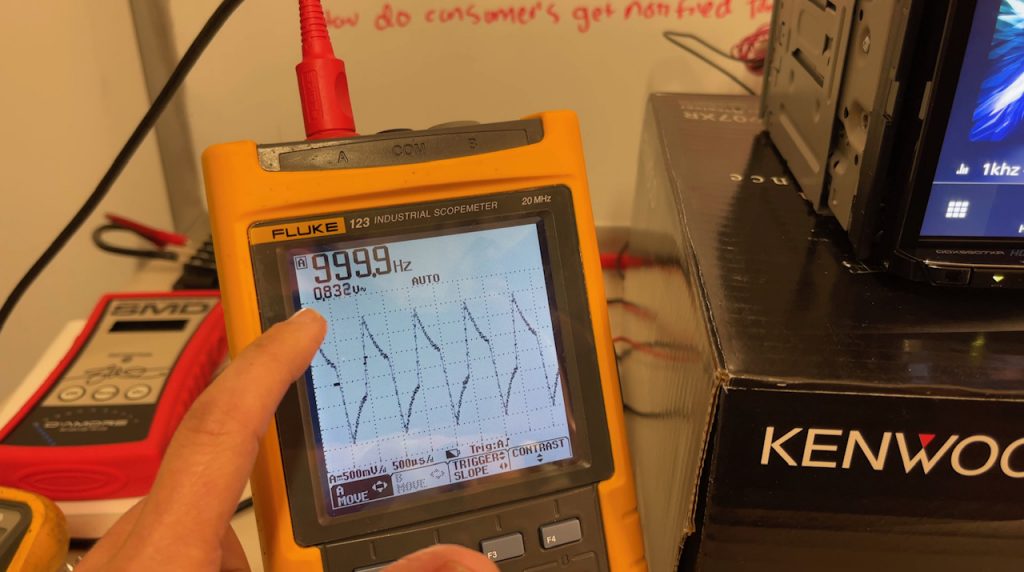
I wouldn’t recommend the Sony XAV-AX150 for anyone looking to build a full aftermarket audio system with amplifiers. It does have a front, rear and subwoofer pre-amp, but it’s low voltage. Plus the signal on the sub channel is not clean. I measured it with an oscilloscope which you can see in the video. Regardless of volume level or sub level, the signal was not a uniform wave. There is definitely some distortion there, perhaps just harmonic distortion. Either way, between the low voltage pre-amp and funky sub level signal, it’s not an ideal deck to build a system with. It’s perfect for clients looking for a great value, easy to use, Apple CarPlay or Android Auto head unit for their older, used vehicle.
Additionally, I would not use this in any vehicle that would benefit from an iDatalink Maestro compatible radio. For example, I wouldn’t use it in a 2015 Silverado or 2016 Ford Edge or 2018 Ram Promaster. All of these vehicles have data flowing through the factory radio. In other words, the radio is part of the operating network in the car. In situations like that you’re best off using an ADS-MRR and iDatalink Maestro compatible radio to retain vehicle features, access to vehicle settings and in general keep information flowing through the network in the car. To check iDatalink Maestro compatibility, check out this product feature look up page where you can plug in your vehicle info and radio info to see what features would be lost or retained.
My only complaint
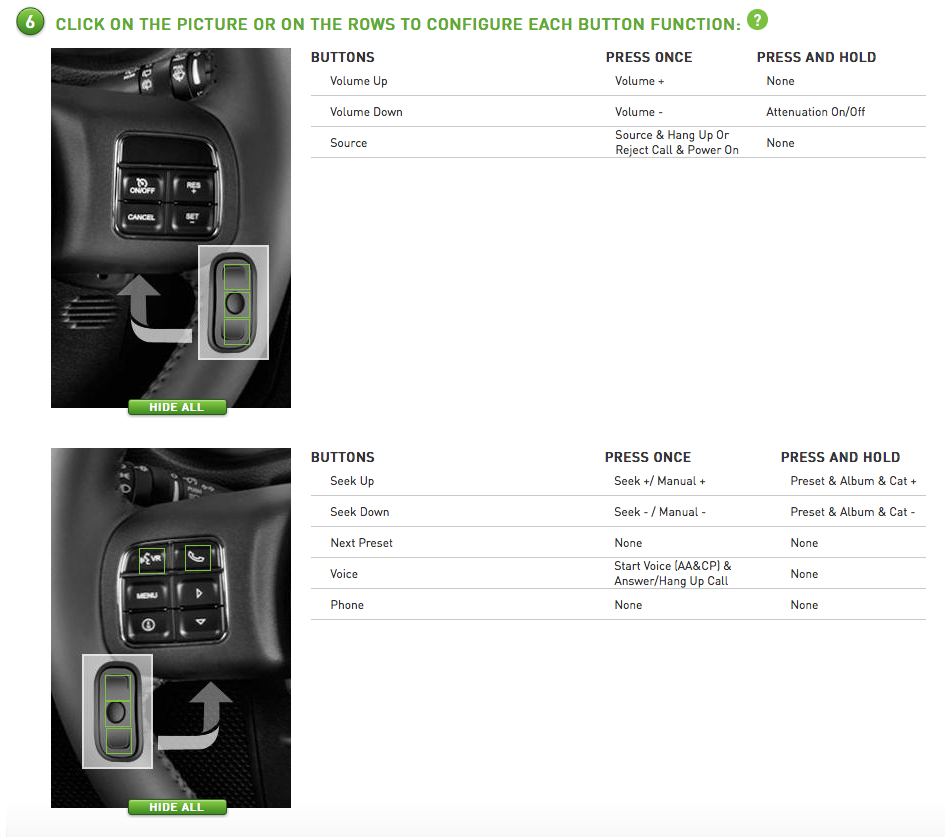
The only thing that is a bit quirky about the Sony XAV-AX150 is the way that Sony maps their steering wheel control functions. They sort of lump functions together. Although there is an option in the radio to remap these functions, I’ve had hit or miss results with that.
Example of Sony steering wheel control functions mapped out for a 2014 Wrangler
The default option for the “Source” button is a double function. Tap “Source” (or “Mode” on your steering wheel) to cycle between sources like Bluetooth, AM/FM Radio or CarPlay/Android Auto. If a call comes in, pressing “Source” rejects the call. If you have a “Phone” button that button does 3 functions: Voice activation or if a call is coming in it will be “Answer call” and when you want to end the call, you press the same button again. This means if your vehicle has a separate “Phone”, “Answer” and “Hang up” button, they will not function that way anymore. The “Phone” button, would do everything. Which is not a big deal, but it’s just something to keep in mind for finicky type A people like myself.
Sony XAV-AX150 Best Value CarPlay Android Auto stereo 2022
Current pricing on the XAV-AX150 ranges between $248.99 – $299.99 which is a great deal IF you can get your hands on one. No telling how long Sony will keep this model at that price. If you can find one and you’ve got an older, basic vehicle, this is a great option for anyone looking to upgrade their vehicle with modern technology at an uninflated price. Do you have the Sony XAV-AX150 in your vehicle? Let us know what you think of it in the comments below.
Sony XAV-AX150 – Best value Apple CarPlay Android Auto stereo 2022