Car audio equalizers are great, if you know what they’re for and how to use them to your advantage.
Estimated read time: 7 minutes 39 seconds. Want to read later?
Car stereo manufacturers often brag about their equalizer. Plastered in bold lettering on the outside of the box you will see phrases like, “3 band parametric EQ” or “7 band pro audio equalizer” “advanced 13 band EQ”.
Are you wondering what difference an EQ can make?
I want to equalize the misbehaving sine (wave).
A lot of people assume if a stereo has an EQ than it must sound really good. Not necessarily. High quality sound reproduction still requires a high quality digital to analog convertor. If you can start out with a good quality head unit that sounds good while listening with the EQ flat, then it can only sound better after correcting for imperfections in your listening environment. If it sounds unpleasant without any EQ adjustments, consider checking things like phase on your speakers, crossover adjustments on any aftermarket components speakers (tweeter level), crossover settings on any aftermarket amplifiers or maybe even just the quality of the audio components you’re using.
I got a lot of flack from readers for comparing the Pioneer DEH-80PRS to Kenwood’s KDC-X996 while listening at flat. I did this for a very good reason. An equalizer is not there to improve the inherent sound quality, detail or ability of a stereo’s DAC to reproduce lively, natural sound (For those that don’t know, DAC stands for digital to analog convertor or what I like to refer to as “what takes the data on your CD or iPod and converts it to the audio that you hear”).
I’ll say that again because I’m sure I may have surprised or confused many readers out there. An equalizer is not able to improve or enhance a receiver’s ability to reproduce audio in a more detailed or lively manner. When properly adjusted, it can appear to sound as though it added more life and vibrancy, but in reality, you’ve simply corrected and accounted for imperfections created by the overall acoustic environment. Basically the closer you can start to perfection, the easier it will be to get there. So make sure you start with a head unit that sounds pretty darn good without tweaking anything.
Get your tools ready. No tools? An iPhone will work too.
Now that I got that out of the way, let’s talk about how you can properly use an EQ to improve and correct the sound in your car audio system. Before you can begin tuning the audio system in your car, you will need a tool to measure the sound in your vehicle. How can you correct or improve the sound it if you don’t know where the imperfections lie? Although my husband John and I both have an excellent ear for music and can generally tune by ear much of the time (interestingly, we’re also both able to pick up and play instruments by ear as well), for perfection, you really have to measure what you’re attempting to correct. And to measure and analyze sound, we use a few different tools.
One of which is a real time analyzer, also known as an RTA. Years ago, an RTA was this big, bulky analyzer that we had to set up in a car with a mic stand positioned in the drivers seat. Thanks to awesome technology, these tools are now easily accessible to anyone. These days we can accomplish the same thing using an app on our iPhone. I like to use one of two apps on my iPhone. Both are made by Studio Six Digital.
JL Audio Tools is a free app which includes an RTA (Real Time Analyzer), SPL meter and speaker polarity testing (phase). The more advanced Audio Tools app provides additional features such as signal generators, audio scope, delay finder and many more acoustical analysis tools. Either app can be downloaded from iTunes. Besides the app, you will need some pink noise. I find the Audio Tools app to be more convenient because it comes with a built in pink noise generator.
Pink noise is equal output of a large range of frequencies, typically from around 20 hertz (slightly below human hearing) to 20,000 hertz (slightly above human hearing) and everything in between. The equalizer on a car stereo represents a division of bands of these frequencies. For example, a 3 band EQ may be referred to as representing Bass, Mid and Treble. Bass may represent frequencies of 60 – 200 hertz, Mid may represent 400-2,500 hertz and treble may represent 8,000 – 15,000 hertz. The more bands, the finer the division of frequency groups, meaning the greater control you have over correcting and tweaking imperfections.
Analyze this.
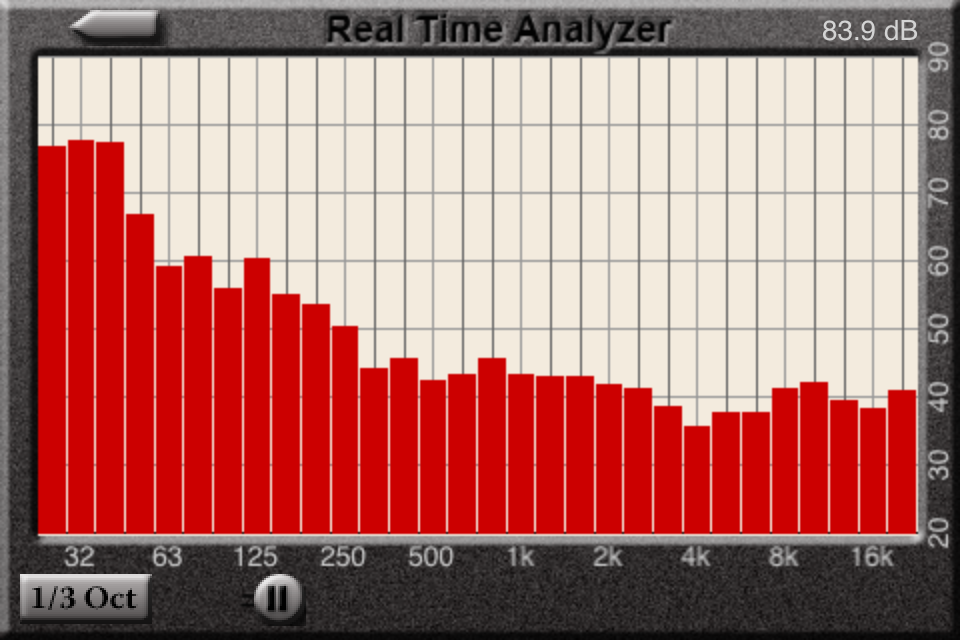
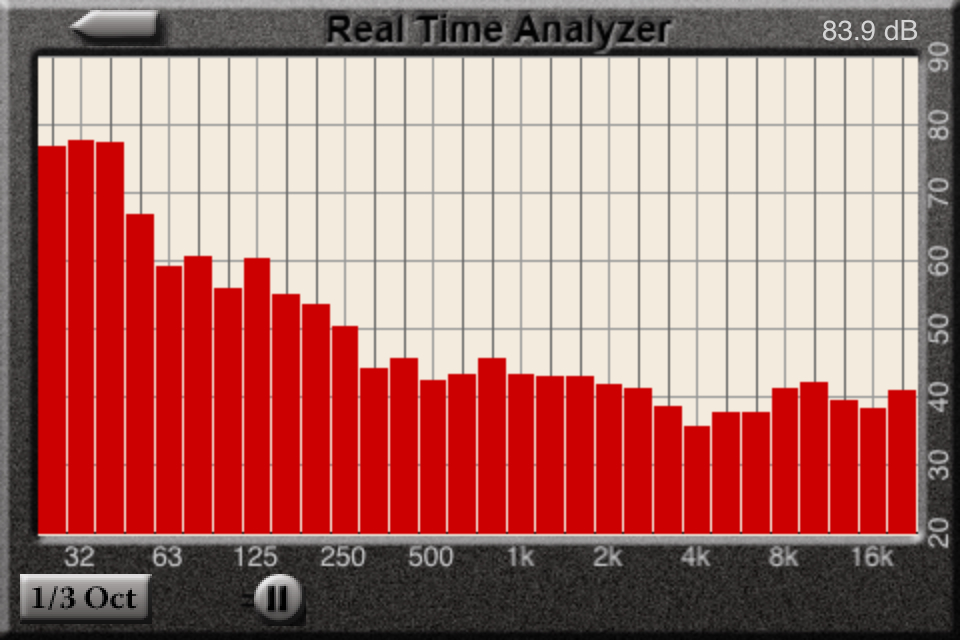
So let’s do a little analyzing. Here is a screen shot of a real time analyzation of pink noise played through my iPhone.
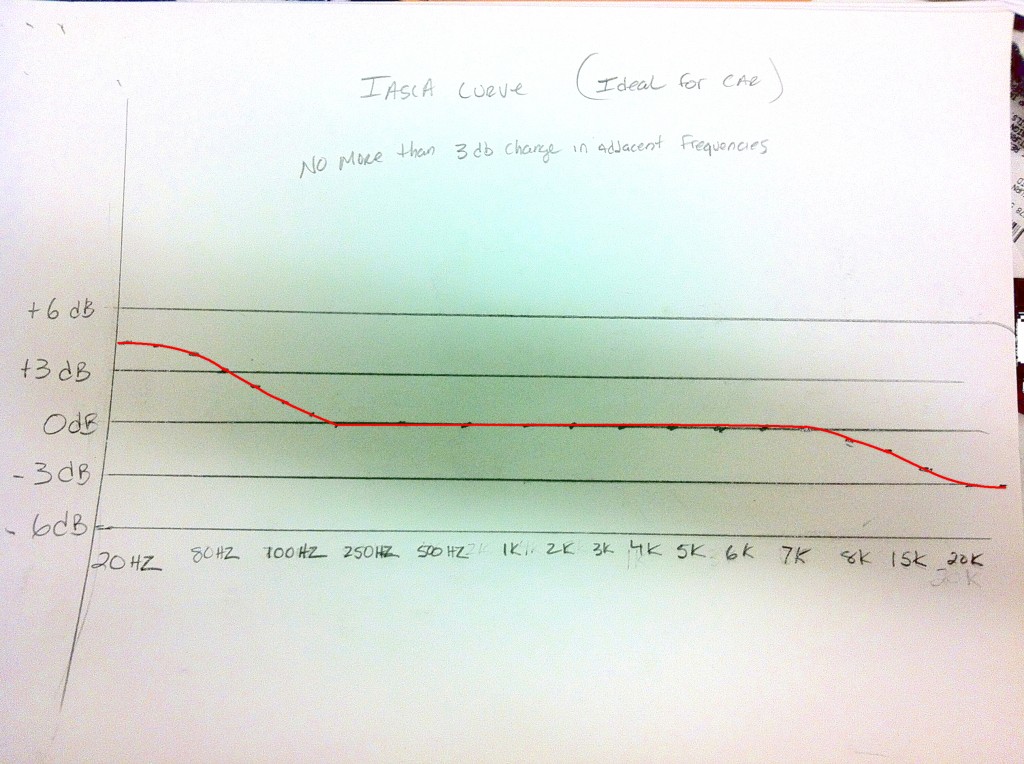
Here is an ideal curve drawn by my lovely husband John who also used to be a judge for IASCA (International Auto Sound Competition Association). Notice his rules, No more than 3 DB change in adjacent frequencies. I’ll address that shortly.
So if I were to try and overlap a proper curve over our RTA analysis, it would look something like this:
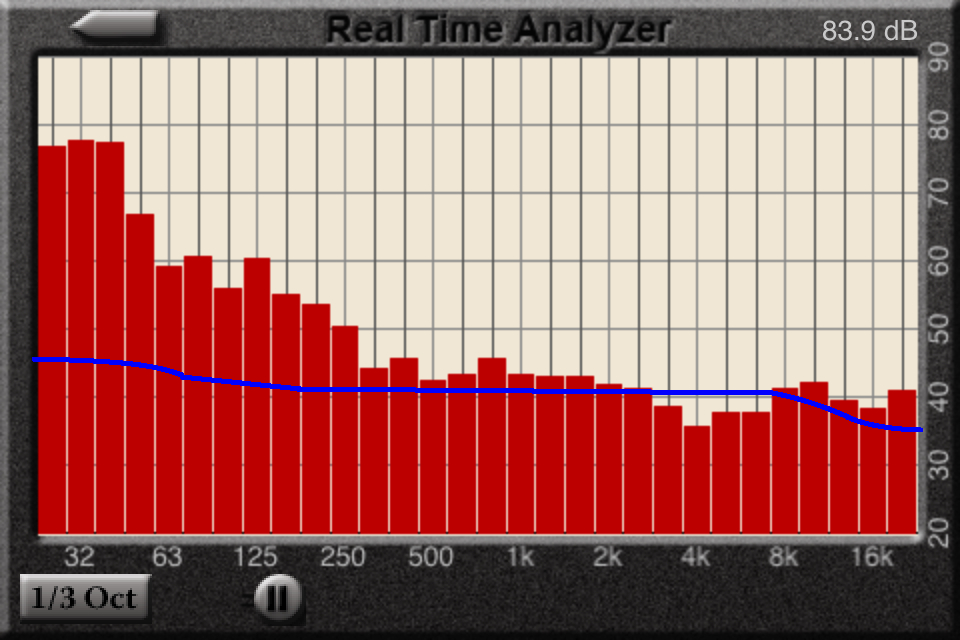
Excuse the poor drawing. I’m using Paint here, not the easiest thing to draw with. Notice the dB increments on the RTA are in increments of 10 vs on John’s drawing he had increments of 3 .John pointed out that you don’t want more than a 3 dB difference between frequencies. The larger the gap, the more displeasing the sound. Listener’s fatigue occurs when there are large gaps between frequencies. Your brain is actually trying to correct for any gaps or overages it’s hearing and it gets tired and irritated doing so. To correct these gaps and overages, we can use our equalizer.
Okay, so how do we fix this?
So in this example, it’s safe to say we need to bring the bass down or almost equal to the mid range band. If we have a 3 band EQ, that will adjust a range of frequencies equally (remember we said roughly 60-200 hertz?). That won’t help with the large gap between 63 and 50 hertz or the even larger gap between 40 and 50 hertz. So how do you correct this? You need a larger range of individual frequency bands to adjust. If you had a 31 band EQ, that would be no problem. You could go to the exact frequency that is unbalanced and correct it. A 13 band gives you a nice range of control as well. A 3 band EQ is extremely limited.
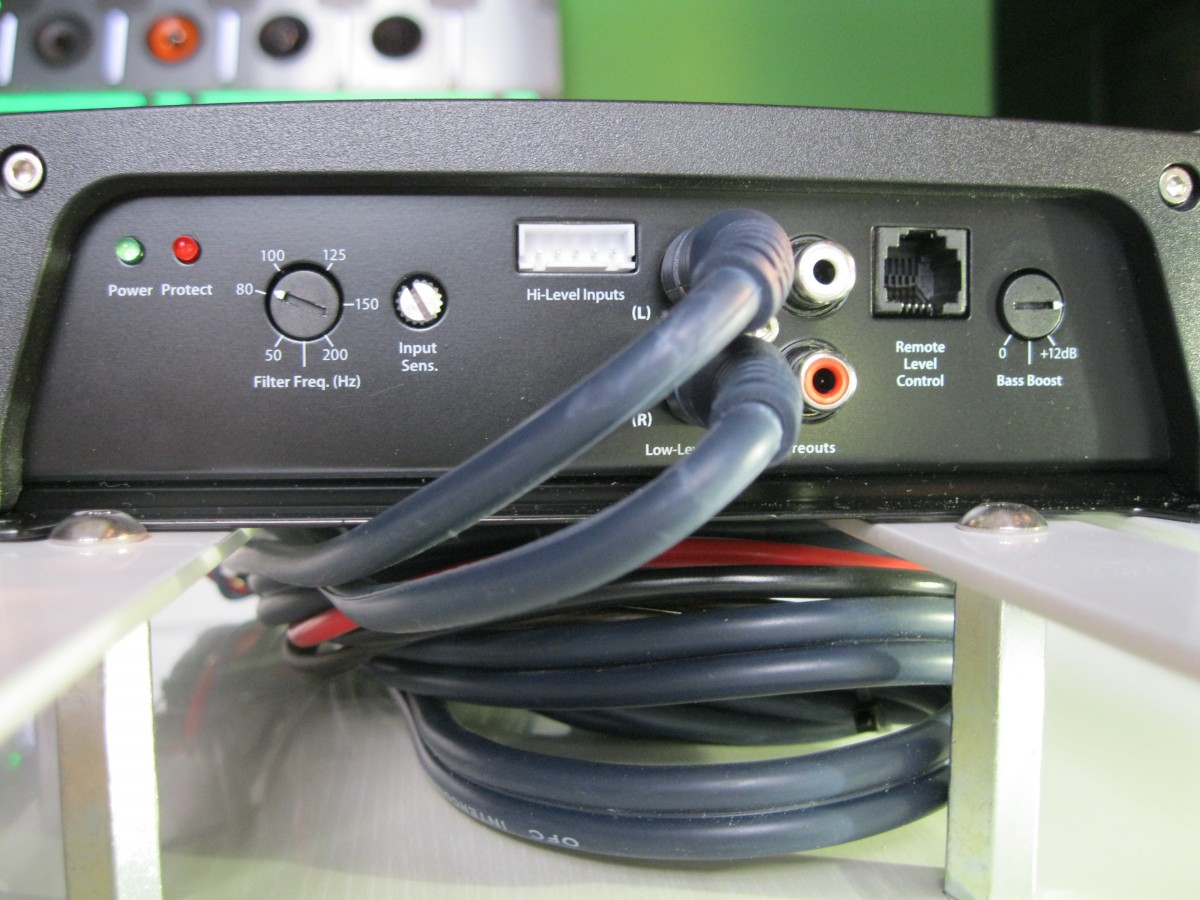
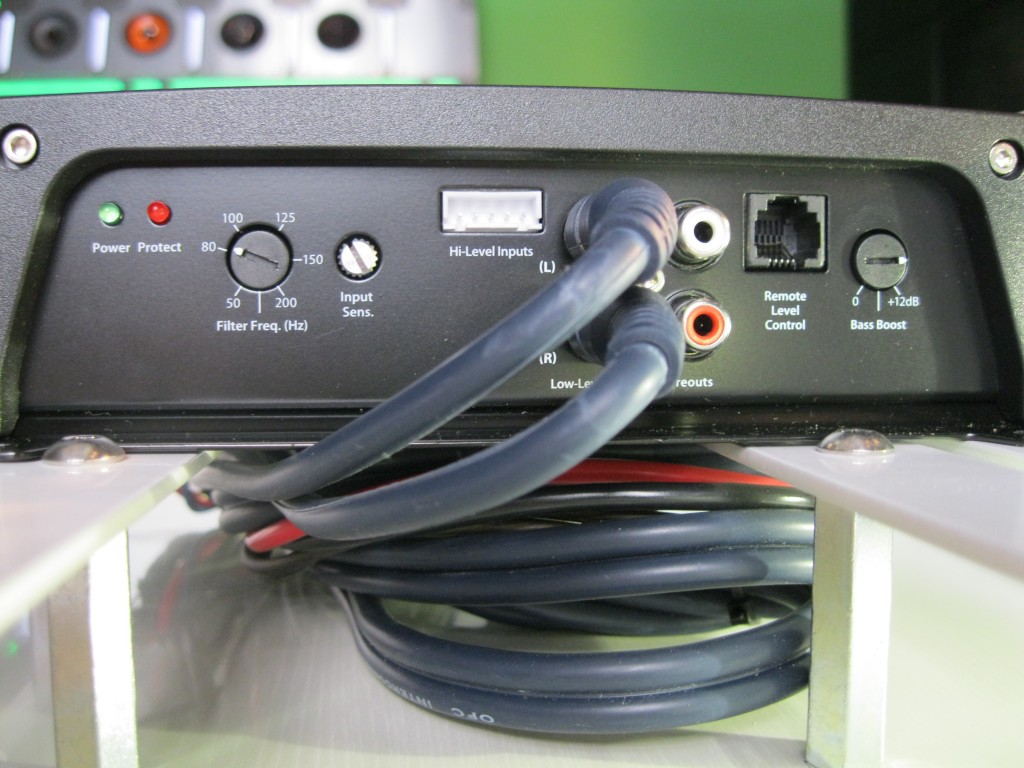
If there are any external factors that can be adjusted to correct the problem, try tweaking those first. Examples would be adjustments you could make on your aftermarket amplifier like gain, crossover or bass boost. Other possible tweaking areas would be subwoofer placement or installing a sound deadening material like Dynamat. After you’ve addressed any controllable external factors, see if the large gap still exists. If it does, the only thing you can really do is this. Adjust the center frequency of your bass, mid or treble that needs balancing, then make your bandwidth narrow, then make your level adjustment (Huh?).
If I lost you there, check out this example:
Suppose we were able to bring the gap between 32 and 63 hertz to a reasonable level through adjusting gain and/or bass boost settings on our subwoofer amplifier. Now we can lower our bass level and thus reduce the level of frequencies ranging from 32 to 200 hertz to about where they should be, slightly sloping down towards 200k. Remember these level adjustments are done equally among the range of frequencies in that band.
Next we can adjust our mid range frequencies on our basic 3 band EQ. Notice that 250k is at a much higher level than the other mid range frequencies in that mid range band. How do we narrow in on the small gap that exists in such a wide band? In the mid adjustment menu on our basic head unit there should be the option (hopefully, if you didn’t cheap out too much) to select the center frequency. This is the frequency your adjustment range is centered on.
Our choices for center mid frequency usually range from 400 – 2500 on head units that have this option. We can then select 400 hertz as that is the option closest to the frequency that needs adjusting. Next we can select a narrower bandwidth. This adjustment narrows the band of frequencies we’re adjusting when we actually boost or lower the mid level. That means rather than boosting or lowering a wide range of mid frequencies equally (like a range of 400 – 2500 hertz) we’re centering our adjustment closer to the imperfection located at 250 hertz. It’s far from perfect as it will also adjust 400 hz, but if we lower that narrowed mid adjustment slightly, we will be able to bring 250 hertz down to a slightly closer level of the other mid range frequencies.
Once we’ve brought that mid range frequency a little more into balance with the other mid range frequencies, we would want to lower the treble slightly to try to get as close as possible to the ideal curve.
That’s how you can tune with a very basic EQ and you can see how limited your control is for true correction. When you actually have 13 or more bands to work with, you have much better control over correcting imperfections in the given acoustical environment. EQ’s can allow you to remove large peaks and valleys between frequencies which can create harsh and unpleasant sound reproduction. When used properly, they can correct and smooth out the overall tonal qualities of your car audio system. When used improperly, they can make your hi fidelity components sound harsh, hollow, tinny or too bright. So use your RTA and pink noise and set your EQ properly. You will be rewarded with the sweet sound of perfection.
